
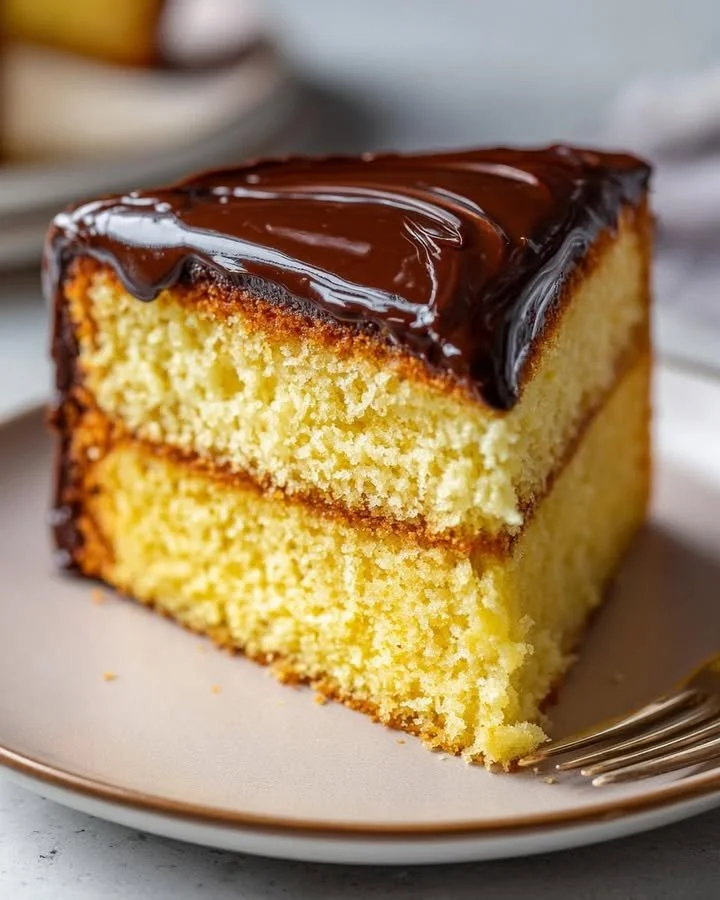
Welcome to my cozy kitchen! Today, I’m excited to share with you a recipe that’s near and dear to my heart—Fluffy Yellow Cake. There’s something magical about this cake that brings joy to any occasion, whether it’s a birthday, a casual family gathering, or just because I’m craving something sweet. The rich buttery flavor and incredible fluffiness come together to create a delightful dessert that never fails to impress. So, grab your apron and let’s get baking!
Why You’ll Love This Recipe
This Fluffy Yellow Cake is a classic for a reason! It’s super easy to whip up, and with just a few simple ingredients, you can have a cake that feels like a warm hug with every bite. The texture is light and airy, making it perfect for layering with frosting or serving alongside fresh berries and whipped cream. Plus, it’s versatile enough to be the base for any flavor combination you desire, allowing your creativity to shine! (See the ingredients in the next page below…)
Ingredients
– 2 cups all-purpose flour
– 1 ½ cups granulated sugar
– ½ cup unsalted butter, softened
– 1 cup milk, room temperature
– 3 ½ tsp baking powder
– 1 tsp vanilla extract
– ½ tsp salt
– 4 large eggs, room temperature
Equipment Needed
– 2 9-inch round cake pans
– Mixing bowls
– Electric mixer or whisk
– Measuring cups and spoons
– Rubber spatula
– Cooling rack
– Parchment paper (optional)
Step-by-Step Instructions
To start, preheat your oven to 350°F (175°C) and grease your cake pans, ensuring you also line the bottoms with parchment paper. This will ensure your cakes come out perfectly without sticking. In a large mixing bowl, I like to cream the softened butter and sugar together until light and fluffy. This step is crucial as it incorporates air into the batter, ensuring a fluffy texture. Add in the eggs, one at a time, mixing well after each addition. Then, it’s time for that delightful vanilla extract! It’s the secret ingredient that makes the cake smell divine as it bakes. (See the next page below to continue steps…)
Next, in a separate bowl, whisk together the flour, baking powder, and salt. Gradually add the dry ingredients to the butter mixture, alternating with the milk, starting and ending with the flour. This method helps to keep the batter airy while ensuring everything is well combined. I always use my electric mixer on low speed for this part to prevent any flour clouds from forming in my kitchen!
Once your batter is smooth and creamy, divide it evenly between the two prepared cake pans. Give them a gentle tap on the counter to release any air bubbles, and then pop them into the preheated oven. Bake for about 25-30 minutes, or until a toothpick inserted into the center comes out clean. While baking, your kitchen will be filled with an irresistible aroma that will have everyone eagerly waiting!
Once out of the oven, allow the cakes to cool in the pans for about 10 minutes, then carefully turn them out onto a cooling rack to cool completely before frosting. This cooling time is essential; I can’t tell you how many times I’ve rushed ahead and ended up with melted frosting disaster!
Pro Tips for Best Results
One thing I’ve learned from testing this recipe a few times is that using room temperature ingredients makes a huge difference. I always take my eggs and milk out of the fridge about an hour before I start baking. The result? A batter that mixes beautifully and bakes evenly!
I also tried substituting the granulated sugar with brown sugar once, just to be adventurous! While it gave the cake a lovely caramel flavor, I found it slightly denser than my original fluffy yellow cake. I prefer the classic granulated sugar for that perfectly airy texture, but hey, it’s all about your personal taste!
Lastly, I always recommend keeping an eye on the cakes in the oven. Every oven is different, and I’ve had some cakes that were done in 23 minutes flat. It’s always a good idea to start checking a little early; your nose will usually tell you when it’s cake time!
Common Mistakes to Avoid
One common mistake I’ve made and seen others make is overmixing the batter. It’s so tempting to keep mixing until everything is perfectly smooth, but this can actually lead to a dense cake. I’ve found that mixing just until combined gives the best results for a light and fluffy texture.
Another pitfall is not properly greasing the pans. Trust me, I’ve had my share of cakes that simply refuse to budge from the pans! A good layer of butter or baking spray, along with parchment paper, will save you from the heartache of broken cakes.
Also, remember to let your cakes cool completely before frosting. I once got a bit too excited and applied frosting to warm layers, and instead of a beautifully frosted cake, I ended up with a puddle of icing on the plate. It’s a lesson learned; patience truly pays off!
Finally, be careful not to skip the toothpick test. When you think your cakes are done, poke a toothpick in the center. It should come out clean or with a few crumbs. If there’s any wet batter on the toothpick, give your cakes a few more minutes and keep an eye on them!
Serving Suggestions
Once your Fluffy Yellow Cake is cooled, the fun part begins—serving! I love spreading a generous layer of classic buttercream frosting on top and between the layers. It’s just so homey and nostalgic! For an added touch, I often sprinkle some colorful sprinkles on top to make it look extra festive for birthdays or special occasions.
Another great option is to serve it with a side of fresh berries and whipped cream. The tartness of the berries perfectly complements the sweet cake, creating a balanced and delightful dessert. I can’t resist a slice topped with strawberries and a dollop of freshly whipped cream!
If I’m feeling particularly indulgent, I sometimes drizzle a bit of chocolate ganache on top. The combination of rich chocolate and fluffy yellow cake is enough to make anyone’s day a little brighter!
Variations & Customizations
One of the best aspects of this Fluffy Yellow Cake is its versatility. You can easily customize the flavor by adding lemon or almond extract instead of vanilla. Just a teaspoon can elevate the whole cake and introduce a delightful twist that keeps you guessing what secret ingredient makes it so special!
If you’re in the mood for something fun, why not turn this cake into a layer cake by adding a filling? I’ve experimented with using lemon curd or fresh fruit preserves between the layers, which adds a refreshing taste and a pop of color when slicing into the cake. It’s like uncovering a little surprise every time!
And if you’re a chocolate lover like me, you can also turn this recipe into a chocolate version. Simply replace a cup of the flour with cocoa powder for a rich, chocolatey delight! It’s a fantastic way to have two cakes in one recipe!
How to Store, Freeze & Reheat
Storing your Fluffy Yellow Cake is quite simple! If you have any leftovers (which I rarely do), just cover the cake with plastic wrap or store it in an airtight container at room temperature. It stays fresh for about 2-3 days, making it perfect for snacking whenever the craving strikes!
If you want to prepare ahead of time, you can also freeze the cake. Just make sure it’s completely cooled before wrapping it tightly in plastic wrap and then aluminum foil. It can be frozen for up to three months. When you’re ready to enjoy, simply transfer it to the refrigerator to thaw overnight, then bring it back to room temperature before frosting.
Reheating slices is easy too! I like warming them in the microwave for about 10 seconds, just enough to take the chill off. It makes the cake soft and gives that nostalgic “just baked” experience, especially when paired with a scoop of ice cream!
Conclusion
I hope you’re as excited as I am to try this Fluffy Yellow Cake recipe in your own kitchen! Whether it’s for a special occasion or a simple treat, this cake is sure to bring smiles and satisfaction all around. With its light and airy texture, it’s a perfect canvas for your favorite flavors and toppings. Happy baking, and may your kitchen always smell like warm cake!