
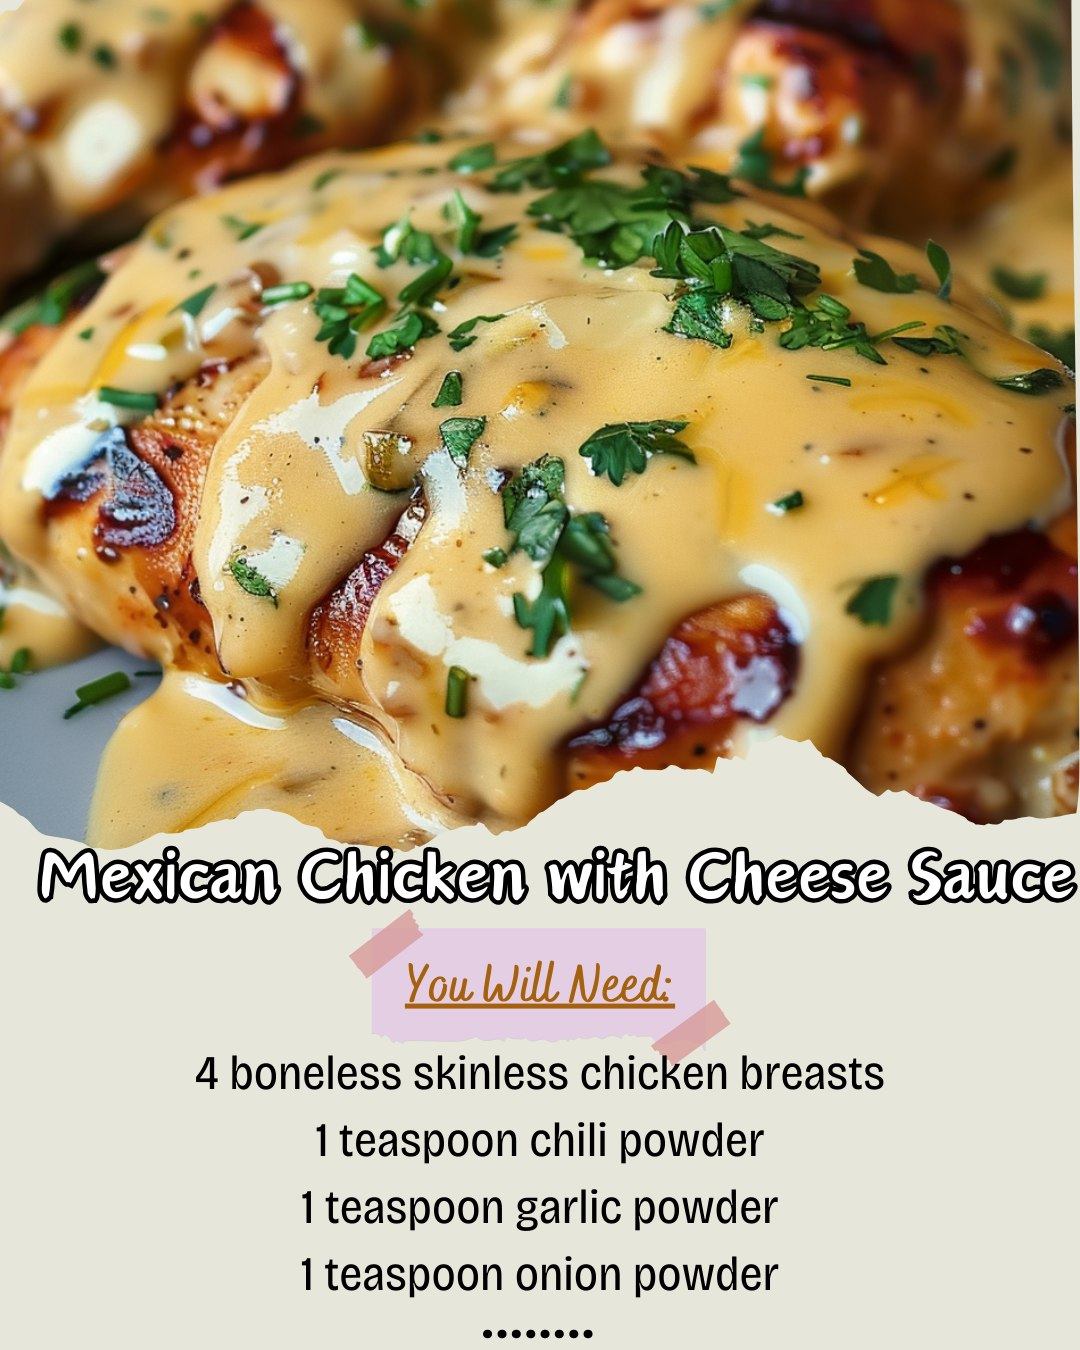
The first time I made this Mexican Chicken with Cheese Sauce, it was a hectic Tuesday, and I needed something comforting, flavorful, and fast. As the spices hit the hot skillet, my kitchen filled with the most incredible aroma—smoky chili powder, sweet onion, and pungent garlic all sizzling together. When I poured that creamy, velvety cheese sauce over the juicy, perfectly cooked chicken breasts, I knew I had stumbled onto a new family favorite. The combination was so rich and satisfying, yet so simple to pull together. It’s the kind of meal that feels like a hug on a plate, and it’s been in my regular rotation ever since that fateful weeknight.
Why You’ll Love This Recipe
You are going to adore this recipe because it delivers the bold, comforting flavors of your favorite Mexican-inspired restaurant dish right in your own kitchen, with minimal effort and maximum payoff. The chicken is juicy and packed with flavor from a simple trio of pantry spices, and the cheese sauce is luxuriously creamy without being overly complicated. It’s a one-skillet wonder (plus one pot for the sauce) that comes together in about 30 minutes, making it perfect for busy weeknights when you want a meal that feels special but doesn’t require special skills.
Ingredients
For the Chicken:
- 4 boneless, skinless chicken breasts
- 1 teaspoon chili powder
- 1 teaspoon garlic powder
- 1 teaspoon onion powder
- 1 teaspoon kosher salt
- ½ teaspoon black pepper
- 1 tablespoon olive oil
For the Cheese Sauce:
- 2 tablespoons unsalted butter
- 2 tablespoons all-purpose flour
- 1 cup chicken broth
- 1 cup whole milk or half-and-half
- 2 cups shredded Monterey Jack cheese (or a Mexican blend)
- 1 (4 oz) can diced green chiles, drained
- Optional garnish: chopped fresh cilantro, diced tomato, sliced jalapeño
(See the next page below to continue…)
Equipment Needed
- Large skillet (I prefer cast iron or stainless steel)
- Medium saucepan
- Whisk
- Tongs
- Meat mallet or rolling pin (for pounding chicken)
- Measuring spoons and cups
Step-by-Step Instructions
My first crucial step is to get my chicken ready for cooking. I place the chicken breasts on a cutting board, cover them with a piece of plastic wrap, and gently pound them to an even thickness—about ¾ of an inch thick. I learned the hard way that skipping this leads to dry, overcooked edges and a raw center. Even thickness is non-negotiable for perfect doneness. Then, in a small bowl, I mix the chili powder, garlic powder, onion powder, salt, and pepper. I pat the chicken dry with paper towels (this helps get a good sear) and rub the spice mixture all over every surface. Letting it sit for just 5-10 minutes allows the flavors to really adhere to the meat.
While the chicken rests, I heat the olive oil in my large skillet over medium-high heat. Once the oil shimmers, I carefully add the chicken breasts. The sound is glorious—a confident sizzle that promises flavor. I resist the urge to move them! I let them cook undisturbed for about 5-7 minutes per side, until they develop a beautiful golden-brown crust and reach an internal temperature of 165°F. Using a meat thermometer took the guesswork out for me; I used to just cut into them, losing precious juices. Once cooked, I transfer the chicken to a plate and tent it loosely with foil. It will continue to cook gently while I make the star of the show: the cheese sauce.
For the sauce, I melt the butter in my medium saucepan over medium heat. As soon as it foams, I whisk in the flour and cook this roux for a full minute, stirring constantly. It should smell nutty and look pale blonde. This cooks out the raw flour taste and is the foundation for a lump-free sauce. Then, I slowly pour in the chicken broth and milk, whisking vigorously the entire time. I keep whisking until the mixture is smooth and begins to thicken and bubble gently. This takes about 3-5 minutes. Patience here prevents a thin, watery sauce.(See the next page below to continue…)
Now, I reduce the heat to low. I add the shredded cheese in handfuls, letting each batch melt completely before adding the next, and I stir in the drained green chiles. This low-and-slow melt is key; high heat can make the cheese sauce grainy or cause it to break. Once the sauce is velvety and smooth, I return the chicken breasts and any accumulated juices back to the large skillet. I pour every last drop of that glorious cheese sauce over the top, letting it pool around the chicken. I let it all heat through for another minute or two on low, just to reunite the flavors before serving.
Pro Tips for Best Results
My first pro tip is to buy block cheese and shred it yourself. I’ve tested this sauce with pre-shredded cheese and freshly shredded, and the difference is night and day. Pre-shredded cheese is coated in anti-caking agents like potato starch, which prevent it from melting into a perfectly smooth sauce. Taking two minutes to shred a block of Monterey Jack or a Mexican blend cheese results in a sauce that’s luxuriously creamy and cohesive. Trust me, do not skip this step.
The second tip is all about the roux. Don’t rush it. That full minute of cooking the flour and butter together is essential for developing flavor and ensuring your sauce thickens properly. I once got impatient and added the liquid after just 30 seconds, and my sauce had a faint, pasty flour taste. Let the roux cook until it’s bubbly and fragrant; it’s the silent workhorse of your sauce.
Finally, let your chicken rest after cooking. I used to slice into it immediately, watching all the delicious juices run out onto the cutting board, leaving the meat dry. Tenting it with foil for 5-10 minutes after it comes out of the skillet allows the fibers to relax and reabsorb those juices, guaranteeing every bite is moist and tender. This small wait makes a monumental difference in texture.
Common Mistakes to Avoid
The most common mistake is using chicken breasts that are too thick and uneven. If you don’t pound them, the thinner ends will be overcooked and dry long before the thick center is done. I made this mistake the first time, and it was so disappointing. A quick pound with a mallet, a heavy pan, or even a rolling pin ensures they cook evenly and stay incredibly juicy.(See the next page below to continue…)
Don’t add cold liquid to your roux. When you pour in the chicken broth and milk, make sure they are at least room temperature, or better yet, slightly warmed. Adding ice-cold liquid to the hot roux can cause the mixture to seize up into tiny lumps that are very hard to whisk out. I take my milk and broth out of the fridge while I’m prepping the chicken to take the chill off.
Avoid cranking the heat when melting the cheese into the sauce. High heat is the enemy of a smooth cheese sauce. It can cause the proteins to tighten and the fats to separate, leaving you with a greasy, broken sauce. Keep the heat on low and add the cheese gradually, stirring until it’s fully incorporated and silky. If your sauce does break, a splash of extra milk and a vigorous whisk can sometimes bring it back together.
Finally, don’t skip the green chiles. I know they might seem optional, but they are the secret ingredient that takes this from “cheesy chicken” to “Mexican-inspired chicken.” They add a subtle, tangy brightness and a whisper of heat that cuts through the richness of the cheese perfectly. Using the mild version keeps it family-friendly, but they add an essential layer of flavor that makes the dish truly special.
Serving Suggestions
I love serving this chicken right out of the skillet, family-style. I spoon extra sauce over the top and garnish it generously with chopped fresh cilantro and a handful of diced tomatoes for a pop of color and freshness. The bright flavors of the garnish contrast beautifully with the rich, cheesy chicken. A simple wedge of lime on the side for squeezing adds another fantastic layer of acidity.
For the perfect plate, I serve it alongside a big pile of cilantro-lime rice to soak up all that extra cheese sauce, and some simple black beans. The rice and beans make the meal feel complete and satisfying. Sometimes, I’ll also add a side of roasted vegetables like bell peppers and onions, or a crisp green salad with a tangy lime vinaigrette to balance the dish’s richness.
This dish is also fantastic for filling tacos or burritos. I’ll slice the sauced chicken and serve it with warm flour tortillas, shredded lettuce, pico de gallo, and a dollop of cool sour cream. It transforms the meal into a fun, interactive build-your-own dinner that my whole family gets excited about. The creamy sauce acts as both flavor and binding, making every taco incredibly delicious.
Variations & Customizations
For a spicier kick, I’ve added a teaspoon of cumin and a half teaspoon of smoked paprika to the chicken spice rub. When making the cheese sauce, I’ll use Pepper Jack cheese instead of Monterey Jack and add a tablespoon of chopped pickled jalapeños along with the green chiles. This version has a wonderful smoky heat that’s perfect for those who love a bit more fire.
You can easily swap the protein. I’ve made this with boneless, skinless chicken thighs, which are even more forgiving and juicy. They require a slightly longer cooking time, but the method is identical. I’ve also seen friends make it with thin-cut pork chops or even spoon the cheese sauce over roasted cauliflower steaks for a fantastic vegetarian main dish.
If you want to make it a full bake-and-serve casserole, you can cube the raw, seasoned chicken and brown it briefly. Then, mix it with the cheese sauce (thinned with an extra ¼ cup of broth), pour it into a baking dish, top with extra cheese and crushed tortilla chips, and bake at 375°F for 20-25 minutes until bubbly. It’s a fantastic make-ahead option for feeding a crowd.
How to Store, Freeze & Reheat
Leftovers store wonderfully. I let the chicken and sauce cool completely, then store them together in an airtight container in the refrigerator for up to 3 days. The sauce will thicken significantly when cold. To reheat, I do so gently. I place a portion in a skillet over low heat, adding a splash of chicken broth or milk to loosen the sauce back to a creamy consistency, stirring frequently until warmed through. Microwaving can make the chicken rubbery and the sauce may separate, so low and slow on the stovetop is best.
This dish freezes quite well for future meals. I freeze fully cooled portions in individual freezer-safe containers for up to 2 months. To thaw, I move a container to the refrigerator overnight. Reheating follows the same gentle stovetop method with added liquid. The texture of the chicken may be slightly less firm after freezing, but the flavors remain excellent.
I don’t recommend freezing just the cheese sauce on its own, as dairy-based sauces can sometimes separate when thawed. It’s best frozen combined with the chicken. For best results after freezing and reheating, a fresh garnish of cilantro or tomato really helps brighten up the flavors and bring the dish back to life.
Conclusion
This Mexican Chicken with Cheese Sauce is more than just a reliable weeknight recipe to me; it’s a guaranteed smile at the dinner table and a meal that makes everyone feel cared for. It has saved me on countless busy evenings and has become one of those dishes friends ask me to make when they come over. I hope it finds a special, frequent spot in your meal plan, bringing you the same simple joy and delicious satisfaction. Now, go grab that block of cheese—dinner is about to get a major upgrade.