
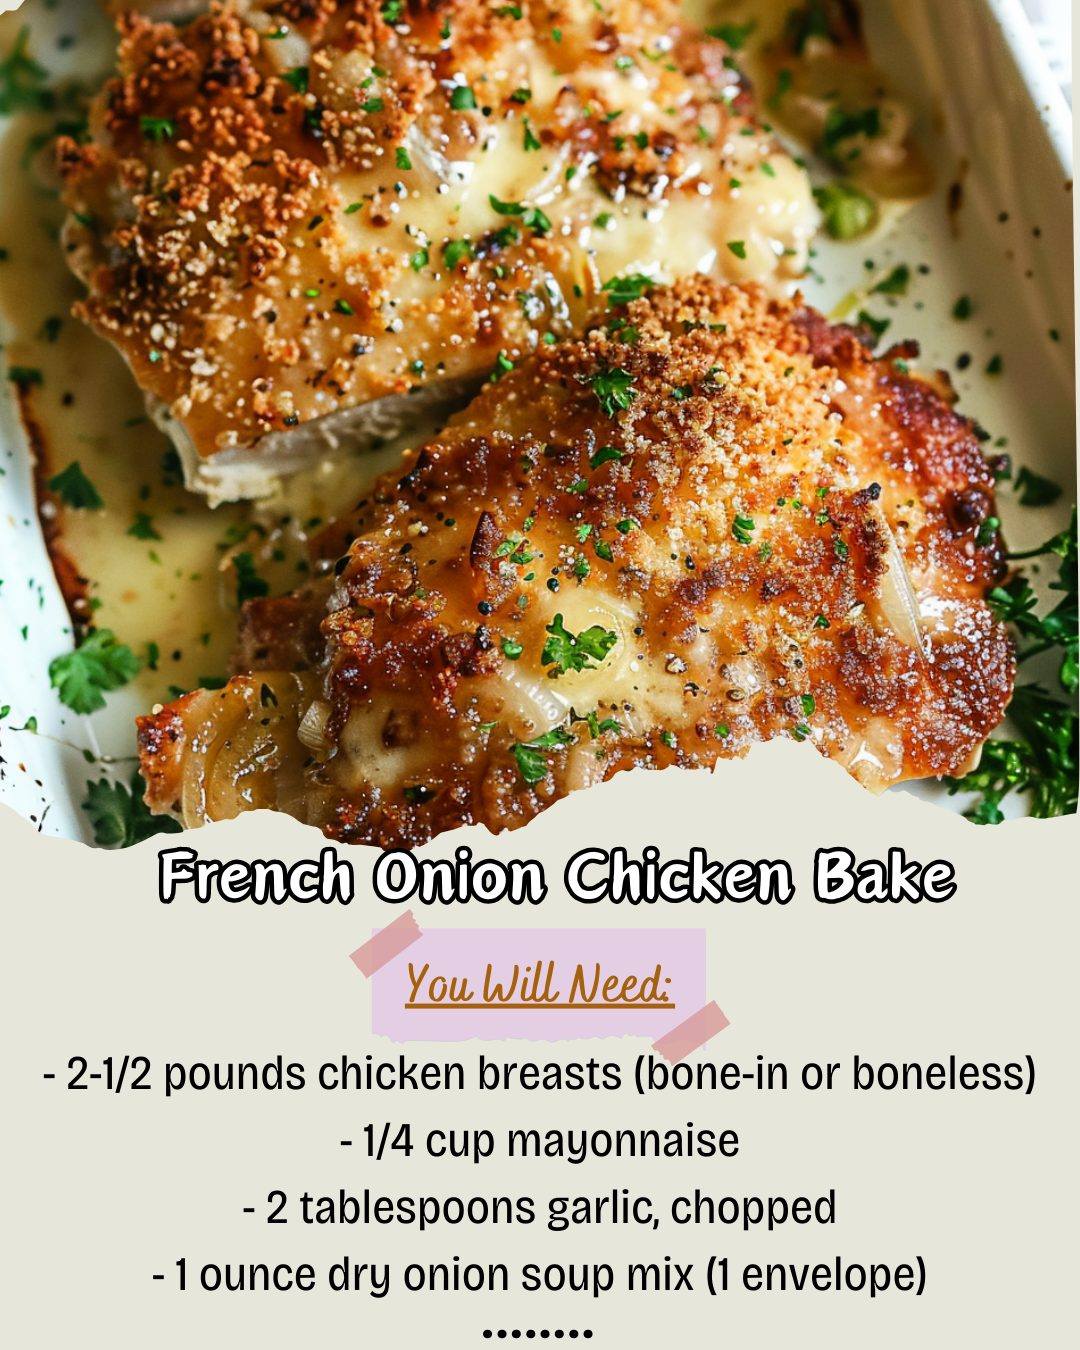
I first made this French Onion Chicken Bake on a chilly, rainy Sunday when all I wanted was the deep, savory comfort of a steaming bowl of French onion soup, but in a hearty main dish form. As it baked, my entire house filled with the most incredible aroma: the scent of toasting onions, roasting garlic, and savory herbs that felt like a warm hug. When I pulled the dish from the oven, the chicken was glistening with a golden, flavorful crust, and the juices below had mingled to create a rich, oniony gravy. That first forkful, tender chicken infused with all those classic soup flavors, was an absolute revelation of cozy, effortless comfort food.
Why You’ll Love This Recipe
You are going to be head-over-heels for this recipe because it magically transforms the beloved, complex flavors of French onion soup—the sweet caramelized onions, the savory broth, the hint of garlic and herbs—into an incredibly easy, one-pan baked chicken dinner. It requires just a handful of pantry staples and about five minutes of active prep. The mayonnaise creates an unbelievably juicy, flavorful crust that locks in moisture, and the onion soup mix does all the heavy seasoning for you. It’s the ultimate set-it-and-forget-it meal that tastes like you spent hours in the kitchen.
Ingredients
- 2-1/2 pounds chicken breasts (I prefer boneless, skin-on for maximum flavor and ease, but boneless/skinless or bone-in work)
- 1/4 cup mayonnaise (full-fat works best here)
- 2 tablespoons freshly chopped garlic (about 4-5 cloves)
- 1 (1 ounce) envelope dry onion soup mix (like Lipton)
- 1 tablespoon olive oil
- Optional for serving: 1 cup shredded Gruyère, Swiss, or mozzarella cheese
- Optional garnish: chopped fresh parsley or thyme
(See the next page below to continue…)
Equipment Needed
- 9×13 inch baking dish or a similar-sized oven-safe casserole dish
- Small mixing bowl
- Whisk or fork
- Basting brush or spoon
- Instant-read meat thermometer
Step-by-Step Instructions
My first step is always to prepare the chicken and the all-important sauce. I pat the chicken breasts completely dry with paper towels—this is a small step I used to skip, but it makes a huge difference in helping the flavorful coating stick properly. If I’m using boneless, skinless breasts, I sometimes lightly pound the thicker ends to ensure even cooking. Then, in my small bowl, I combine the mayonnaise, chopped garlic, and the entire envelope of onion soup mix. I whisk it until it forms a thick, speckled paste. The smell at this point is already incredible—pungent, savory, and promising.
Now, I lightly drizzle the olive oil in the bottom of my baking dish and place the dried chicken breasts in it in a single layer. Using a basting brush or the back of a spoon, I slather every square inch of the chicken with the mayonnaise-onion soup mixture. I mean it—get it on the tops and sides. I’ve tried just dolloping it on top, and it doesn’t spread as evenly while baking. This thick coating is what will steam and brown into that fantastic crust and infuse the chicken with moisture and flavor from the outside in. It’s the secret to the dish’s success.
Once the chicken is thoroughly coated, the hard work is done. I place the dish, uncovered, into a preheated 375°F (190°C) oven. I’ve tested this at 400°F and 350°F, and 375°F is the sweet spot. It’s high enough to get a beautiful browning on the coating without burning the garlic or drying out the chicken. I let it bake for 30-40 minutes. About halfway through, I like to take a spoon and baste the chicken with the juices that have already started pooling in the dish. This extra step adds another layer of flavor and moisture.(See the next page below to continue…)
The key to knowing when it’s done is an instant-read thermometer. I insert it into the thickest part of a breast, and I look for 165°F. Relying on time alone failed me once, as chicken thickness varies so much. Once it hits temperature, if I’m using cheese, I’ll sprinkle it generously over the top and pop the dish under the broiler for 2-3 minutes, just until the cheese is melted, bubbly, and slightly spotted with brown. I then let the chicken rest in the pan for about 5-10 minutes. This allows the juices to redistribute, ensuring every slice is succulent.
Pro Tips for Best Results
My number one tip is to use fresh garlic. I tested this with jarred minced garlic and fresh, and the flavor difference is profound. The fresh garlic roasts and sweetens beautifully in the oven, while the jarred version can sometimes taste sharp or bitter. Taking two minutes to chop a few cloves is absolutely worth it for the depth of flavor it brings to the simple coating.
Don’t shy away from the mayonnaise. I know it might seem odd, but it’s the magic ingredient. I’ve tried substituting Greek yogurt or sour cream, and while tasty, they don’t create the same rich, insulating crust that the mayo does. The egg and oil in mayonnaise promote browning and lock in an incredible amount of moisture. Trust me, do not skip it or swap it—it makes all the difference in achieving that juicy, non-dry result.
Finally, let your chicken rest after baking. I used to be too hungry to wait and would slice right in, only to watch all the savory juices run out onto the cutting board. Letting it sit for 5-10 minutes after it comes out of the oven allows the muscle fibers to relax and reabsorb those liquids. This simple patience is the final step to guaranteeing perfectly moist, tender chicken in every single bite.
Common Mistakes to Avoid
The most common mistake is not patting the chicken dry. If the chicken is wet, the mayonnaise mixture will slide right off and pool in the baking dish instead of forming that beautiful, adherent crust. I made this mistake the first time, and I ended up with patchily seasoned chicken and a separated, greasy sauce on the bottom. A quick blot with paper towels is your best friend here.(See the next page below to continue…)
Don’t use a glass dish without adjusting. Glass bakeware heats and retains heat differently than metal or ceramic. If you use a glass dish, your cooking time might be slightly longer, and the bottom may not get as much caramelization. I prefer a ceramic or metal baking dish for this recipe. If glass is all you have, just keep a close eye on it and use your thermometer religiously.
Avoid overcrowding the pan. The chicken pieces need space around them for the hot air to circulate, ensuring they cook evenly and the coating crisps up properly. If you cram them all in, they’ll steam instead of roast, resulting in a pale, soggy topping. If my chicken pieces are large, I’ll even use two smaller dishes to give them plenty of room.
Finally, don’t forget to check the saltiness of your onion soup mix. Brands can vary. I once used a generic brand that was significantly saltier than my usual, and the whole dish was a bit overwhelming. If you’re sensitive to salt or using an unfamiliar brand, you can use 3/4 of the packet or look for a lower-sodium version. You can always add more, but you can’t take it away.
Serving Suggestions
I love serving this chicken right from the baking dish, family-style. I spoon the incredible oniony, garlicky pan juices over the top like a built-in gravy. It’s fantastic served over a big bed of creamy mashed potatoes or buttery egg noodles—they soak up every last drop of that flavorful sauce. A simple side of roasted green beans or steamed broccoli completes the plate beautifully.
For a truly “French onion soup” experience, I’ll slice the baked chicken and serve it on top of a thick slice of toasted, crusty bread (like a baguette), then spoon the pan juices over everything and top with the melted cheese. It’s like a deconstructed, heartier version of the soup and makes for a fun and delicious presentation that always impresses.
This dish also makes amazing leftovers for salads or sandwiches. The next day, I’ll slice the cold chicken and add it to a green salad with a sharp vinaigrette, or I’ll pile it on a crusty roll with a little extra cheese and broil it open-faced for a killer chicken melt. The flavors deepen overnight, making the leftovers something to look forward to.
Variations & Customizations
For a richer, more decadent version, I add 8 ounces of sliced mushrooms to the baking dish before adding the chicken. As everything bakes, the mushrooms release their water and absorb all the amazing onion and garlic flavors, becoming little juicy flavor bombs. I also love stirring a tablespoon of Worcestershire sauce into the mayonnaise mixture for an extra umami kick.
You can easily swap the protein. This coating is fantastic on bone-in, skin-on chicken thighs or drumsticks—just increase the baking time to 45-50 minutes to ensure they cook through. I’ve also used it as a paste on pork chops or even thick slices of firm tofu for a vegetarian option, adjusting the baking time accordingly.
To make it a full one-pan meal, I’ll add hearty vegetables to the dish before baking. Chunks of potato, carrots, and parsnips tossed in a little oil and salt nestled around the chicken work wonderfully. They roast in the chicken juices and onion flavors, creating a complete dinner with no extra pots to wash. Just ensure the vegetables are cut small enough to cook through in the same time.
How to Store, Freeze & Reheat
Leftovers keep wonderfully. I store cooled chicken and any pan juices in an airtight container in the refrigerator for up to 3-4 days. To reheat, I prefer the oven or toaster oven to preserve the texture of the crust. I place it in a baking dish, add a splash of chicken broth or water to keep it moist, cover with foil, and warm at 325°F until heated through. The microwave can make the coating soggy.
This dish freezes well before or after baking. To freeze unbaked, assemble the coated chicken in a freezer-safe baking dish, wrap tightly in plastic and foil, and freeze for up to 2 months. Thaw overnight in the fridge before baking as directed, adding a few extra minutes to the cook time. You can also freeze individual portions of baked chicken for quick lunches.
I don’t recommend freezing the dish after it’s been baked with cheese on top, as dairy-based toppings can become grainy when thawed and reheated. It’s best to add fresh cheese when reheating a frozen portion. The flavors hold up beautifully to freezing, making this a fantastic make-ahead meal for busy weeks.
Conclusion
This French Onion Chicken Bake is more than just a simple recipe to me; it’s my dependable ticket to a comforting, flavorful dinner that never fails to please. It has saved countless busy weeknights and has become a requested dish for casual dinners with friends. I hope it brings the same warmth, ease, and delicious satisfaction to your table, creating a new go-to in your recipe collection. Now, go grab that envelope of soup mix—an incredibly easy, flavor-packed dinner is just an hour away.