
Next, return the saucepan to low heat and stir in the mini marshmallows and salt. Keep stirring until the mixture is smooth and creamy. Once you reach that lovely consistency, turn off the heat and fold in the chopped walnuts if you’re using them. Pour this heavenly goodness into your prepared baking pan and spread it evenly. Let it cool for about 30 minutes at room temperature, and then transfer it to the refrigerator for about an hour to firm up.
Once the nougat layer has set, it’s time to make the caramel layer. In a separate saucepan, combine another cup of sugar, butter, and a couple of tablespoons of water, and cook on medium until it reaches a golden brown color. This step always makes me nervous, but just keep an eye on it, stirring frequently. When the caramel is ready, carefully pour it over the chilled nougat layer and spread it evenly. Pop it back in the fridge for about 20 minutes to let the caramel set.
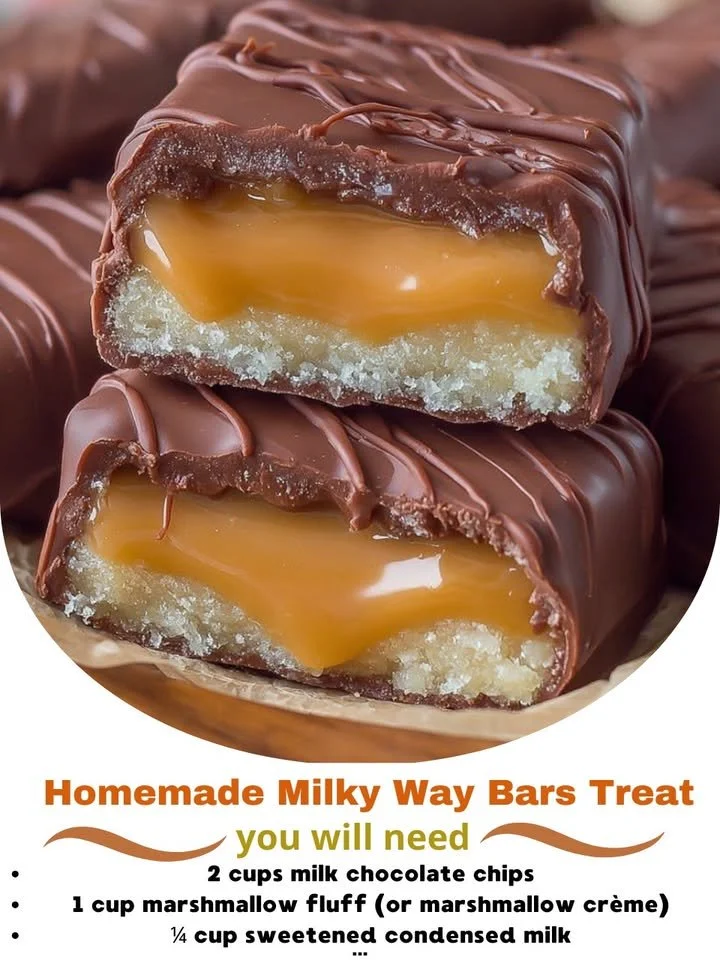
Finally, melt the semi-sweet chocolate chips in a double boiler or microwave until smooth and glossy. Drizzle or spread the melted chocolate over the caramel layer, and then refrigerate again until everything is nicely set. When the chocolate has hardened, it’s time to slice these beauties into bars. Enjoy the delightful flavors as you indulge in every bite!
Pro Tips for Best Results
I tested this recipe three ways, and my favorite method is definitely to line the baking pan with parchment paper, as it makes it so much easier to lift the entire batch out at once. You’ll thank me later when you’re ready to cut those perfect squares! Also, be careful not to rush the cooling times; I once got impatient and ended up with a gooey mess instead of beautiful layers. Give each component enough time to set, and you’ll be rewarded with a perfect texture.
When it comes to the chocolate coating, I find that using high-quality chocolate makes a world of difference. I’ve tried both semi-sweet and dark chocolate, and while both are delicious, I favor semi-sweet for that classic Milky Way flavor. It adds just the right amount of sweetness without overpowering the other layers.
Lastly, remember that practice makes perfect! The first time I made these bars, they didn’t come out perfect, but each time I learn a little bit more about managing heat and timing. Don’t get discouraged—just keep experimenting, and soon, you’ll be a pro at making these homemade candies!
Common Mistakes to Avoid
One common mistake I made initially was misunderstanding the cooking temperatures while making the caramel. It’s so important to monitor the color closely; if you cook it too long, it turns too dark and can become bitter. I recommend investing in a candy thermometer if you want to get consistent results.
Another thing to watch out for is not letting the nougat layer cool completely before pouring the caramel over it. I made that mistake once, and the layers mixed, resulting in what I call “Milky Way Surprise!” Taking the time to ensure that each layer is fully set will give you that classic presentation and texture.
Sometimes, people underestimate the power of chopping the nuts evenly. If some pieces are larger than others, they might poke out, which affects the overall look and texture of your bars. I found that using a food processor can help achieve a finely chopped mix, allowing for uniform distribution throughout each bar.
Finally, don’t forget to refrigerate your bars after they are assembled! I’ve had moments where I thought they were done and tempting on the counter, but they need that chill time to set properly. Trust me, it makes a difference in the bite!
(See the next page below to continue…)