
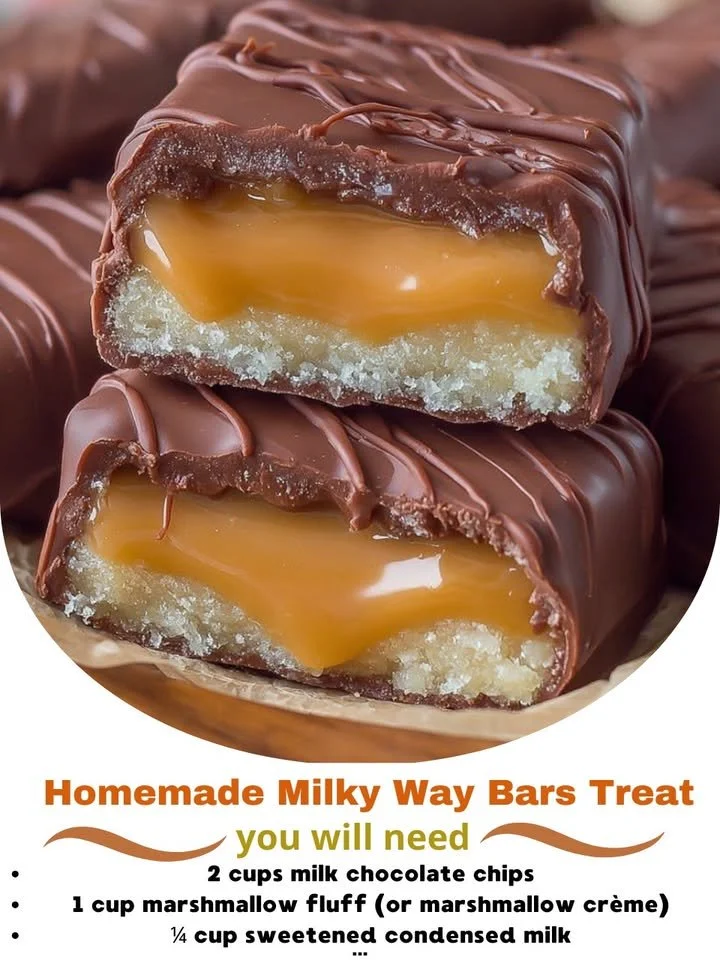
Welcome to my cozy kitchen, where I’m always on the lookout for delightful treats to whip up! Today, I’m excited to share my recipe for Homemade Milky Way Bars. These sweet, chocolatey indulgences are remarkably easy to make and are sure to impress anyone who takes a bite. With layers of rich chocolate, soft nougat, and creamy caramel, they hit all the right notes of flavor and texture. I can assure you that once you try this recipe, you’ll want to make it again and again!
Why You’ll Love This Recipe
You’ll absolutely love this recipe because it captures the essence of the beloved candy bar while adding a personal, homemade touch. I adore how easy it is to customize these bars to suit my taste preferences, whether I want them extra chewy or more chocolatey. Plus, making these at home means I know exactly what’s going into them. Trust me, once you taste the combination of soft nougat, gooey caramel, and rich chocolate, you’ll view store-bought candy bars in a whole new light! (See the ingredients in the next page below…)
Ingredients
– 1 cup sugar
– 1/2 cup corn syrup
– 1/4 cup unsalted butter
– 1 cup sweetened condensed milk
– 1 teaspoon vanilla extract
– 2 cups semi-sweet chocolate chips
– 1 cup mini marshmallows
– 1 cup chopped walnuts (optional)
– 1/2 teaspoon salt
– 1/4 cup water
Equipment Needed
– 9×13 inch baking pan
– Small saucepan
– Mixing bowls
– Wooden spoon or spatula
– Double boiler or microwave-safe bowl
– Parchment paper
Step-by-Step Instructions
Let’s get started on creating these scrumptious Homemade Milky Way Bars! First, begin by lining your baking pan with parchment paper to ensure easy removal later on. In a small saucepan, combine the sugar, corn syrup, butter, and water over medium heat. Stir the mixture until everything is dissolved and bubbling, which should take about 3-4 minutes. Once that’s done, you’ll want to remove it from the heat and add in the sweetened condensed milk along with the vanilla extract, stirring it to combine. The sweet aroma will fill your kitchen, and I can never resist sneaking a taste! (See the next page below to continue steps…)
Next, return the saucepan to low heat and stir in the mini marshmallows and salt. Keep stirring until the mixture is smooth and creamy. Once you reach that lovely consistency, turn off the heat and fold in the chopped walnuts if you’re using them. Pour this heavenly goodness into your prepared baking pan and spread it evenly. Let it cool for about 30 minutes at room temperature, and then transfer it to the refrigerator for about an hour to firm up.
Once the nougat layer has set, it’s time to make the caramel layer. In a separate saucepan, combine another cup of sugar, butter, and a couple of tablespoons of water, and cook on medium until it reaches a golden brown color. This step always makes me nervous, but just keep an eye on it, stirring frequently. When the caramel is ready, carefully pour it over the chilled nougat layer and spread it evenly. Pop it back in the fridge for about 20 minutes to let the caramel set.
Finally, melt the semi-sweet chocolate chips in a double boiler or microwave until smooth and glossy. Drizzle or spread the melted chocolate over the caramel layer, and then refrigerate again until everything is nicely set. When the chocolate has hardened, it’s time to slice these beauties into bars. Enjoy the delightful flavors as you indulge in every bite!
Pro Tips for Best Results
I tested this recipe three ways, and my favorite method is definitely to line the baking pan with parchment paper, as it makes it so much easier to lift the entire batch out at once. You’ll thank me later when you’re ready to cut those perfect squares! Also, be careful not to rush the cooling times; I once got impatient and ended up with a gooey mess instead of beautiful layers. Give each component enough time to set, and you’ll be rewarded with a perfect texture.
When it comes to the chocolate coating, I find that using high-quality chocolate makes a world of difference. I’ve tried both semi-sweet and dark chocolate, and while both are delicious, I favor semi-sweet for that classic Milky Way flavor. It adds just the right amount of sweetness without overpowering the other layers.
Lastly, remember that practice makes perfect! The first time I made these bars, they didn’t come out perfect, but each time I learn a little bit more about managing heat and timing. Don’t get discouraged—just keep experimenting, and soon, you’ll be a pro at making these homemade candies!
Common Mistakes to Avoid
One common mistake I made initially was misunderstanding the cooking temperatures while making the caramel. It’s so important to monitor the color closely; if you cook it too long, it turns too dark and can become bitter. I recommend investing in a candy thermometer if you want to get consistent results.
Another thing to watch out for is not letting the nougat layer cool completely before pouring the caramel over it. I made that mistake once, and the layers mixed, resulting in what I call “Milky Way Surprise!” Taking the time to ensure that each layer is fully set will give you that classic presentation and texture.
Sometimes, people underestimate the power of chopping the nuts evenly. If some pieces are larger than others, they might poke out, which affects the overall look and texture of your bars. I found that using a food processor can help achieve a finely chopped mix, allowing for uniform distribution throughout each bar.
Finally, don’t forget to refrigerate your bars after they are assembled! I’ve had moments where I thought they were done and tempting on the counter, but they need that chill time to set properly. Trust me, it makes a difference in the bite!
(See the next page below to continue…)
Serving Suggestions
Homemade Milky Way Bars make a fantastic treat for parties or family gatherings! I love to slice them into bite-sized pieces and present them on a pretty platter alongside other desserts. They also spark joy with a hot cup of cocoa or your favorite coffee, making for a delightful afternoon snack.
If you’re feeling fancy, you can drizzle some extra chocolate sauce or caramel on top before serving. A sprinkle of sea salt can elevate the flavor profile and make them even more irresistible. These little touches impress your guests and elevate the whole dessert experience.
I also love to pack them in lunchboxes as a sweet treat for my kids. They certainly make lunchtime more exciting, and it’s a treat I don’t mind them having. A little homemade goodness feels a lot healthier than store-bought options—plus, what kid could resist?
Variations & Customizations
The beauty of this recipe is its flexibility! For a fun twist, consider swapping out the nuts for something different, like crushed pretzels or candy bars. I once tried adding chopped peanuts, which added a delightful crunch and a hint of saltiness that paired well with the sweet layers.
You could even play with flavors by incorporating different extracts like almond or coconut. I’ve experimented with mint extract, which gave a refreshing touch to the bars, reminiscent of a candy cane candy bar. It can make a festive variation during holidays!
And let’s not forget about dietary preferences! If you have vegan friends or family, you can substitute the ingredients with plant-based alternatives, such as coconut milk or caramel, which can create equally delicious results. The joy of baking is adapting and creating to suit everyone!
How to Store, Freeze & Reheat
To store your Homemade Milky Way Bars, I recommend keeping them in an airtight container in the refrigerator. They stay fresh for about a week, although they rarely last that long at my house! If you’re planning to keep them for later, you can lay them between layers of parchment paper to prevent sticking.
Freezing these bars is also an option! I’ve learned the hard way that it’s best to slice them into pieces before freezing so that you can grab just a few at a time without thawing the whole batch. Wrap each piece in plastic wrap, then store them in a freezer-safe zip bag. They can last in the freezer for about two months.
When you’re ready to enjoy them again, simply let them come to room temperature for about 15-20 minutes before serving. You’ll be amazed at how well they hold up, with the chocolate still perfectly dreamy and the nougat soft. It’s like having a little piece of heaven waiting for you in the freezer!
Conclusion
I hope you’ve enjoyed this journey into making Homemade Milky Way Bars as much as I have! There’s something incredibly satisfying about creating your own treats in the kitchen, filled with love and deliciousness. Whether for yourself, family, or friends, these bars are sure to please anyone’s sweet tooth. So, roll up your sleeves, gather your ingredients, and dive into this scrumptious adventure—I promise you won’t regret it!