
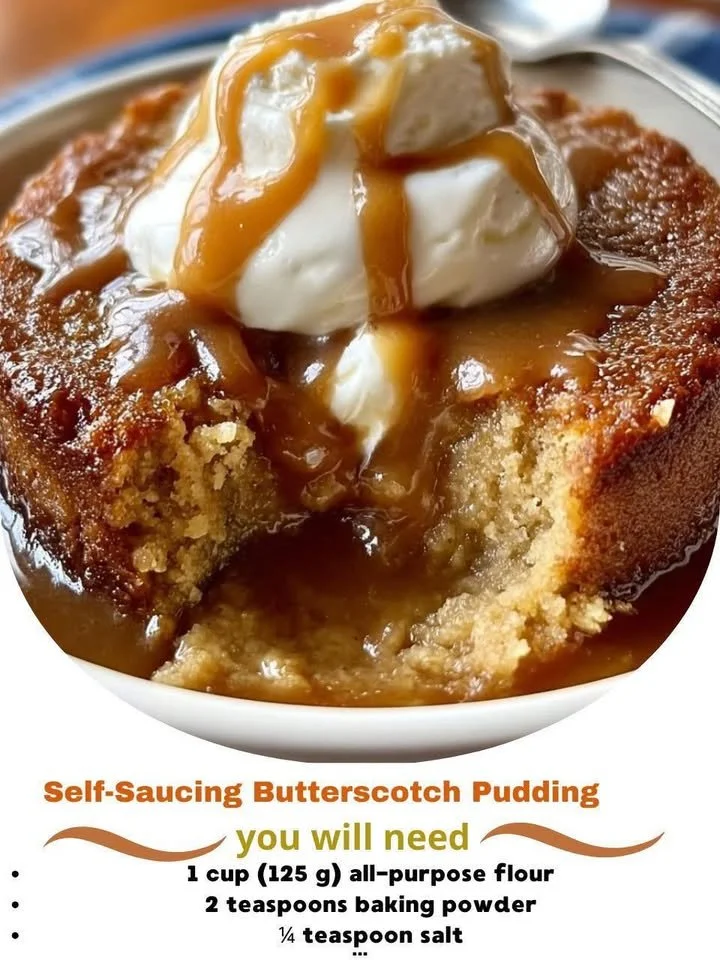
Ah, the wonders of dessert! There’s something so comforting about a warm, sweet treat at the end of a long day, and today, I can’t wait to share my go-to recipe for Self-Saucing Butterscotch Pudding. It’s one of those cozy desserts that wraps you in a hug with every spoonful. Picture this: a rich, sticky butterscotch sauce mingling with a soft, delicate pudding—all baked together to create a delightful surprise at the bottom of your dish. Trust me, once you try this recipe, it’ll become a staple in your kitchen!
Why You’ll Love This Recipe
This Self-Saucing Butterscotch Pudding is not only incredibly easy to make, but it also requires minimal ingredients that you most likely already have in your pantry. The fusion of that sweet butterscotch flavor with a warm, gooey sauce is simply irresistible. Plus, it’s perfect for weeknight dinners or special occasions, warming hearts and bellies alike. I just know you’ll love how effortlessly this dessert comes together and how it impresses everyone you serve it to! (See the ingredients in the next page below…)
Ingredients
– 1 cup brown sugar, packed
– 1/2 cup all-purpose flour
– 1 tsp baking powder
– 1/4 tsp salt
– 1 cup milk
– 1/4 cup unsalted butter, melted
– 1 tsp vanilla extract
– 1 cup hot water
Equipment Needed
– Mixing bowls
– Whisk
– 8×8-inch baking dish (or a similar size)
– Measuring cups and spoons
– Oven
Step-by-Step Instructions
Let’s dive into the magic of making this pudding! First, preheat your oven to 350°F (175°C). In a mixing bowl, combine the brown sugar, flour, baking powder, and salt. Stir that mixture until all the dry ingredients are well combined. Once everything is evenly mixed, it’s time to add the milk, melted butter, and vanilla extract. Whisk until you get a smooth batter. It might seem a tad thick, but don’t worry! That’s exactly how it should be. (See the next page below to continue steps…)
Next, pour the batter into your prepared baking dish. Now, here’s where the fun begins! Evenly sprinkle an additional half cup of brown sugar over the batter. This will create that luscious sauce once it bakes. Carefully pour the hot water over the top, making sure not to stir it in; the water will settle at the bottom and create the saucy layer. It might look a little strange before baking, but trust me, it’s going to turn into something magnificent!
Now, it’s time to slide your pudding into the preheated oven and bake for about 30-35 minutes. You’ll know it’s done when the top feels firm to the touch and the edges are slightly golden. The aroma that fills your kitchen during baking is pure bliss! Let it cool for a few minutes before serving.
Pro Tips for Best Results
I’ve experimented with this recipe several times, and I found that using fresh ingredients can make a real difference. Make sure your baking powder is active—if it’s been sitting in your pantry for a while, it might not give you that perfect rise. I also prefer using whole milk for a richer flavor, but 2% works fine too!
When it comes to mixing, don’t overdo it! You want to combine the ingredients until they’re just mixed. Over-mixing can lead to a tougher pudding, while gentle mixing keeps it light and fluffy. I always find a gentle hand yields the best results, letting the butter and sugar do their magic!
Lastly, try to use unsalted butter for this recipe. It gives you more control over the sweetness, allowing you to adjust as needed. Plus, the creamy richness of unsalted butter complements the butterscotch flavor beautifully!
Common Mistakes to Avoid
I’ve had my share of hiccups while mastering this recipe, and I want to save you from them! One big mistake is not letting the pudding cool for at least a few minutes before serving. I know it’s tempting to dive right in; however, the pudding needs a moment to set slightly—this will also help the sauce firm up a bit. (See the next page below to continue…)
Another pitfall is forgetting to sprinkle the sugar before pouring the hot water. Mixing it all together might seem easier, but those sugar crystals are key to creating that gorgeous sauce! Trust the process; layering makes all the difference.
One other common error is opening the oven door too soon. I did it once, and it caused my pudding to sink in the middle—so avoid peeking for the first 25 minutes. The steam helps create that wonderfully soft texture on the top and keeps the sauce layer intact.
Serving Suggestions
Now for the best part—serving this delightful pudding! I love to scoop generous portions into bowls while it’s still warm and top each serving with a dollop of freshly whipped cream. The cream adds a lovely touch and balances the sweetness perfectly. If you’re feeling extra indulgent, a sprinkle of sea salt elevates the flavor profile and adds a delicious contrast.
Pairing this self-saucing butterscotch pudding with a scoop of vanilla ice cream is another fantastic option. As the ice cream melts into the pudding, it creates a creamy, dreamy experience that’s hard to resist! It’s one of those combinations that feels like a warm hug on a chilly evening.
And don’t forget about garnishing! A light sprinkle of chopped pecans or walnuts on top not only adds texture but a nice nutty flavor complementing the butterscotch too. Just be sure to serve it warm for that lovely contrast of hot and cold!
Variations & Customizations
If you’re like me and adore butterscotch, modifying this recipe might be a fun endeavor! You can easily substitute brown sugar with coconut sugar for a different flavor profile that still keeps the sweetness intact. I tried this once, and it added a lovely, intricate taste that was a new favorite!
For a hint of spice, consider adding a teaspoon of cinnamon or ginger into the dry ingredients. This twist gives the pudding a warm, cozy flavor that’s perfect for fall or winter. I adore warming spices, and adding them to desserts always feels like a sweet embrace!
If you’re in the mood for something fruity, mix in some chopped apples or pears into the batter before baking. The fruit softens while baking and adds a delightful burst of moisture and flavor to every bite, creating an exciting twist to this classic recipe!
How to Store, Freeze & Reheat
If you happen to have any leftovers (which is rare, trust me!), the self-saucing butterscotch pudding can be stored in an airtight container in the fridge for up to 2–3 days. Just make sure to reheat it gently, as you don’t want to lose that lovely sauce at the bottom! A quick spin in the microwave should do the trick, so go for 30 seconds at a time, stirring in between until it’s warm throughout.
For longer storage, you can freeze the pudding! After it has cooled completely, transfer it to a freezer-safe container and enjoy it within two months. When you’re ready to enjoy your pudding again, just let it thaw overnight in the fridge, then reheat as mentioned above for that fresh-baked feel!
While reheating, if you find that the top feels a bit dry, don’t hesitate to add a splash of milk before warming it up. This little trick helps to revitalize the texture and bring back some of that creamy goodness!
Conclusion
I hope you’ve enjoyed my journey through making this delightful Self-Saucing Butterscotch Pudding as much as I do each time I make it. It’s a comforting dessert that surely warms the soul and brings smiles around the table. Whether it’s a cozy night in or a gathering with loved ones, this recipe is bound to please. Grab your apron, and let’s create some sweet memories together in the kitchen! Happy baking!