
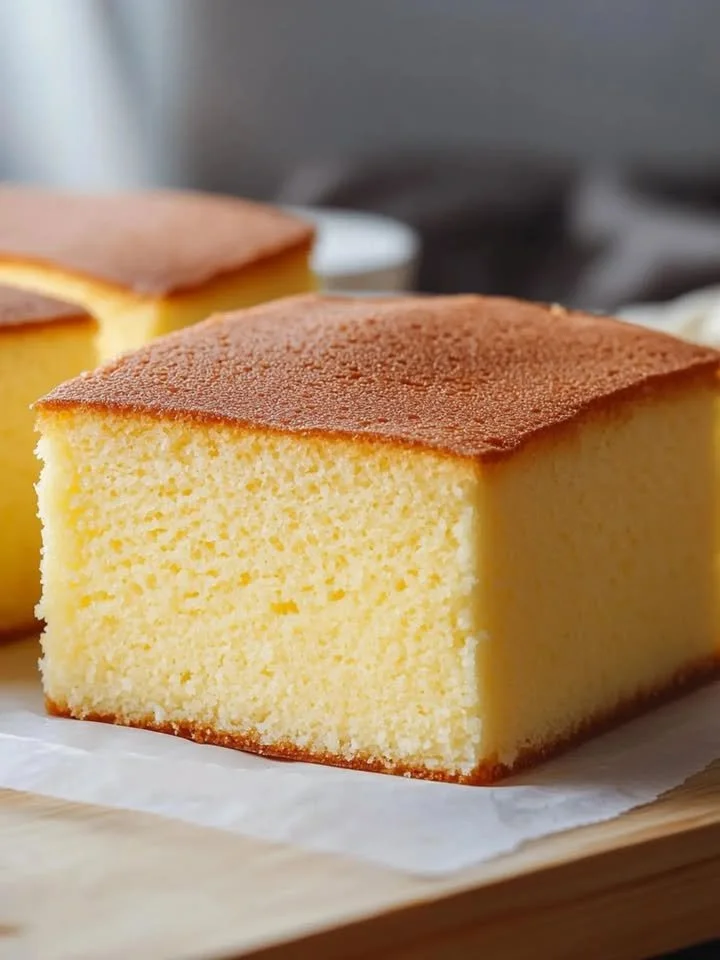
I’m excited to share my take on the classic Japanese Castella Cake. If you’ve never had this delightful dessert, you’re in for a treat. This soft and fluffy cake brings to mind gentle clouds and sweet memories, making it the perfect addition to any occasion—or just a cozy afternoon at home with a cup of tea.
Why You’ll Love This Recipe
What I love most about this Castella Cake is its incredible texture—a fluffy, sponge-like consistency that melts in your mouth. It feels light yet satisfying, and the subtly sweet flavor profiles ensure that it’s not overly indulgent. Plus, it’s so versatile; you can enjoy it plain or jazz it up with your favorite toppings or flavors. It’s a showstopper that’s surprisingly easy to make! I promise you, once you’ve mastered this recipe, it will quickly become a staple in your baking repertoire. (See the ingredients in the next page below…)
Ingredients
- 4 large eggs
- 1 cup granulated sugar
- 1/2 cup whole milk
- 1/2 cup vegetable oil
- 1 cup all-purpose flour
- 1 teaspoon baking powder
- 1 teaspoon honey (optional)
- 1 teaspoon vanilla extract (optional)
Equipment Needed
- Mixing bowls
- Electric mixer (or whisk)
- Sifter
- Spatula
- 8-inch square baking pan
- Parchment paper
- Toothpick for testing doneness
Step-by-Step Instructions
Let’s dive into making this fluffy delight! First, I preheat my oven to 320°F (160°C). I line my baking pan with parchment paper, allowing some to hang over the edges for easy removal later. In a mixing bowl, I beat the eggs and granulated sugar together using my electric mixer until the mixture turns pale and thick, almost like a beautiful meringue. I can already smell the sweetness rising! (See the next page below to continue steps…)
Next, I gently warm the milk and vegetable oil in a saucepan over low heat. Once it’s just lukewarm, I remove it from the heat and gradually add it to the egg mixture, stirring continuously. This step ensures that everything blends perfectly without cooking the eggs. Once mixed, I sift the flour and baking powder into the bowl, folding it in gently with a spatula until the batter is smooth. I’m careful not to over-mix, as I want to keep that lovely airiness!
Now, here comes the best part: pouring the batter into my prepared pan. I give it a gentle tap on the counter to release any air bubbles. Then, I pop it in the oven and bake for about 40-50 minutes. As it bakes, my kitchen fills with the most divine aroma! When it’s done, I check with a toothpick; it should come out clean.
Once it’s out of the oven, I let the cake cool in the pan for about 10 minutes before transferring it to a wire rack. I’m always tempted to sneak a piece at this stage, but patience is key to achieving that perfect slice!
Pro Tips for Best Results
I’ve tested this cake several times, tweaking little details to make it just right. One thing I learned was to really focus on the egg-sugar mixture; the longer you beat it, the fluffier your cake will turn out. Trust me, those extra few minutes make a difference!
Another tip? Use room temperature ingredients. I find that taking the eggs and milk out of the fridge an hour before baking gives the batter a smoother consistency, and the cake bakes more evenly.
Lastly, don’t be tempted to open the oven door while baking! I’ve made that mistake, and the sudden drop in temperature can cause your cake to sink in the middle. Just let it do its thing for the entire baking time!
Common Mistakes to Avoid
One of the most common mistakes I’ve encountered—and have made, too—is overmixing the batter. It’s so tempting to just keep stirring, especially when you see little lumps, but mixing too much can lead to a denser cake. Aim for a smooth mixture but don’t obsess over it! (See the next page below to continue…)
Another pitfall is not measuring your ingredients accurately. I’ve found that even a small variation can change the texture of the cake. If you’re unsure, invest in a kitchen scale—it’s a game changer for baking!
Also, make sure you’re using the right baking pan. A square pan works best; using a different size can throw off the baking time and could lead to an undercooked or overcooked cake. If you don’t have an 8-inch pan, just keep an eye on the baking time!
Serving Suggestions
Once your Castella Cake cools, you can serve it in delightful squares, just like they do in Japan. I love enjoying it with a generous dusting of powdered sugar or a light drizzle of honey for added sweetness. It pairs beautifully with a hot cup of green tea or even a scoop of ice cream for those cozy nights in.
Another lovely option is to layer it with fresh fruits like strawberries or mangoes. This adds a refreshing twist, and it looks stunning—perfect for impressing guests at a dinner party!
Finally, if I’m hosting a brunch, I love turning slices of Castella Cake into mini parfaits. Just layer it with yogurt and fruit and watch how everyone goes back for seconds!
Variations & Customizations
Castella Cake is incredibly versatile, and I love experimenting with flavors. Once, I added lemon zest to the batter, and it gave the cake a bright, zesty twist that was a hit! You can also swap out the vanilla extract for almond extract for a nutty flavor.
If you’re feeling adventurous, try adding matcha powder for an earthy, vibrant green cake. It adds a beautiful color and delightful taste, making it perfect for a special occasion.
Lastly, don’t hesitate to incorporate different fillings! I’ve experimented with adding a layer of whipped cream and berries in the center for a delightful surprise. The possibilities are endless, and I encourage you to get creative!
How to Store, Freeze & Reheat
Once I’ve finished baking my Castella Cake, I usually wrap any leftovers tightly in plastic wrap and store them at room temperature to keep them soft. It can last about 3-4 days, but believe me, it rarely lasts that long in my house!
If you want to prepare it ahead of time, freezing is your friend! Just wrap it tightly in plastic and then foil to prevent freezer burn. It’s good for about a month. When you’re ready to enjoy it again, simply thaw it at room temperature for a few hours.
To reheat, I pop individual slices in the microwave for about 10 seconds. This revives the cake, making it soft and fluffy all over again—perfect for when that cake craving hits!
Conclusion
I hope you’ll give this Soft, Fluffy Castella Cake a try in your own kitchen! It’s a delightful dessert that brings warmth and comfort with every bite. I can’t wait for you to experience the joy of slicing into this beautiful cake and sharing it with friends and family. Happy baking!