
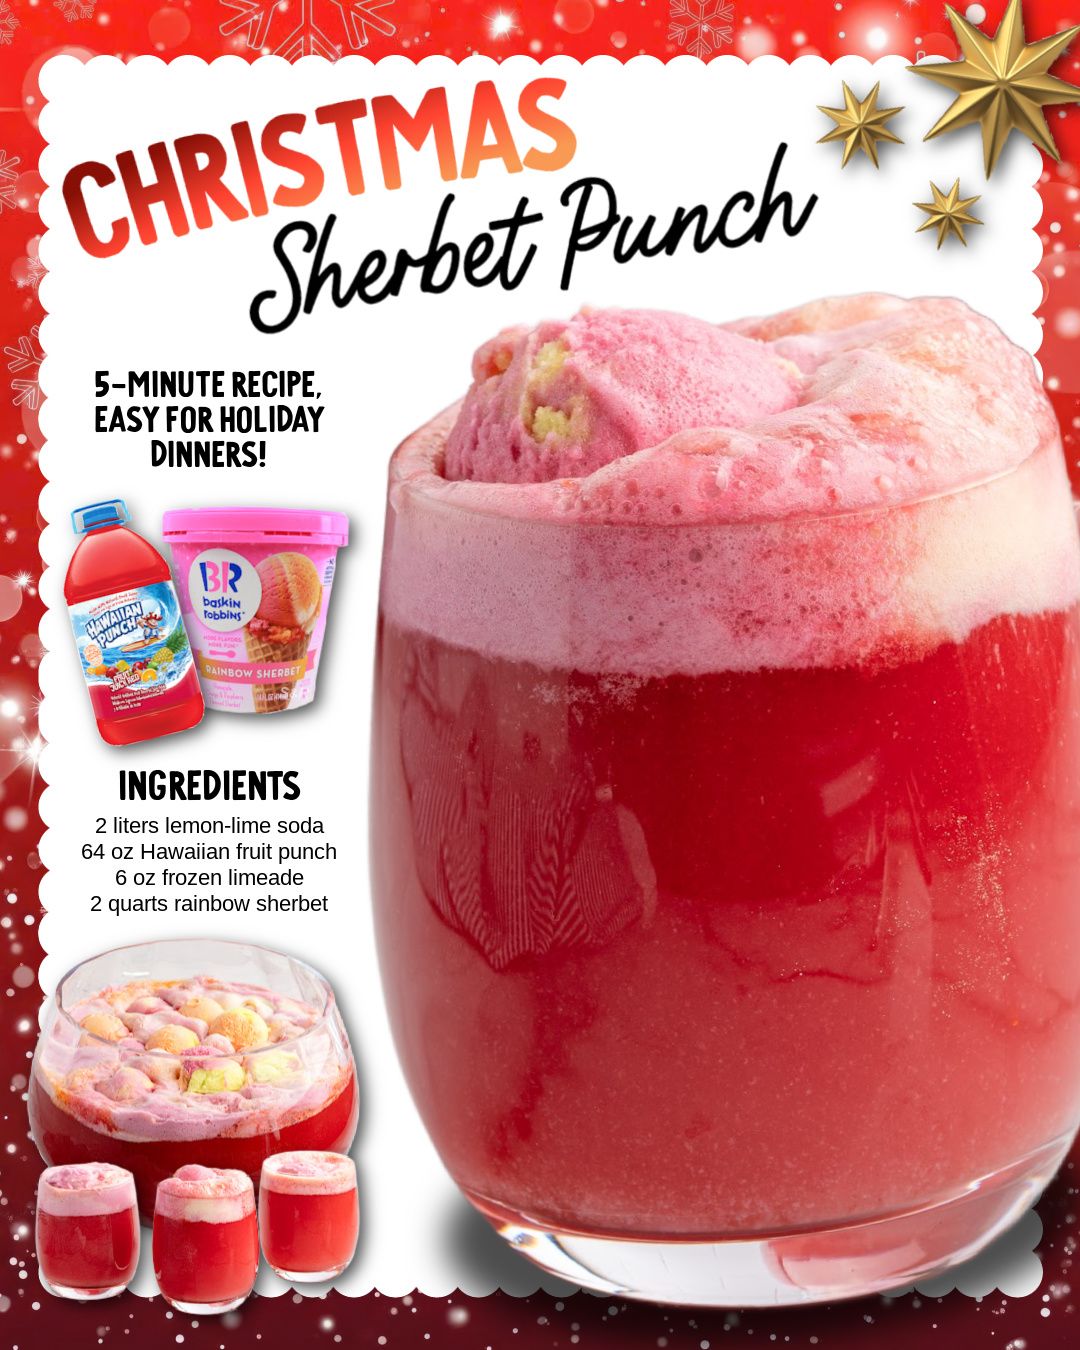
I discovered this Christmas Sherbet Punch recipe in a tattered, old community cookbook, and it immediately transported me back to my childhood holiday parties. I decided to give it a try for my own family gathering. As I scooped the vibrant rainbow sherbet into the punch bowl, its sweet, fruity scent already promised something magical. The moment I poured the lemon-lime soda over it, the whole bowl erupted into a fizzy, frothy, pastel spectacle. The sound of the bubbles and the sight of the sherbet melting into swirls of pink, orange, and green felt like pure celebration. The first sip was a burst of sweet, citrusy joy—it instantly became the taste of Christmas fun in my home.
Why You’ll Love This Recipe
You will adore this recipe because it is the absolute easiest way to create a stunning, crowd-pleasing drink that feels incredibly festive. With just four simple ingredients and five minutes of effort, you can create a centerpiece punch that thrills both kids and adults with its sweet, fizzy flavor and beautiful, swirled appearance. It’s a guaranteed conversation starter, it’s affordable, and it brings a touch of nostalgic, joyful whimsy to any holiday table. This punch is the definition of minimal effort for maximum merriment.
Ingredients
- 2 liters lemon-lime soda (like Sprite or 7-Up), chilled
- 64 oz (half a gallon) Hawaiian fruit punch, chilled
- 1 (6 oz) can frozen limeade concentrate, partially thawed
- 2 quarts (2 containers) rainbow sherbet
Let’s talk about these ingredients. The chilled part is non-negotiable. Starting with cold ingredients keeps the punch cold longer and prevents the sherbet from melting into a flat soup too quickly. The frozen limeade concentrate is the secret weapon—it’s what gives the punch its signature tangy punch and keeps the flavor from being one-dimensionally sweet. Don’t substitute juice; the concentrated flavor is key. For the rainbow sherbet, the classic orange-pink-lime combo is perfect for its festive look and multi-citrus flavor. Trust me, the sherbet isn’t just for looks; it adds a creamy, fruity body that makes this punch unique. You can also use orange or raspberry sherbet for a different color scheme!(See the next page below to continue…)
Equipment Needed
- A large punch bowl (at least 4-5 gallon capacity)
- A ladle
- A large spoon for scooping sherbet
- A pitcher for pre-mixing (optional, but helpful)
Step-by-Step Instructions
The beauty of this recipe is its assembly-line simplicity. First, ensure everything is cold. I place my unopened soda and fruit punch in the fridge the night before, and I move the limeade from the freezer to the fridge about an hour before I start. This preparation makes all the difference. When you’re ready to serve, place your empty punch bowl on the table where you’ll be serving. There’s no need for a fancy setup—the ingredients themselves are the decoration.
Now, let’s build our flavor base. Open your chilled Hawaiian fruit punch and pour all 64 ounces into the punch bowl. Then, open the can of partially thawed limeade concentrate. Use a fork to break it up a bit in the can, then pour and scrape every last bit of that tart, green concentrate into the fruit punch. Take a large spoon and stir these two together vigorously until the limeade is completely dissolved and incorporated. This creates the flavorful, tangy-sweet foundation of the punch. The color will be a beautiful, deep red.
Here comes the fun, fizzy part. Slowly and carefully, pour the entire 2-liter bottle of chilled lemon-lime soda into the bowl. I pour it down the side of the bowl to minimize foam, but a little froth is part of the charm! Gently stir just once or twice to combine. You’ll hear that wonderful, festive fizz and see the color lighten slightly. Now, for the star of the show: take your scooper and add big, generous scoops of the rainbow sherbet directly onto the surface of the punch. I cover the entire top with sherbet islands. They’ll immediately start to float and slowly melt, creating those dreamy, creamy swirls.(See the next page below to continue…)
Your punch is ready! I like to immediately place the ladle in the bowl. As you serve, scoop a little bit of the melting sherbet into each cup along with the punch. The drink will evolve as it sits—the sherbet will melt further, making it creamier and a touch sweeter, which is all part of the experience. The key is to embrace the process and not worry about it being perfect. The imperfect, swirly, bubbly mess is what makes it so charming and delicious.
Pro Tips for Best Results
For the best presentation and to keep it cold longer, I use a classic metal or glass punch bowl set with a pedestal base. Before I add any ingredients, I’ll often place the empty punch bowl in the freezer for 15-20 minutes to get it icy cold. This extra chill slows down the melting process significantly, so your punch stays beautifully frothy and cold throughout your party.
The order of operations matters. I’ve tried adding the sherbet first or mixing everything haphazardly, and it’s not the same. Adding the sherbet last, just before serving, is crucial. This ensures it stays in distinct, pretty scoops for your guests to see and doesn’t melt completely before anyone gets a cup. It’s the dramatic finishing touch that makes everyone say “wow.”
If you’re serving a very large crowd or want to have a backup ready, you can mix the fruit punch and limeade concentrate ahead of time and keep it chilled in a pitcher in the fridge. Right before serving, pour this mixture into the bowl, add the cold soda, and then top with the sherbet. This “pre-mix” step saves you time during the party and ensures your base is perfectly blended.
Common Mistakes to Avoid
The first mistake I made was using room temperature ingredients. I was in a hurry and grabbed soda and punch from the pantry. The sherbet melted into a foamy puddle within minutes, and the punch was lukewarm and unappealing. Always, always chill your liquids. This is the single most important tip for maintaining that perfect, frosty, party-ready texture.(See the next page below to continue…)
Don’t stir the punch vigorously after adding the sherbet. Gentle stirring when adding the soda is fine, but once the sherbet scoops are floating, leave them be! Over-stirring will break them down too quickly, turning your beautiful, swirled punch into a uniformly frothy, beige drink. The visual appeal is half the fun, so let it melt naturally as people serve themselves.
Avoid using a small bowl. This recipe makes a lot of punch (and foam!). You need a bowl with plenty of room for the soda to fizz without overflowing. I learned this the hard way at my first attempt, using a nice but too-small ceramic bowl. I had a very sticky, fruity counter to clean up. A large, 4-5 gallon capacity punch bowl is ideal.
Finally, don’t skip the limeade concentrate. I thought I could substitute fresh lime juice once, and the result was flat and lacked that distinctive, bright tang. The concentrated flavor and sugar in the frozen limeade are essential for balancing the sweetness of the sherbet and fruit punch. It’s the ingredient that makes the flavor pop and taste like more than just sweet soda.
Serving Suggestions
I love serving this punch as the colorful centerpiece of my holiday dessert or appetizer table. I’ll surround the punch bowl with festive napkins and cups, and sometimes I’ll float a few extra lime or orange slices on top for an elegant touch. It pairs perfectly with all kinds of holiday cookies, especially gingerbread or shortbread.
For an adult-friendly version, you can easily set up a “spike your own punch” station. I’ll place a bottle of white rum, vodka, or even a citrus-flavored liqueur next to the punch bowl with a small sign. This lets guests customize their drink, and keeps the main bowl family-friendly for the kids. It’s a simple way to please everyone.
To make serving even easier for a big crowd, I sometimes use a drink dispenser with a spigot instead of a traditional punch bowl. You’ll lose some of the visual drama of the floating sherbet, but it’s much less messy and prevents people from having to ladle. I simply add a few scoops of sherbet to the bottom of the dispenser before pouring in the mixed liquids.
Variations & Customizations
You can easily tailor the color scheme of this punch to any holiday. For a Fourth of July party, use blue raspberry sherbet and strawberry soda with white fruit punch for a red, white, and blue effect. For a Halloween party, use orange sherbet and call it “Witch’s Brew.” The basic formula is endlessly adaptable.
If you can’t find Hawaiian punch, any similar red, fruity punch will work. You can also use ginger ale instead of lemon-lime soda for a slightly different, spiced flavor profile. For the sherbet, feel free to experiment: orange sherbet makes a creamsicle-like punch, while raspberry sherbet creates a beautiful pink hue.
For a slightly less sweet and more sophisticated flavor, try using half lemon-lime soda and half sparkling water or club soda. This cuts the sweetness and lets the fruity and tart flavors shine through more clearly. It’s a great option if you’re serving a crowd that might not have a big sweet tooth.
How to Store, Freeze & Reheat
This punch is best served immediately and does not store well once assembled. The soda will go flat, and the sherbet will melt completely, separating and creating a layered, unappealing look. It’s truly a “make and serve” recipe. Any leftover punch can be stored in a sealed pitcher in the refrigerator for a day, but expect it to be flat. It will still taste good, but lose its magic.
You cannot freeze the assembled punch. However, you can absolutely keep the individual components on hand. I always keep an extra container of sherbet in my freezer and cans of limeade concentrate and bottles of soda in the pantry. This way, I can whip up a batch for unexpected guests or a last-minute gathering in literally five minutes.
There is no reheating involved for this recipe, as it is a cold beverage. The only “prep” is chilling your ingredients. If you need to chill soda or punch quickly, you can place the bottles in an ice bath in your sink or a large cooler for 20-30 minutes before the party starts.
Conclusion
This Christmas Sherbet Punch is more than just a drink; it’s a fizzy, colorful, edible tradition that brings instant joy and nostalgia to any gathering. It’s proof that the simplest recipes, made with a little love and a lot of sprinkles (well, sherbet scoops), can create the most memorable moments. I hope this recipe brings as much festive fun and sweet delight to your holiday table as it has to mine. So chill those ingredients, grab your biggest bowl, and get ready to make a little magic. Cheers to a joyful, bubbly season