
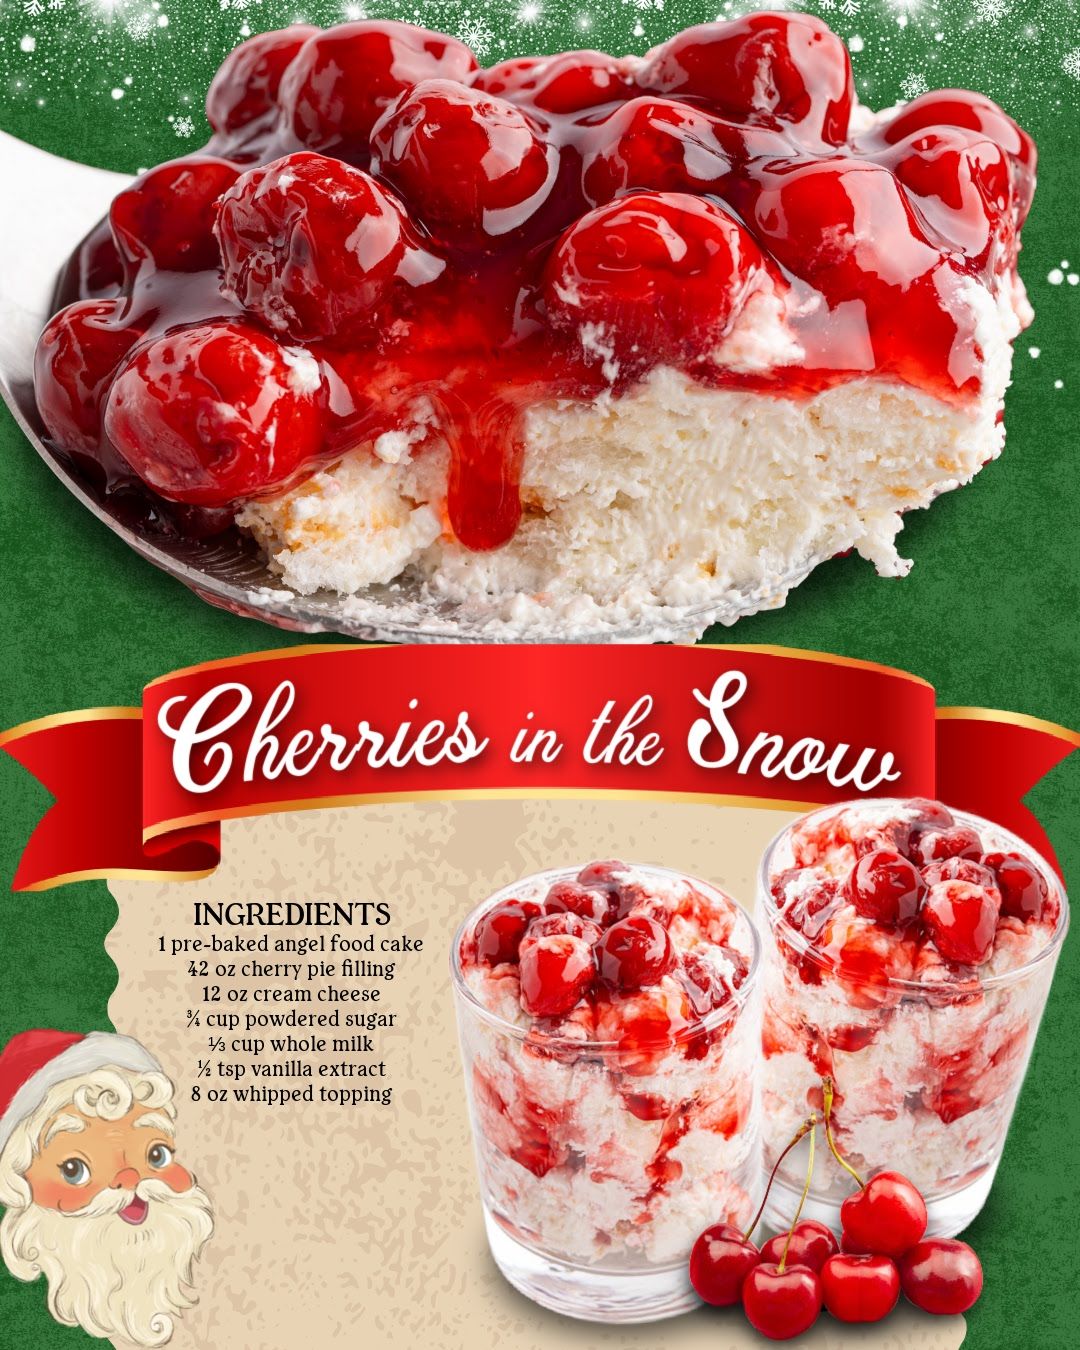
I found the recipe for Cherries in the Snow scribbled on a faded index card in my mother’s recipe box, the name alone evoking a sense of vintage charm. It was the dessert she made for every special occasion when she wanted to impress without stress. The first time I made it myself, the process felt like creating edible layers of clouds and jewels. The sweet, clean scent of the angel food cake gave way to the rich, creamy aroma of the whipped cream cheese layer, and finally, the bright, tangy smell of the cherry pie filling. Assembling it felt like a ritual. That first cool, creamy, cherry-topped bite was pure nostalgia—a perfect, no-bake masterpiece that tasted like a celebration.
Why You’ll Love This Recipe
You will adore this recipe because it is the epitome of easy elegance. It requires no baking on your part, assembles in minutes, and looks stunningly beautiful with its striking layers of white and red. The combination of light, airy cake, lush cream cheese fluff, and sweet-tart cherries is a timeless crowd-pleaser that feels special yet is incredibly simple to execute. It’s the perfect dessert for busy holidays, potlucks, or when you crave something impressively delicious without spending hours in the kitchen. It’s a guaranteed showstopper that whispers “I fussed,” when really, you barely broke a sweat.
Ingredients
- 1 pre-baked angel food cake (store-bought or homemade)
- 1 (42 oz) can cherry pie filling
- 1 (8 oz) package cream cheese, softened
- ½ cup powdered sugar
- ⅓ cup whole milk
- ½ teaspoon pure vanilla extract
- 1 (8 oz) tub frozen whipped topping (like Cool Whip), thawed
Let’s talk ingredients. The angel food cake is the foundation. A store-bought one works perfectly, but if you have a favorite homemade recipe, use it! Just ensure it’s completely cooled. The cream cheese must be softened to room temperature. Trying to blend cold cream cheese will leave you with stubborn lumps no matter how long you mix. I leave mine out on the counter for a good two hours. The whole milk helps create a smooth, spreadable consistency for the cream cheese layer—don’t substitute a lower-fat milk here, as the fat content is needed for richness. And while you can make fresh whipped cream, the stabilized frozen whipped topping holds its shape beautifully for days, making this dessert perfect for making ahead.(See the next page below to continue…)
Equipment Needed
- A 9×13 inch glass or ceramic baking dish (clear glass is beautiful for showing layers!)
- An electric hand mixer or stand mixer
- A large mixing bowl
- A spatula
- A fork or your hands for tearing cake
Step-by-Step Instructions
We start by preparing the “snow” bed. Take your pre-baked angel food cake and tear it into 1 to 1.5-inch chunks using your hands. I find tearing creates better texture than cutting—it gives the cake fluffy, irregular pieces that soak up the layers beautifully. Don’t worry about making them uniform; rustic is perfect. Take about two-thirds of these cake chunks and press them gently into the bottom of your 9×13 dish, creating an even layer. It won’t be a solid sheet, more like a fluffy, spongy base. This layer will soak up all the creamy goodness to come.
Now, for the luxurious “snow” layer. In your mixing bowl, combine the softened cream cheese, powdered sugar, milk, and vanilla extract. Using your electric mixer, beat this on medium speed for 2-3 minutes. You want it completely smooth, with no lumps whatsoever. Scrape down the sides of the bowl a few times to ensure everything is incorporated. The mixture will be thick and creamy. Then, with the mixer on low, gently fold in about three-quarters of the thawed whipped topping until just combined and smooth. This creates the most dreamy, cloud-like cream cheese fluff.
Carefully spread this creamy mixture evenly over the layer of cake chunks in your dish. Use your spatula to take it all the way to the edges, creating a smooth, white blanket. This is the “snow” in our Cherries in the Snow. I sometimes give the dish a gentle tap on the counter to help the mixture settle into all the nooks and crannies of the cake below. Once it’s smooth, I’ll take the remaining cake chunks and gently press them randomly into the top of this cream layer. They’ll peek through the cherries later, adding wonderful texture.(See the next page below to continue…)
Finally, the grand finale: the cherries. Open your can of cherry pie filling. Give it a gentle stir in the can to distribute the cherries and glossy sauce. Now, spoon it evenly over the entire creamy surface. I like to use the back of the spoon to spread it gently, ensuring every bite will have cherry. For the prettiest presentation, I’ll often spoon it in dollops and then lightly swirl it rather than spreading it completely flat, so you get gorgeous ribbons of red and white. Cover the dish with plastic wrap or a lid and refrigerate for at least 4 hours, but preferably overnight. This chilling time is magical—it allows the cake to soften perfectly and the flavors to marry into one sublime dessert.
Pro Tips for Best Results
For the absolute best texture, I always make this dessert the day before I need it. That overnight chill in the fridge is non-negotiable in my book. It transforms the dessert from good to spectacular. The cake layers soften into a tender, almost pudding-like texture that melts in your mouth, and the flavors deepen beautifully. I tested serving it after 2 hours, 4 hours, and overnight, and the overnight version was the unanimous favorite.
To prevent a soggy bottom, don’t press the first layer of cake chunks down too firmly. You want them to be nestled together, but not compacted. A light touch allows the creamy layer to seep down and moisten the cake without turning it into a dense, wet mass. Think of it as creating a fluffy mattress, not a brick foundation.
If you want to ensure your cream cheese layer is flawlessly smooth, take an extra minute to sift your powdered sugar before adding it. This prevents any tiny lumps of sugar in your creamy base. Also, after mixing the cream cheese with the sugar and milk, let the mixer run for a full extra minute on medium-high. This incorporates more air and makes the layer impossibly light and fluffy.
Common Mistakes to Avoid
The biggest mistake is using cold cream cheese. I made this error in my early baking days, and no matter how long I beat it, I was left with tiny, pesky lumps of cream cheese throughout my beautiful white layer. It still tasted fine, but the texture wasn’t the smooth dream it should be. True room-temperature cream cheese is soft to the touch and blends into a satiny perfection.(See the next page below to continue…)
Don’t skip the milk in the cream cheese mixture. I once thought it was unnecessary and omitted it. The cream cheese and whipped topping mixture was so thick it was almost impossible to spread smoothly without tearing the delicate cake layer underneath. The milk (or even a tablespoon of the cherry syrup) adds just enough fluidity to make it spreadable and lush.
Avoid stirring the cherry pie filling too vigorously. You want whole, plump cherries nestled in their glossy sauce, not a mashed, jam-like consistency. Gently fold it in the can with a spoon to loosen it before spooning it over the dessert. A gentle hand preserves the beautiful visual appeal of whole cherries dotting the snowy landscape.
Finally, don’t be tempted to serve it too soon. The chilling time is not just for setting; it’s for the cake to properly absorb moisture and flavor. Serving it after only an hour or two means you’ll have distinct, dry layers of cake and cream. Patience is key. Let it rest, covered, in the fridge. The wait makes every bite worth it.
Serving Suggestions
I love serving this directly from the glass dish it was chilled in, so everyone can see the beautiful layers. I use a large, clean spoon or a pie server to scoop out generous portions. For a truly elegant touch, I’ll garnish each plate with a single fresh mint leaf or a very light dusting of powdered sugar just before serving.
This dessert is a dream for potlucks and carry-in dinners because it travels so well. I simply keep it covered in the fridge until I’m ready to walk out the door, then cover the dish tightly with plastic wrap or a lid. It can sit out for the duration of a party without issue, whereas many baked desserts can dry out or melt.
For a special dinner party, I’ll sometimes prepare individual servings in clear glass dessert cups or mason jars. Simply layer torn cake, cream cheese fluff, and cherries in the glass, repeating if desired, and chill. It creates a stunning, portable parfait that feels extra personal and fancy.
Variations & Customizations
This recipe is wonderfully adaptable. Not a cherry fan? Substitute with a can of blueberry, strawberry, or apple pie filling. Each creates a completely different but equally delicious “Fruit in the Snow” dessert. I’m particularly fond of the blueberry version for a Fourth of July celebration.
For a different cake base, you can use torn pieces of pound cake or even white cake. Angel food is traditional for its lightness, but a buttery pound cake adds a richer, denser contrast that is also fantastic. I’ve even used leftover sponge cake with great success.
To add a little crunch and nutty flavor, try sprinkling a layer of toasted, sliced almonds or chopped pecans between the cream layer and the cherry topping. The contrast of the creamy, soft dessert with the crunchy nuts is absolutely delightful and adds a sophisticated touch.
How to Store, Freeze & Reheat
Once assembled, this dessert stores beautifully, covered tightly with plastic wrap or a lid, in the refrigerator. It will keep its perfect texture and flavor for 3-4 days. In fact, it often tastes even better on the second day as the flavors continue to meld. This make-ahead quality is one of its greatest strengths.
You can freeze Cherries in the Snow, though the texture of the thawed cake will be slightly more moist. To freeze, assemble the dessert in a freezer-safe dish, cover tightly with a double layer of plastic wrap and foil, and freeze for up to 1 month. Thaw overnight in the refrigerator before serving. I find the whipped topping holds up better in the freezer than fresh whipped cream would.
There is no need to reheat this dessert—it is meant to be served cold. Its cool, refreshing quality is part of its charm, especially after a heavy meal. Simply take it from the fridge, garnish if desired, and serve. It’s the perfect, effortless finale.
Conclusion
Cherries in the Snow is more than a recipe; it’s a cherished tradition, a slice of nostalgia, and a testament to the fact that the most beloved dishes are often the simplest. It has brought joy and sweetness to my family’s table for generations, and I hope it finds a special place in your recipe collection, ready to create beautiful, delicious memories for years to come. So grab an angel food cake and a can of cherries, and get ready to make a little magic. You’re about to create a dessert that feels like a hug from the past.