
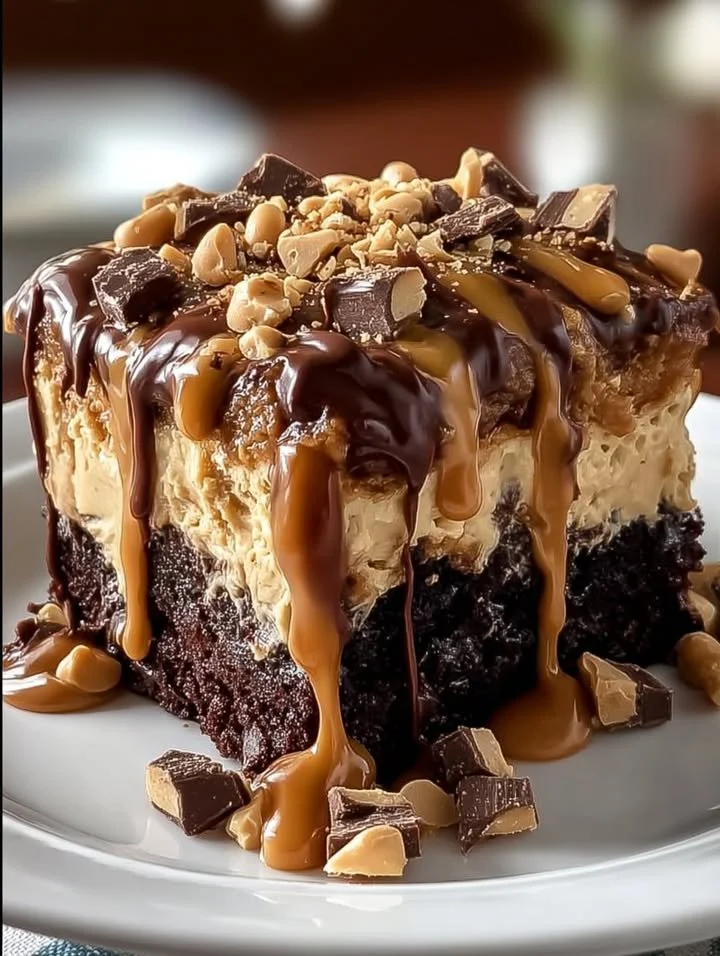
Next, while the cake is baking, I usually take this time to prepare the peanut butter filling. In a separate bowl, combine the creamy peanut butter and powdered sugar. You want to get this mixture nice and smooth; sometimes I add a splash of milk to help it reach that creamy consistency. Once the cake is baked and completely cooled, I take a wooden skewer and poke holes all over its surface, creating little pockets to fill with that delectable peanut butter mixture. Then, I spread the peanut butter filling into the holes, allowing it to seep into the cake—it looks like a delicious mess, and trust me, it’s going to be amazing!
Now, let’s make the ganache! In a small saucepan, heat the heavy cream over medium heat until it’s just about to simmer. Remove it from heat and add the chocolate chips, whisking until it’s wonderfully smooth and glossy. The aroma of warm chocolate is simply heavenly; it’s one of those moments that has my whole family eagerly gathering around the kitchen. Once the ganache is ready, I pour it over the peanut butter-filled cake, allowing it to drape lovingly over the edges, creating a chocolatey waterfall. I put the cake in the fridge for about an hour to set up nicely.
To serve, I like to add a dollop of whipped cream and sprinkle some chopped peanuts on top for a beautiful finish. And there you have it—a Chocolate Peanut Butter Poke Cake that is every bit as fun to make as it is to enjoy!
Pro Tips for Best Results
When I first started making this cake, I tested it in three different ways: using natural peanut butter, creamy peanut butter, and even a whipped peanut butter spread. I found that creamy peanut butter works best for that smooth filling I love, but if you’re feeling adventurous, natural peanut butter could add a nice touch, though it’s crunchier!
Another thing I’ve learned through trial and error is to let the cake cool completely before poking holes. If you poke it while warm, all the filling will simply run to the bottom. I usually let it cool for at least 30 minutes on a wire rack before going to town with my skewer.
Lastly, for a richer flavor, I recommend letting the ganache set in the fridge for about 15 minutes before pouring it over the cake. This slight thickening helps it cling better and creates a beautiful, glossy finish.
Common Mistakes to Avoid
One common mistake I made initially was not using enough holes when poking the cake. If the holes are too few and far between, the filling won’t adequately saturate the cake, and instead, you’ll have dry areas. I now like to poke holes every inch apart to ensure that every bite is a rich blend of chocolate and peanut butter. (See the next page below to continue…)