
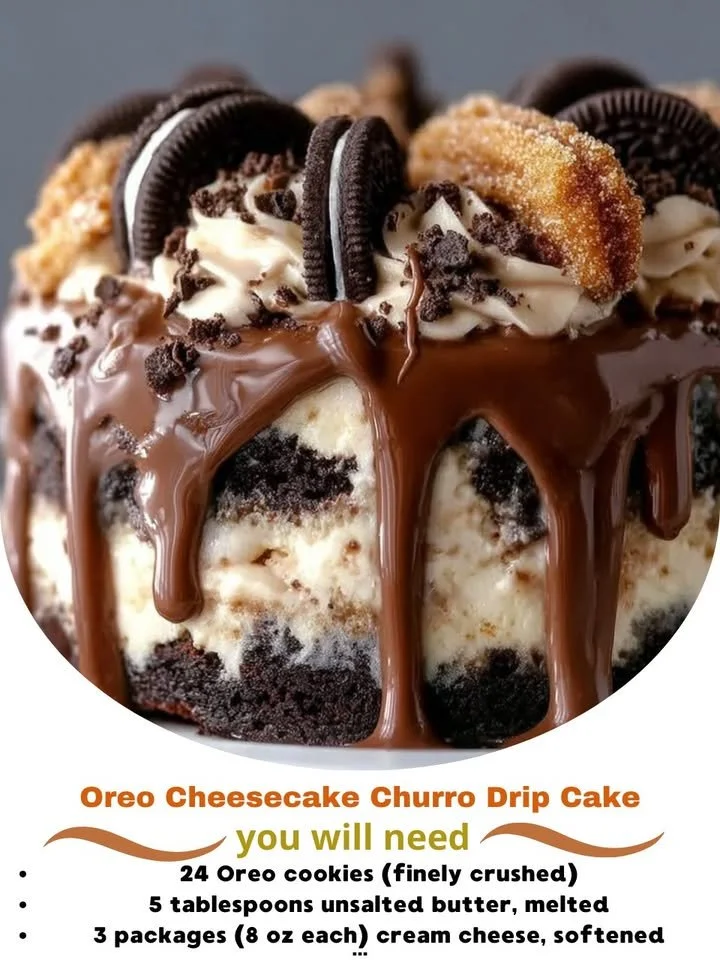
I’m excited to share a truly indulgent dessert that combines two of my favorite treats: Oreo cookies and churros. Introducing the Oreo Cheesecake Churro Drip Cake! This delightful cake is a delightful fusion of rich, creamy cheesecake layered between fluffy cake rounds, all topped with the irresistible flavor of churro-style cinnamon sugar and a decadent chocolate drip. If you’re wondering how to impress your friends at your next gathering, this cake is the perfect answer!
Why You’ll Love This Recipe
You’ll love this cake for its incredible combination of flavors and textures. The creamy Oreo cheesecake pairs so perfectly with the crunchy, sugary churros, and that warm chocolate drip—let me tell you, it takes the whole thing over the top! Plus, it’s visually stunning, which is always a bonus. I believe that every celebration deserves an extravagant cake, and this one is sure to make any moment special. (See the ingredients in the next page below…)
Ingredients
– 2 cups crushed Oreo cookies
– 1 cup butter, softened
– 1 cup granulated sugar
– 4 large eggs
– 2 cups cream cheese, softened
– 1 teaspoon vanilla extract
– 2 cups all-purpose flour
– 1 tablespoon baking powder
– 1/2 teaspoon salt
– 1 cup heavy cream
– 1 cup chocolate chips
– Cinnamon sugar for coating
– 1/4 cup sugar
– 1 teaspoon cinnamon for churros
Equipment Needed
– Mixing bowls
– Hand mixer or stand mixer
– 9-inch round cake pans (2)
– Baking tray
– Piping bag
– Whisk
– Small saucepan
– Offset spatula
Step-by-Step Instructions
Let’s dive into making this incredible cake! First, I start by preheating the oven to 350°F (175°C). While that warms up, I prepare my cake pans by greasing them and lining the bottom with parchment paper. For the cake itself, I cream together the softened butter and granulated sugar until it’s light and fluffy. Then, I add in the eggs one at a time, followed by the vanilla and the softened cream cheese. This batter is the heart of the cake, and it’s so luscious! (See the next page below to continue steps…)
Next, I combine the dry ingredients: flour, baking powder, and salt in a separate bowl. I sift them together to make sure there are no lumps. It’s such a lovely process—flour gently cascading into the bowl. Then, I gradually mix the dry ingredients into my wet mixture, being careful not to overmix. I pour the batter evenly into the prepared cake pans, giving them a gentle shake to level it out. Bake these beauties for around 25 minutes or until a toothpick comes out clean. While those cakes cool, I get started on the churro bites.
For the churros, I heat equal parts water and butter in a saucepan, bringing it to a gentle boil before removing it from heat. I stir in the flour, sugar, and a pinch of salt until it forms a dough. Once it’s cool enough to handle, I pipe small strips of dough onto a baking sheet and fry them until golden brown. I can’t even describe the delightful aroma that fills my kitchen during this step! After they’ve cooled, I coat them in a mixture of cinnamon and sugar, which adds that classic churro touch.
Now comes the fun part—assembly! I carefully slice the cooled cakes in half and layer them with generous dollops of Oreo cheesecake filling in between. I love using a piping bag for this—it makes everything so neat! Once stacked, I whip up some heavy cream and chocolate chips over a double boiler until it’s silky smooth for the drip. I let it cool slightly before pouring it over the top of my cake. I finish by arranging my delicious churro bites on top for that jaw-dropping presentation.
Pro Tips for Best Results
To get that perfect cheesecake filling, I used room temperature cream cheese. I tested it three ways, and trust me, taking the time to soften it properly made a huge difference in how creamy and blended the filling turned out. Nobody likes lumps, especially in cheesecake!
When it comes to the chocolate drip, I had to play around with the consistency a bit. The secret is to have it slightly cooled but still pourable. I once let it get too cold, and it wouldn’t drip down the sides—what a mess! So always keep an eye on that timing!
Lastly, if you want your churros extra crispy, I recommend frying them in batches. This way, they all get a nice even golden brown color and a perfect crunchy texture. If they sit in the oil for too long, they can get a little soggy, and nobody wants that in a churro—trust me!
Common Mistakes to Avoid
One of the biggest mistakes I made the first time was not letting my cake layers cool completely before assembling. Picture this: warm cake layers, a creamy filling, and everything just starts to melt together into a gooey mess. It’s heartbreaking to watch! So, be patient and let that cake cool.
Another pitfall is overmixing your batter. I’ve done that, and it can result in a dense cake instead of the fluffy layers we desire. Mix just until everything’s combined, and you’ll be on the right track.
Don’t skip the step of lining the cake pans! I thought greasing them would be enough the first time, but one of my layers stuck and came apart when I flipped it out. This left me fumbling to patch it up with filling. A quick piece of parchment on the bottom is worth every second!
Lastly, keep an eye on those churros while frying. It’s so easy to get distracted with the cake-making process. The first time I left my churros too long, they turned nearly black! Set a timer if you need to, so you can focus on those delicious flavors without burning them. (See the next page below to continue…)
Serving Suggestions
When serving this cake, I like to cut thick, generous slices. It’s just so rich that a little goes a long way! I pair it with a side of whipped cream or a scoop of vanilla ice cream. The creaminess balances out the sweet richness of the cake beautifully, making each bite even more enjoyable.
I also love to top each slice with a little extra sprinkled cinnamon sugar and perhaps some crushed Oreo bits just for that added crunch. It visually pops, and trust me, it draws everyone’s attention right to the dessert table!
If you’re feeling fancy, drizzle a bit of thick chocolate sauce on the side of the plate. It adds a touch of decadence and makes for a gorgeous presentation that’s sure to impress your guests!
Variations & Customizations
Want to switch it up? Instead of using Oreos in the filling, try using different types of cookies such as Chocolate Chip or Peanut Butter cookies. The flavor will change, but the cake will still be fantastic. You could also swap out the churros for other toppings; maybe consider banana chips or graham cracker bits for a different twist.
If you’re feeling adventurous, you might want to try a flavored cheesecake filling, like peppermint for the winter or strawberry for summer. A fruity layer would offer a refreshing contrast to the rich cake, making it a refreshing option for any occasion!
Lastly, don’t hesitate to play with the colors and embellishments—think food coloring in the filling for fun themed parties or sprinkles on top for an exciting birthday creation. The world is your canvas!
How to Store, Freeze & Reheat
To store this amazing cake, simply place it in an airtight container in the refrigerator. It can last up to four days, but I can guarantee you it won’t last that long once everyone gets a taste! If you need to keep it for a longer period, I recommend freezing individual slices. Wrap them tightly in plastic wrap and then place them in a freezer bag. They’ll stay fresh for up to three months.
When you’re ready to enjoy a slice, just take it out of the freezer and let it thaw in the fridge for a few hours or on the counter for about an hour. It’s best served chilled. If you find that the chocolate drip has hardened too much after freezing, a quick zap in the microwave for a few seconds can help soften it back up.
Reheating isn’t usually necessary for this cake, but if you want to warm a piece slightly, I suggest doing so in a microwave for about 10-15 seconds to keep that cheesecake filling creamy!
Conclusion
I hope you enjoyed this journey into making the Oreo Cheesecake Churro Drip Cake as much as I did! It’s a delight both in flavor and presentation, and I can’t wait for you to share it with family and friends. Whether it’s a birthday, a holiday, or just a regular day that needs a bit of sweetness, this cake is sure to bring a smile to everyone’s face. Happy baking, and enjoy every delicious bite!