Equipment Needed
Step-by-Step Instructions
- When I start making this pie, the first thing I do is whip the cold heavy cream in a bowl until stiff peaks form. I’ve learned that using very cold cream makes a big difference in getting that light, fluffy texture.
- Next, I add the sweetened condensed milk and vanilla extract to the whipped cream. I gently fold everything together instead of mixing aggressively. This keeps the mixture airy and smooth.
- Then I fold in the cherry pie filling. I like to swirl it in slightly rather than fully mixing it so you get those beautiful ribbons of cherry throughout the pie.
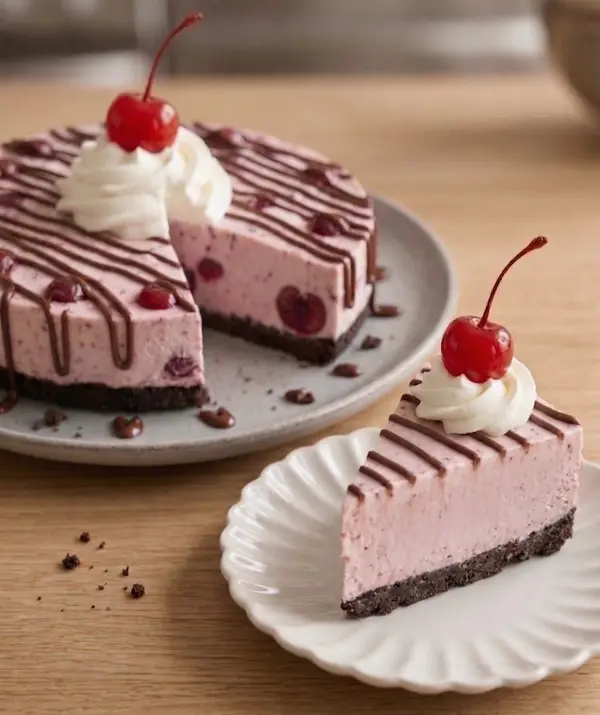
- Finally, I spoon the mixture into the Oreo pie crust and smooth the top. I place it in the freezer for at least 4–6 hours until fully set. Before serving, I add hot fudge, whipped cream, and cherries for extra indulgence.
Pro Tips for Best Results
One thing I’ve learned after making this recipe a few times is to whip the cream to stiff peaks. If it’s too soft, the pie won’t hold its shape well.
Another tip is to fold gently when combining ingredients. This helps keep the texture light and creamy. I also like freezing the pie overnight when possible. It gives the best firm yet scoopable texture.
Common Mistakes to Avoid
The first mistake I made was not whipping the cream enough. The filling ended up too soft and didn’t set properly. Another mistake is overmixing the cherry filling. It can break down and make the mixture too liquid.
I also learned not to skip freezing time. The pie needs enough time to fully firm up. Finally, avoid using warm ingredients. Everything should be cold for the best results.
Serving Suggestions
When I serve this cherry ice cream pie, I like slicing it slightly frozen so it holds its shape perfectly. Sometimes I drizzle warm hot fudge on top right before serving for a rich chocolate contrast. I also love adding extra whipped cream and a few cherries for a classic dessert look.
Variations & Customizations
One variation I enjoy is using a chocolate cookie crust instead of Oreo for a slightly different flavor. I’ve also tried mixing in chocolate chips for added texture. Another version I like is swapping cherry filling for strawberry or blueberry for a fruity twist.
How to Store, Freeze & Reheat
Whenever I make this pie, I store it in the freezer covered tightly for up to one week. I keep it well wrapped to prevent freezer burn and maintain its creamy texture. To serve, I let it sit at room temperature for a few minutes before slicing so it softens slightly.
Conclusion
Every time I make this Cherry Ice Cream Pie, I’m reminded how easy desserts can still feel special. The creamy texture, sweet cherries, and chocolatey crust come together perfectly. I love how quick it is to prepare and how it always impresses with minimal effort. Once you try it, it might become your go-to no-bake dessert too.