
Next, I whip up the cheesecake filling. In a mixing bowl, I combine the softened cream cheese and 1 cup of sugar, beating them together until it’s light and fluffy. I then add in the eggs, one at a time, making sure each one is fully incorporated before moving on. Finally, I mix in the vanilla extract. The batter will have a smooth and velvety texture that’s so tempting! After preparing the filling, I fold in the diced apples and ground cinnamon, which gives it that amazing autumn flavor.
Once the filling is ready, I pour it over the pre-baked graham cracker crust and spread it evenly. It’s such a delightful sight! I slide the cheesecake into the oven and let it bake for about an hour. I find it helpful to keep an eye on it as it bakes—the center should be set but still slightly jiggly when you give it a gentle shake. After it’s out of the oven, I let the cheesecake cool completely at room temperature before transferring it to the fridge to chill for at least four hours, or overnight if I can resist!
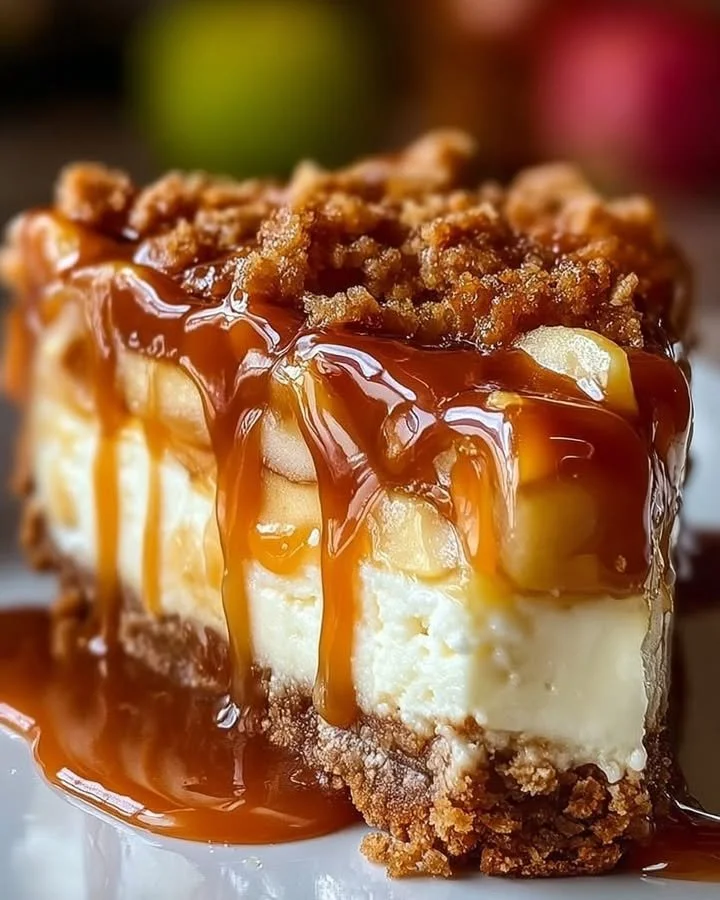
Just before I’m ready to serve, I drizzle the warm caramel sauce over the top of the chilled cheesecake—this is hands down my favorite part: those smooth, golden ribbons just scream indulgence! I also like to add a dollop of whipped cream for that extra touch of wow!
Pro Tips for Best Results
When I first made this cheesecake, I discovered the importance of using room temperature cream cheese. It helps create a smoother filling and reduces the risk of lumps, which is crucial for that creamy texture we’re aiming for. I typically take the cream cheese out of the fridge an hour before I start the recipe to ensure it’s perfectly softened.
Another tip that really made a difference for me was to carefully fold in the apples rather than mixing them in vigorously. This maintains that nice chunky texture in the filling and ensures that every slice has those delightful bites of apples. Trust me; you want to savor that combination of flavors in each forkful!
Lastly, patience is key when it comes to chilling the cheesecake. I know it’s hard to wait, but letting it sit in the fridge for several hours allows the flavors to meld beautifully. It’s truly worth the wait when you finally get to enjoy that first slice!
Common Mistakes to Avoid
One of the biggest mistakes I made early on was not properly greasing the springform pan. I learned the hard way when my cheesecake stuck to the sides, making it an absolute mess during the un-molding process. To avoid this, I recommend using a bit of parchment paper lining on the bottom as an extra precaution for easy removal.
Another thing to watch out for is overbaking the cheesecake. It’s tempting to leave it in a bit longer to get that perfect set, but the center should still have a slight jiggle. If you bake it too long, you’ll end up with a dry texture, and nobody wants that! Keep an eye on it, and remember that it will continue to set as it cools.
Also, if you’re thinking of skipping the chilling step, let me urge you not to! I tried serving it warm once, and although the flavors were still there, the texture was completely off. Chilling allows it to thicken and firm up, creating the silky-smooth cheesecake experience we all crave. (See the next page below to continue…)