
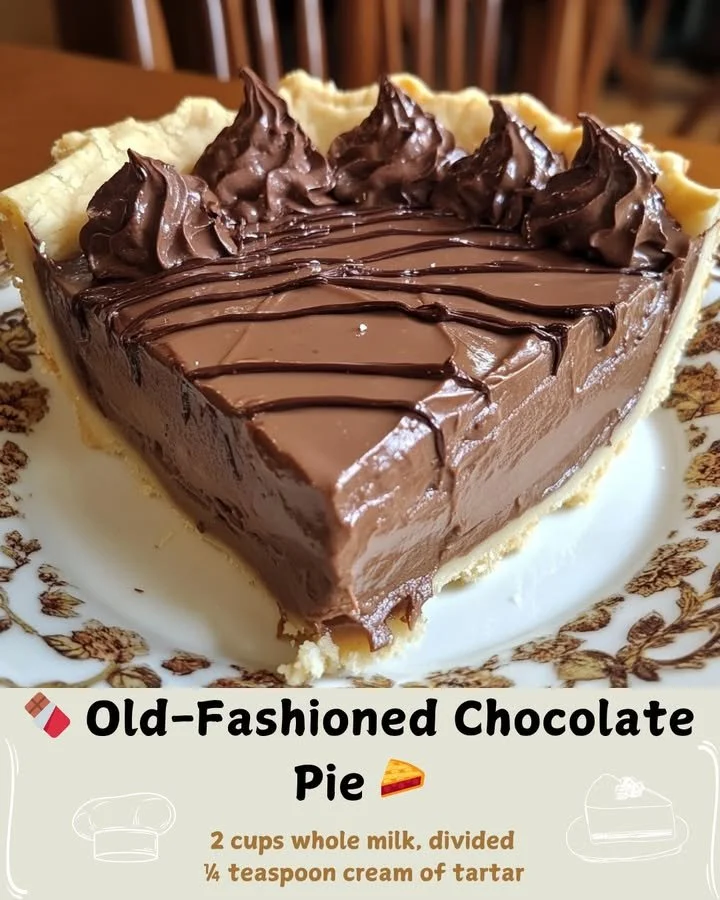
I’m excited to share my cherished recipe for Old-Fashioned Chocolate Pie. This pie evokes sweet memories of family gatherings, with its rich, creamy filling wrapped in a flaky crust, each slice offering comfort and nostalgia with every bite. Whether you’re looking to impress guests or treat yourself, this pie is absolutely worth the effort.
Why You’ll Love This Recipe
There’s something remarkably satisfying about making a classic dessert like Old-Fashioned Chocolate Pie from scratch. The richness of the chocolate filling combined with the buttery crust brings a sense of home and warmth, making it perfect for any occasion. Trust me, once you experience the velvety texture and deep cocoa flavor, you’ll find yourself craving a slice at the end of every meal! There’s just nothing quite like it. (See the ingredients in the next page below…)
Ingredients
– 1 prepared pie crust (store-bought or homemade)
– 1 cup granulated sugar
– 1/3 cup unsweetened cocoa powder
– 1/4 cup cornstarch
– 1/4 teaspoon salt
– 2 3/4 cups whole milk
– 4 large egg yolks (lightly beaten)
– 2 tablespoons unsalted butter
– 1 teaspoon vanilla extract
– Whipped cream (for topping)
Equipment Needed
– 9-inch pie pan
– Medium saucepan
– Whisk
– Mixing bowl
– Spatula
– Measuring cups and spoons
– Stove or cooktop
Step-by-Step Instructions
Let’s get started! Start by preheating your oven to 350°F (175°C). If you’re using a store-bought crust, simply place it in the pie pan and set it aside. If you’re going homemade, make sure it’s rolled out and fitted snugly into the pan. In a medium saucepan, whisk together the sugar, cocoa powder, cornstarch, and salt to combine. This step is vital as it helps avoid any lumps when we add the milk. Add the whole milk gradually while whisking to ensure a smooth mixture. Bring this to a medium heat and keep stirring until it starts to thicken, which will take about 5-7 minutes. The aroma of chocolate wafts through the kitchen during this part—pure bliss! (See the next page below to continue steps…)
Once the mixture has thickened, take a moment to reminisce as you prepare for the next step. Lower the heat, and slowly temper the egg yolks by adding a few spoonfuls of the hot chocolate mixture to them, whisking constantly. This prevents the yolks from scrambling when added to the saucepan. After you’ve tempered the egg yolks, pour them back into the saucepan and stir until everything is well combined. Then, continue to cook this heavenly mixture for an additional 2-3 minutes until it reaches a pudding-like consistency.
Next, remove the saucepan from the heat and stir in the unsalted butter and vanilla extract until fully melted and incorporated. Take a moment to enjoy the delightful smell; it’s like a warm hug! Pour this silky filling into your pre-prepared pie crust, smoothing the top with a spatula. Let it cool for at least an hour at room temperature before refrigerating for a couple of hours. This will allow it to set up just right.
Finally, serve your Old-Fashioned Chocolate Pie cold or at room temperature. Top each slice generously with whipped cream for that perfect finishing touch. You’ll find that the creamy chocolate filling pairs beautifully with the lightness of the whipped cream—utter perfection!
Pro Tips for Best Results
I’ve made this pie multiple times, tweaking things here and there to get it just right. One of the tricks I learned is to use high-quality cocoa powder. It makes a world of difference in flavor; trust me, you won’t regret splurging a little! Additionally, I found that letting the pie chill overnight enhances the flavors even more. The filling takes on a deeper, richer taste that’s hard to beat.
Another thing I’ve experimented with is the crust. If you have time, try making your own! A flaky, homemade crust elevates this pie to a whole new level. I tested several recipes and settled on using a basic butter crust that’s both flavorful and easy to work with. It complements the chocolate filling perfectly!
Lastly, don’t be afraid to taste along the way. When I was working on getting the filling’s sweetness just right, I found that a little extra vanilla extract truly boosted the flavors without overwhelming the chocolate. It’s always easier to add a bit more than it is to take away.
Common Mistakes to Avoid
One common mistake I made early on was not whisking the dry ingredients thoroughly enough. This can lead to clumps in your filling that nobody wants! It’s essential to take that extra moment to ensure everything is well combined right from the start. (See the next page below to continue…)
Another blunder is taking the pie out of the oven too soon. It can be tempting to rush things, but trust the process. The pie needs that time to set properly, and if not, you may end up with a runny filling instead of the smooth, luscious consistency you’re aiming for.
Also, don’t forget to cool the filling before pouring it into the crust! I remember one time I was too eager and almost melted my crust, which was a total disaster. Patience is key in baking; the chilling time is crucial for achieving that perfect slice.
Lastly, use fresh ingredients. Specifically, make sure your eggs are at room temperature before using them in the filling. This helps them whip better, creating that light and creamy texture we all love in a pie filling.
Serving Suggestions
When it comes to serving this decadent Old-Fashioned Chocolate Pie, I always enjoy adding a generous dollop of freshly whipped cream on top. But don’t stop there! You can also drizzle some chocolate syrup or sprinkle finely chopped nuts for an extra layer of flavor and texture. Each slice can be a canvas for whatever toppings you love!
For a special touch, pair each slice with fresh berries, like strawberries or raspberries. The tartness of the berries beautifully balances the richness of the chocolate, creating a delightful marriage of flavors. Plus, the vibrant color adds a beautiful pop to your dessert presentation!
Lastly, consider serving a scoop of vanilla ice cream on the side. The creamy, cold ice cream contrasts wonderfully with the smooth chocolate filling. It’s the comfort dessert duo that everyone loves, perfect for any gathering or a quiet night at home.
Variations & Customizations
One fun variation I enjoy is adding a hint of espresso powder to the filling. It amplifies the chocolaty richness without tasting like coffee, enhancing the overall flavor profile. Just a teaspoon can work wonders—trust me, it’s magic!
Another customization I’ve played around with is using a graham cracker crust instead of the traditional pie crust. It adds a wonderful crunch and a bit of sweetness that pairs well with the rich chocolate filling. It’s a fun twist that gives the pie a delightful texture that’s worth trying!
If you’re feeling adventurous, why not experiment with different chocolate types? You could use dark chocolate for a richer taste, or even try a mix of semi-sweet and milk chocolate for a more balanced flavor. The beauty of this pie is that it’s versatile, allowing you to play around until it’s uniquely yours!
How to Store, Freeze & Reheat
If you have leftover pie (which is hard to imagine!), you can store it in the refrigerator for up to 4 days. Make sure to cover it with plastic wrap or store it in an airtight container to keep it fresh. Just be sure to let it come to room temperature before serving, so you don’t miss out on its delicious creamy texture!
For longer storage, this pie freezes wonderfully! Slice it and wrap individual pieces in plastic wrap, then place them in an airtight container or freezer bag. It can last up to a month in the freezer. When you’re ready to enjoy a slice, simply thaw it overnight in the fridge or let it sit at room temperature for about an hour.
Reheating isn’t necessary, but if you prefer your pie warm, pop it in an oven preheated to 250°F (120°C) for about 10 minutes, until it’s warmed through. Just be cautious not to overheat it, as the filling is best enjoyed either chilled or slightly warm.
Conclusion
I hope you’re as excited to make this Old-Fashioned Chocolate Pie as I am to share it with you! Baking it not only fills your home with delightful aromas but also creates a truly special dessert for friends and family. So, gather your ingredients, embrace the process, and enjoy every creamy, chocolatey bite. Happy baking!