
Next, it’s time to form the balls. Using a cookie scoop or a small spoon, take a heaping tablespoon of the mixture and roll it into a ball in your hands. Place the formed balls on a baking sheet lined with parchment paper. Repeat the process until you’ve used up all the mixture. This is where the fun really begins; feel free to sample a bit of the dough—it’s so good! Once your baking sheet is full, pop it in the fridge for about 30 minutes to set.
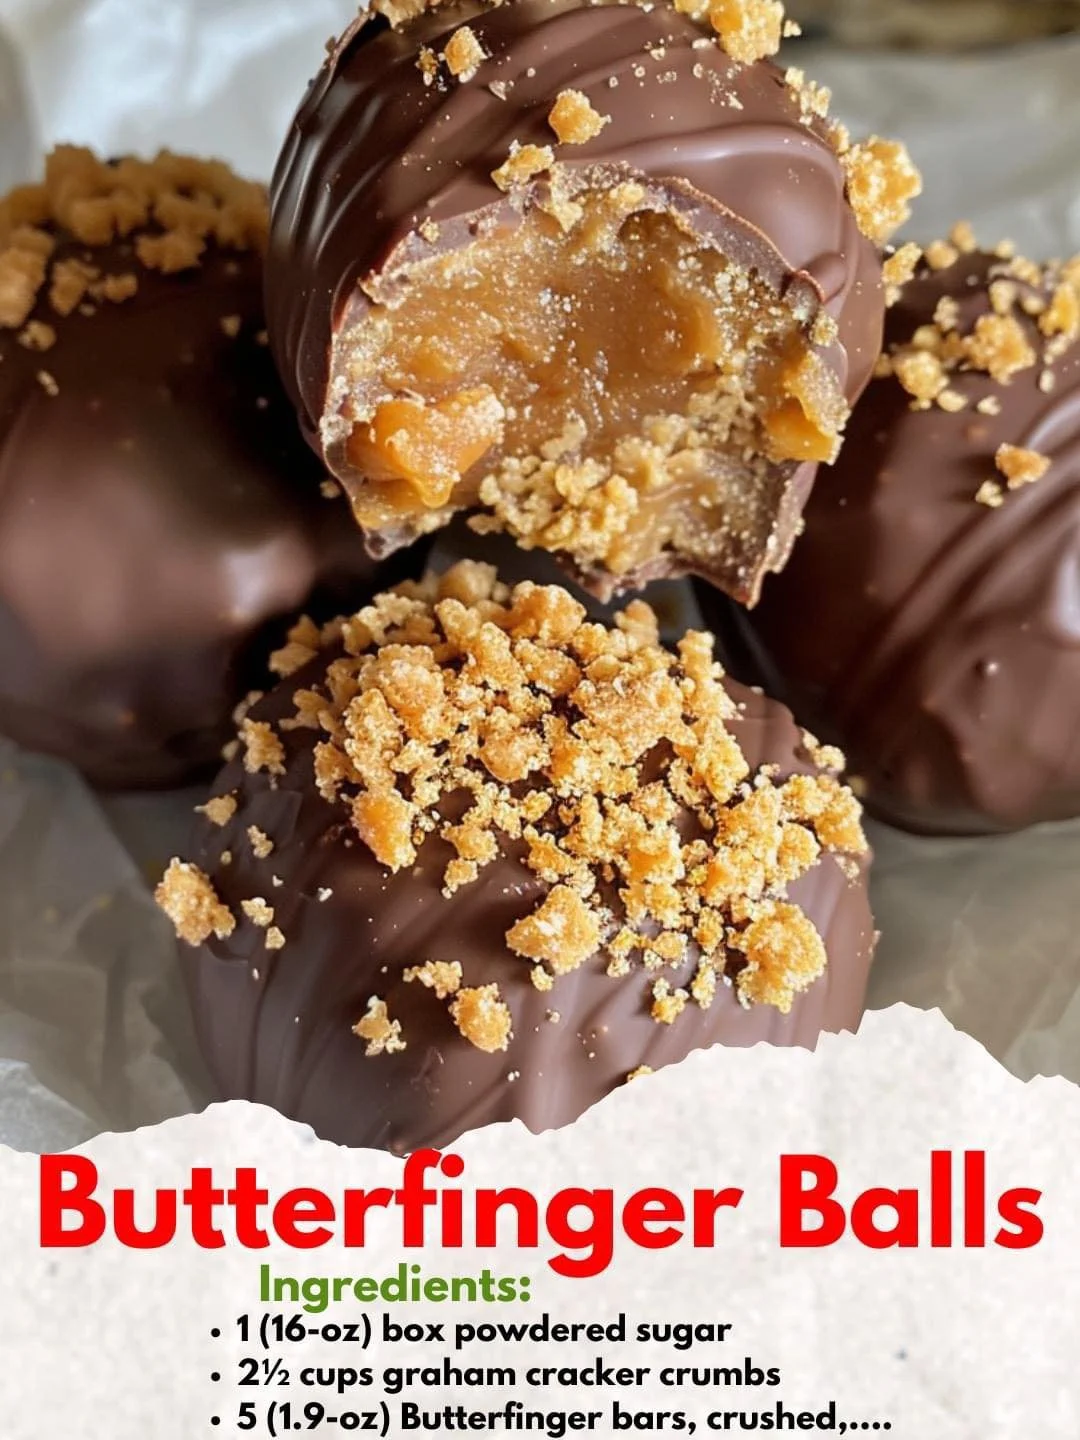
Now for the finishing touch! While the Butterfinger Balls are chilling, melt the milk chocolate chips in a microwave-safe bowl. Heat them in 30-second intervals, stirring in between, until they’re just melted and smooth. If you find the chocolate is too thick for dipping, you can add a tablespoon of vegetable oil to thin it out a bit. Once ready, remove the balls from the fridge, and dip each one into the chocolate to fully coat, letting the excess chocolate drip off before placing them back onto the parchment. Aren’t they starting to look irresistible?
Pro Tips for Best Results
I tested this recipe three ways to find the best consistency for dipping, and I found that chilling the balls for at least 30 minutes helps them hold their shape during the chocolate dip. If you’re in a hurry, you can freeze them for about 10–15 minutes instead; just make sure to check that they don’t get too hard to dip!
For a more decadent chocolate experience, consider using dark chocolate instead of milk chocolate. The contrast with the buttery sweetness of the filling is simply divine, and it adds a hint of richness that really elevates these treats.
Lastly, don’t skip the vanilla! It may seem like a small addition, but it really enhances the overall flavor, making each bite a bit more rounded. Trust me, you’ll notice the difference!
Common Mistakes to Avoid
One common mistake I made the first time was not crushing the Butterfinger bars finely enough. Bigger chunks can make the mixture crumbly and difficult to form into balls, so aim for a fine crumb for the best texture. I also found that over mixing can result in a pretty dense ball, so incorporate the ingredients until just combined for that perfect bite! (See the next page below to continue…)
Another thing to watch out for is the temperature of your chocolate when dipping. If it’s too cool, it might not coat the balls evenly, leaving unsightly spots. If it’s too hot, the balls might start to melt. Finding that sweet spot is crucial, and cooling the chocolate slightly before dipping can help with this.
Lastly, I learned the hard way that letting the dipped balls sit out at room temperature for too long can cause them to melt! It’s best to keep them stored in the refrigerator, especially during warmer months. A cool treat is a happy treat!