
Next, while the crust is cooling, I beat the cream cheese, powdered sugar, and vanilla extract together until it’s smooth and creamy. There’s nothing quite like the fluffy texture that develops during this process! I carefully fold in the whipped topping until everything is just combined, creating a luscious cream that will complement the banana flavor beautifully.
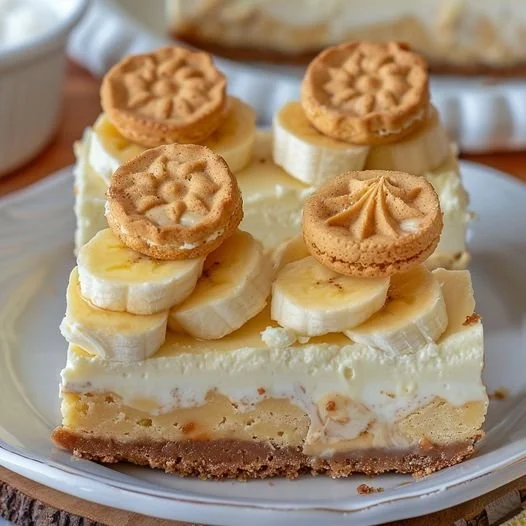
After that, I slice my bananas, arranging them over the cooled crust. I make sure every nook and cranny is filled to maximize that banana taste. Then I pour the cream cheese mixture over the bananas, smoothing it out to create an even layer. As I do this, I can’t help but feel a little giddy! Finally, I prepare the instant pudding mix and combine it with cold milk, whisking it to get a thick and creamy consistency, which I spread over the cheesecake layer.
Once all the layers are beautifully stacked, I cover my pan with plastic wrap and let it chill in the fridge for at least 4 hours (but overnight is best!). The anticipation builds as I imagine slicing through that beautiful creation, revealing the creamy layers within.
Pro Tips for Best Results
I tested this recipe three ways to figure out the best banana-to-cream cheese ratio, and trust me, keeping it balanced is crucial. Too many bananas can overwhelm the other flavors. I like to use three ripe bananas; they add natural sweetness without overpowering the cheesecake layer.
Another tip I learned is to make sure your cream cheese is at room temperature before mixing. This makes the blending process smoother, preventing any lumps and creating that airy texture we all love. I once tried to rush this step, and the texture was not as creamy as I desired!
Lastly, letting the cheesecake squares chill overnight is not just a suggestion; it’s a must! The flavors meld beautifully, and the texture becomes even more decadent. The waiting game is tough, but it’s well worth it when you finally dive into those squares.
Common Mistakes to Avoid
One common mistake I made during my early baking attempts was not greasing the pan properly. This led to a sticky situation that made it quite the challenge to cut neat squares! I’ve since learned to generously grease my pan to ensure easy release of those delicious squares. (See the next page below to continue…)