
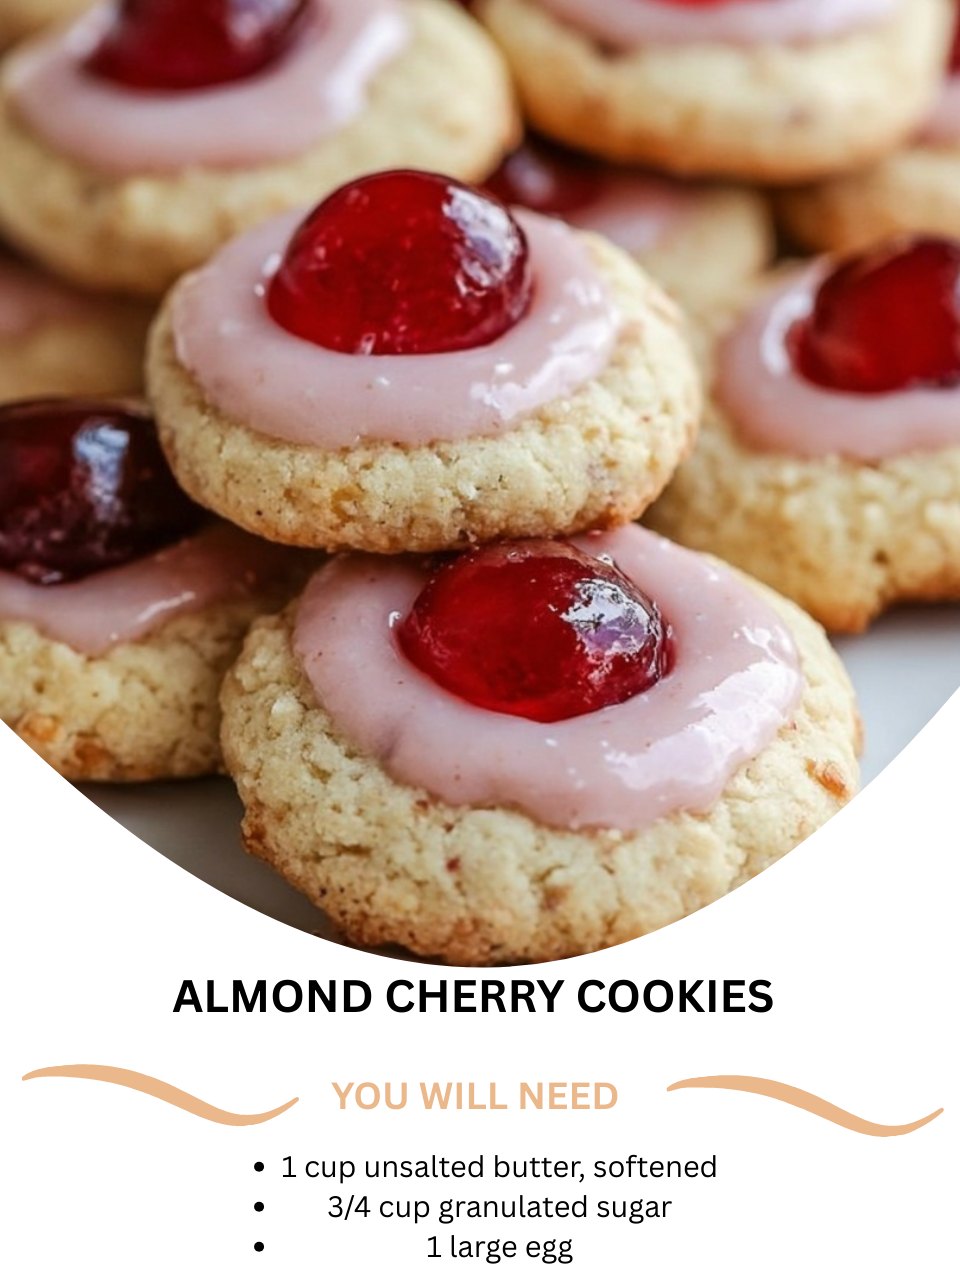
I discovered the magic of these Almond Cherry Cookies in my grandmother’s faded recipe box, a handwritten card simply titled “Christmas Jewels.” The first time I creamed the butter and sugar, the air in my kitchen filled with the promise of something special. As they baked, the scent of toasting almonds and sweet cherries wrapped around me like a hug, transforming my ordinary kitchen into a place of warm, nostalgic delight. That first bite—a perfect blend of buttery crumble, nutty richness, and a tart cherry surprise—was an instant love affair. They’ve since become my signature treat, a little edible treasure that feels both elegantly festive and wonderfully homespun.
Why You’ll Love This Recipe
You will fall in love with this recipe because it delivers the sophistication of a bakery cookie with the comforting soul of a homemade classic. The dough comes together like a dream, and the result is a cookie that’s beautifully tender with a subtle crunch, striking the ideal balance between sweet and tart. They are impressive enough for a cookie swap or holiday platter, yet simple enough for a quiet afternoon with a cup of tea. They’re the kind of cookie that makes people ask, “What’s in these?” and then immediately ask for the recipe.
Ingredients
- 1 cup (2 sticks) unsalted butter, truly softened at room temperature
- 3/4 cup granulated sugar
- 1 large egg, at room temperature
- 1 teaspoon pure almond extract (don’t skip this; it makes a huge difference)
- 1/2 teaspoon pure vanilla extract
- 2 1/4 cups all-purpose flour, spooned and leveled
- 1/2 teaspoon baking powder
- 1/4 teaspoon salt
- 2/3 cup finely chopped almonds (I prefer blanched almonds for a lighter color)
- 1 cup maraschino cherries, well-drained, patted very dry, and roughly chopped
- Optional: Extra granulated sugar for rolling (See the next page below to continue…)
Equipment Needed
- Electric hand mixer or stand mixer
- Large and medium mixing bowls
- Measuring cups and spoons
- Rubber spatula
- Baking sheets
- Parchment paper or silicone baking mats
- Wire cooling rack
Step-by-Step Instructions
My process always begins with the butter. I let my unsalted butter sit out until it’s perfectly softened—you should be able to make a deep indentation with your finger without meeting resistance. I combine it with the 3/4 cup of sugar in my mixing bowl and beat them together on medium-high speed for a full two to three minutes. This isn’t just mixing; it’s aerating. I watch for the transformation into a pale, fluffy, almost whipped cream-like mixture. This step is the foundation of the cookie’s tender texture, so I never rush it. Then, I beat in the egg and the almond and vanilla extracts until the batter is beautifully smooth and fragrant.
In a separate bowl, I whisk together the flour, baking powder, and salt. I add this dry mixture to my butter mixture in two additions, mixing on low speed just until the flour disappears. Overmixing here is the enemy of a tender cookie, so I stop the moment I no longer see dry flour streaks. Now, for the stars of the show: I gently fold in the finely chopped almonds and those crucial, well-drained cherries. I’ve learned to be patient here, folding with a spatula until they are just evenly distributed. The dough will be soft and studded with red and white gems.
Here’s a tip I developed after a batch of oddly shaped cookies: I always chill the dough. I cover the bowl and pop it into the refrigerator for at least 30 minutes. This firms up the butter, preventing the cookies from spreading too much into thin puddles in the oven. When I’m ready to bake, I preheat my oven to 350°F (175°C) and line my baking sheets with parchment paper. I scoop the dough by rounded tablespoons, and if I want a little extra sparkle, I roll each ball lightly in granulated sugar before placing them about 2 inches apart on the sheet.(See the next page below to continue…)
The baking is a lesson in patience. I bake one sheet at a time on the center rack for 10-12 minutes. I watch not for browning, but for the edges to look just set. The centers will still look soft and slightly underdone—this is perfect. They will finish setting as they cool. I let the cookies rest on the baking sheet for 5 full minutes before I carefully transfer them to a wire rack to cool completely. This waiting period is when the flavor settles and the texture becomes magic.
Pro Tips for Best Results
First, the cherry prep is critical. I drain my maraschino cherries in a sieve, then spread them on a stack of paper towels and gently pat them completely dry. Any extra liquid will seep into the dough and can make your cookies soggy or cause them to spread unevenly. I even let them sit on fresh towels for a few minutes while I prep the other ingredients. Taking this extra five minutes ensures every cookie has perfect texture.
I tested the almond component three different ways: whole almonds I chopped myself, store-bought pre-sliced almonds, and almond flour. Finely chopping whole blanched almonds by hand gave me the absolute best result—little crunchy bits that toast beautifully without overpowering the dough. Almond flour made the texture too dense and sandy, and pre-sliced almonds were often too large. A few pulses in a food processor or a good chop with a chef’s knife is worth the effort.
Finally, for picture-perfect cookies, I use a cookie scoop. It ensures every cookie is the same size, which means they bake evenly and all finish at the same time. My #40 scoop (which holds about 1.5 tablespoons of dough) is my perfect tool here. It’s faster than using two spoons and keeps my hands clean, creating lovely, uniform mounds that bake into consistently gorgeous cookies.
Common Mistakes to Avoid
The biggest mistake, and one I made the first time, is using butter that’s either too cold or melted. If your butter is still firm, your cookies will be dense. If it’s melted or overly soft (greasy), your cookies will spread too much. True room-temperature butter is key. To test, press your thumb into the stick—it should leave a deep, clean indentation without sinking straight through to the wrapper.(See the next page below to continue…)
Don’t rush the creaming process. Simply combining the butter and sugar until they’re mixed isn’t enough. That full 2-3 minutes of beating on medium-high speed is what incorporates tiny air bubbles into the fat, giving your cookies that light, tender crumb. I used to skip this, thinking it was fussy, and my cookies were always a bit heavy and flat. Trust me, set a timer and let the mixer do its magic.
Another error is adding wet cherries. If you skip the thorough drying step, the extra cherry juice will bleed pink streaks into your dough (which isn’t the end of the world, but muddies the look) and, more importantly, add unwanted moisture. This can affect how the flour hydrates and lead to a cakey or gummy spot around the cherry pieces. A few extra pats with a paper towel is the simplest insurance policy for perfect cookies.
Avoid over-baking. These cookies are done when the edges are lightly golden and the centers look soft and just barely set. They will not be firm when you take them out. I learned the hard way that waiting for them to turn golden brown all over results in a dry, crunchy cookie. They continue to cook on the hot baking sheet, so pulling them at the right moment is essential for that melt-in-your-mouth texture.
Serving Suggestions
I love serving these cookies piled high on a simple white platter, where their red cherry flecks and golden edges really shine. They are elegant enough to stand alone, but I often place the platter next to a pot of freshly brewed coffee or a pot of Earl Grey tea. The nutty, buttery flavor of the cookie is a perfect companion to a warm, slightly bitter drink.
For a truly special dessert presentation, I’ll sometimes sandwich a small scoop of high-quality vanilla bean ice cream between two cookies for an incredible ice cream sandwich. The chew of the cold cookie against the creamy ice cream is divine. Alternatively, I’ve crumbled a cookie over a bowl of lemon sorbet, which plays up the tartness of the cherries in a wonderfully refreshing way.
During the holidays, I pack them in festive cookie tins lined with parchment as gifts for neighbors and friends. I always include a little note about the almond and cherry flavors—it feels personal and homemade. They are sturdy travelers and hold up beautifully, making them the ideal edible gift that truly comes from the heart.
Variations & Customizations
While I adore the classic version, I’ve played with some delicious twists. For a more intense almond flavor, I once substituted 1/4 cup of the all-purpose flour with an equal amount of fine almond flour. It made the cookies even more tender and packed an incredible almond punch. I’ve also rolled the dough balls in finely chopped almonds instead of sugar before baking for an extra-crunchy, nutty exterior.
If maraschino cherries aren’t your thing, dried cherries are a fantastic alternative. I chop them up and soak them in warm water (or even a little amaretto liqueur!) for about 10 minutes to plump them up before draining and patting them dry. They offer a deeper, more tart cherry flavor and a chewier texture. I’ve also seen friends use dried cranberries for a “Christmas in every bite” version.
Chocolate and cherry are a legendary pair. I’ve folded in 1/2 cup of mini chocolate chips along with the cherries and almonds for a Black Forest-inspired cookie. Another time, I dipped half of each cooled cookie in melted dark chocolate and let it set. It felt incredibly decadent and turned a simple cookie into a stunning confection perfect for a dessert table.
How to Store, Freeze & Reheat
Once completely cooled, I store these cookies in an airtight container at room temperature. I place sheets of parchment paper between layers if I need to stack them. They stay wonderfully fresh and soft for up to 5 days this way. I’ve found that storing them with a single piece of plain bread in the container (changing it daily) helps maintain their perfect moisture level without making them soggy.
These cookies freeze spectacularly well. I freeze them in a single layer on a parchment-lined baking sheet until solid, then transfer the frozen cookies to a heavy-duty freezer bag or airtight container. They’ll keep for up to 3 months. You can also freeze the unbaked dough balls on a sheet, then bag them for ready-to-bake treats. To bake from frozen, just add 1-2 minutes to the baking time.
To refresh cookies or serve them warm, I place them on a baking sheet in a 300°F (150°C) oven for 4-5 minutes. This gently re-crisps the edges and warms the center, making them taste freshly baked. Never use the microwave, as it will make them tough and can melt the cherry pieces unevenly. The low-and-slow oven method is the only way to go.
Conclusion
These Almond Cherry Cookies are more than just a recipe to me; they’re a little jar of happiness, a bite of buttery nostalgia that never fails to bring a smile. I hope you’ll welcome the process of making them—the scent of almond extract, the bright pop of cherry color, the satisfaction of a perfectly golden edge. They are a testament to the fact that the most beloved recipes are often the simplest, most heartfelt ones. I’m so glad I found that old recipe card, and I’m even happier to share it with you. Happy baking