
Introduction
When it comes to comforting meals that the whole family can enjoy, few things beat a good casserole. Today, I’m excited to share my favorite recipe for Walking Taco Casserole. This dish combines all the delicious flavors of a walking taco—think seasoned beef, cheese, and toppings—into a warm, cozy casserole that’s perfect for weeknight dinners or feeding a crowd. My kitchen fills with rich, mouthwatering aromas as it bakes, and I can’t wait to share this delightful recipe with you!
Why You’ll Love This Recipe
One of the best parts about this Walking Taco Casserole is how versatile it is. You can customize it with your favorite ingredients, making it a hit with everyone at the table. Plus, it comes together quickly, and you’ll have minimal cleanup thanks to the one-pan approach. Whether you’re cooking for a family gathering or a cozy dinner for two, this casserole brings comfort and joy. So trust me when I say you’re going to love every cheesy, crunchy bite! <strong>(See the ingredients in the next page below…)</strong><!–nextpage–>
Ingredients
– 1 lb ground beef (or turkey)
– 1 packet taco seasoning
– 1 can (15 oz) black beans, drained and rinsed
– 1 can (15 oz) corn, drained
– 1 can (10 oz) diced tomatoes with green chilies
– 2 cups tortilla chips, crushed
– 2 cups shredded cheddar cheese
– 1 cup sour cream
– 1/2 cup sliced green onions
– Optional: jalapeños, avocado, or salsa for serving
Equipment Needed
– Large skillet
– Baking dish (9×13 inches)
– Mixing bowl
– Spoon for mixing
– Aluminum foil (for covering while baking)
Step-by-Step Instructions
To get started, preheat your oven to 350°F (175°C). Then, in a large skillet over medium heat, cook the ground beef until it’s browned and cooked through. I like to drain any excess grease to keep the dish from being too greasy. Next, stir in the taco seasoning along with a little water (follow the packet instructions), allowing the flavors to meld beautifully. The smell of the spices is just heavenly as it fills my kitchen! <strong>(See the next page below to continue steps…)</strong><!–nextpage–>
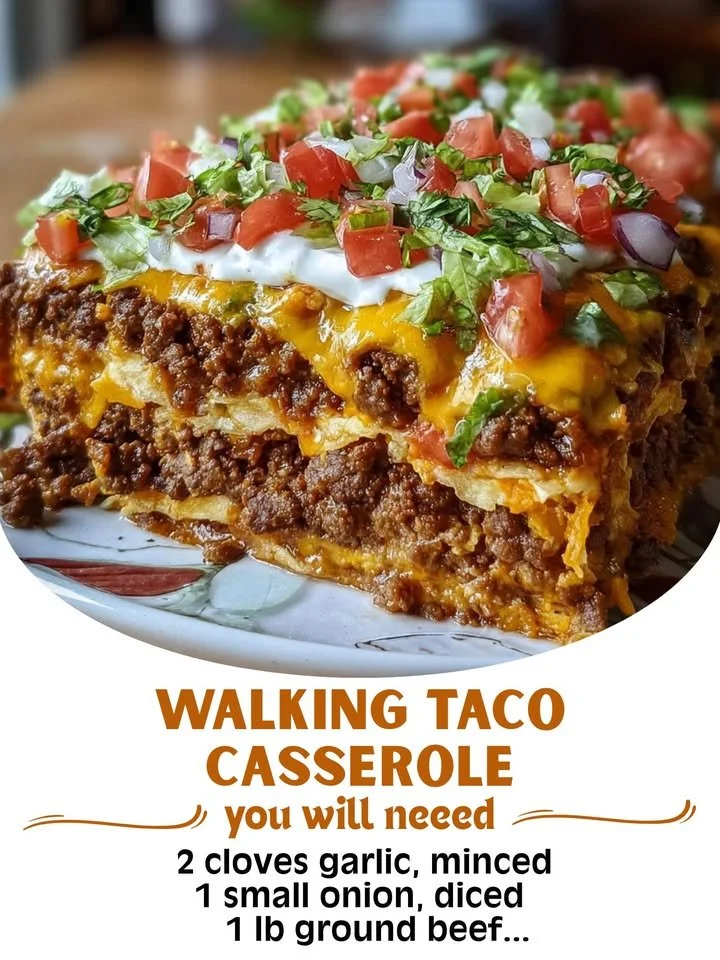
Once your beef mixture is ready, it’s time to build the casserole. In your baking dish, spread half of the crushed tortilla chips evenly on the bottom. Layer on the beef mixture, followed by the black beans, corn, and diced tomatoes. I love how colorful everything looks at this stage! Then sprinkle on a generous layer of cheddar cheese—don’t be shy here, cheese makes everything better.
Now, add the remaining tortilla chips on top, followed by the rest of the cheese. Cover the dish with aluminum foil and pop it into the oven for about 25 minutes. This step allows everything to meld together perfectly. After 25 minutes, remove the foil and bake for an additional 10-15 minutes until the cheese is bubbly and golden brown. It’s hard to resist the aroma wafting from the oven!
Finally, after letting the casserole cool for a few minutes, dollop some sour cream on top and garnish with green onions (and any other toppings you desire). The crunchy chips combined with creamy, cheesy goodness is just perfection, and you’re going to love it!
Pro Tips for Best Results
One tip I always swear by is to let the beef mixture cool slightly after cooking. I once rushed straight into assembly, and the excess heat made the chips soggy. Not a culinary catastrophe, but definitely something to avoid! I’ve found that letting it cool for about 5-10 minutes can make a significant difference.
If you’re like me and love a bit more heat, try adding diced jalapeños directly into the meat mixture or on top of the casserole before it goes into the oven. This little tweak has turned up the flavor in my version and made it extra deliciously spicy.
Also, don’t skip the final step of baking uncovered. This step lets the cheese get that delightful bubbly and slightly crispy finish, which is what you want for a perfect casserole. I can still remember the first time I took it out of the oven and was completely blown away by how cheesy and inviting it looked.
Common Mistakes to Avoid
One mistake I made early on was not draining the black beans and corn properly. Excess liquid can make the casserole watery and less enjoyable. So make sure you drain those cans well before adding them to the mix! If you do end up with a watery casserole, just note that a quick mix with a fork can salvage the texture a bit.
Another thing to keep in mind is the type of tortilla chips you use. I’ve tried this with both baked and regular tortilla chips, and I found that the regular ones hold up better under the casserole’s moisture. Baked chips can get mushy, which isn’t quite the texture I was going for.
Overloading on toppings can also be a trap. While I adore layers of flavor, too many toppings can make it hard to serve and eat. I aim for a good balance that enhances each bite without overwhelming the main flavors of the casserole. <strong>(See the next page below to continue…)</strong><!–nextpage–>
Serving Suggestions
This Walking Taco Casserole is perfect on its own, but I love serving it with some sides to elevate a casual dinner night. Freshly made guacamole and salsa on the side give an extra burst of flavor and texture. I usually set up a little taco bar where everyone can add their own toppings after serving themselves.
Pairing it with a simple green salad can lighten things up too. The freshness of the lettuce and tomatoes really complements the rich flavors of the casserole. Plus, a zingy dressing can add a fantastic contrast that keeps every bite exciting.
And let’s not forget about drinks! A chilled glass of lemonade or a refreshing iced tea goes beautifully with this dish, especially when serving guests. It’s all about creating that warm atmosphere where everyone feels at home and ready to dig in.
Variations & Customizations
One of the amazing aspects of this casserole is how easy it is to customize. If you’re looking for vegetarian options, you can easily swap the ground beef for a mix of sautéed mushrooms, bell peppers, and extra black beans. It’s just as satisfying, and the veggies add a fresh, vibrant twist.
Another variation I love is switching it up with different cheese. Instead of cheddar, try pepper jack for an extra kick or even a Mexican blend cheese for a combination of flavors. Sometimes, I sneak in a bit of cream cheese to make it even creamier.
If you want to give your casserole a barbecue flair, consider adding some cooked and shredded chicken with barbecue sauce instead of taco seasoning. This gives a totally new spin on what is usually a taco dish but keeps that comforting casserole base intact.
How to Store, Freeze & Reheat
If you happen to have leftovers—though I doubt you will!—you can store the casserole in an airtight container in the fridge for about 3-4 days. When reheating, I prefer using the oven at 350°F until warmed through, which helps keep the texture just right.
For freezing, it’s best to do this before baking. Assemble the casserole up to the point of baking, then cover tightly with plastic wrap or foil and freeze. When ready to enjoy, just take it out the night before to thaw in the fridge. Then, remove the covering and bake as directed.
Reheating individual portions in the microwave works well, too. Just cover with a damp paper towel to help retain moisture, and heat in quick bursts to avoid overcooking. I usually reach for a yummy baked tortilla chip to garnish it with after reheating for that perfect crunch.
Conclusion
I hope you’re as excited to dive into this Walking Taco Casserole recipe as I am to share it! It’s not just delicious; it’s a dish that brings everyone together at the table, creating cherished memories over a hearty meal. I can’t wait for you to try it in your own kitchen—happy cooking!