
Another common pitfall is not properly preparing the pan. I’ve had my fair share of breads stuck to the bottom, and trust me, it’s not a fun cleanup. I recommend either greasing it generously or using parchment paper to ensure an easy release.
Also, keep an eye on your baking time. It can vary based on your oven. I once left a loaf in for a minute too long, and while it didn’t ruin the bread, it certainly changed the texture slightly. Set a timer and check a few minutes early if your oven runs hot.
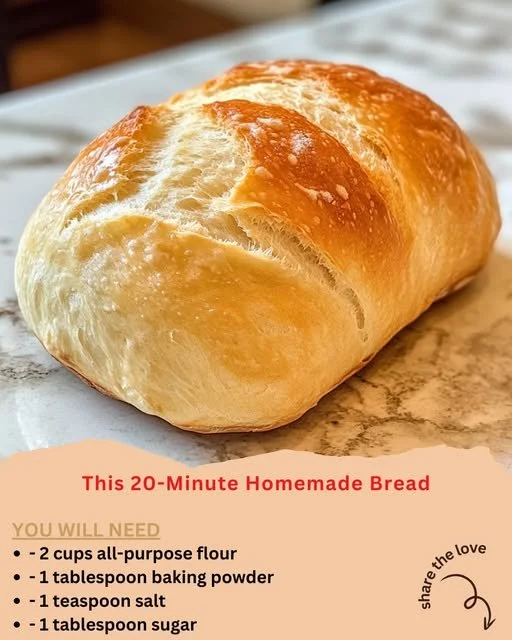
Lastly, do let your bread cool before slicing. It’s tempting to want to dig in right away, especially when it’s warm and calling your name, but allowing it to cool a bit helps it set and makes slicing much easier.
Serving Suggestions
The best way to enjoy this homemade bread? Slather it with a generous amount of butter or your favorite nut butter while it’s still warm. The way it melts into the slightly crispy crust is a moment of pure bliss! I often pair it with jam or honey, and it’s an instant hit with my family during breakfast or brunch gatherings.
For a wonderful sandwich, layer up some roasted vegetables, ham, or turkey with a slice of cheese. This bread is stable enough to hold all your favorite fillings without crumbling. I’ve made everything from savory to sweet sandwiches, and the bread elevates them all.
If you’re feeling particularly fancy, make some garlic bread with it! Simply melt a bit of butter, mix in crushed garlic and chopped parsley, and brush it generously on the sliced loaf—you won’t regret it.
Variations & Customizations
There are so many ways to customize this recipe, which is part of what I love about it. For a sweeter bread, add chocolate chips or dried fruit like cranberries or raisins into the dry mix. This variation is always a favorite for a simple dessert or breakfast treat!
I also enjoy making herb-infused bread. Just toss in dried herbs like rosemary or thyme for an aromatic experience. Fresh herbs work beautifully, too. I often add a sprinkle of Parmesan cheese on top before baking for a delightful crunch and flavor that pairs so well with soups.
If you’re looking to add a bit more nutrition, consider replacing up to half of the all-purpose flour with whole wheat flour or oats for a heartier texture. Just be mindful of adding slightly more liquid to balance it out, as I’ve learned from trying several combinations in my kitchen.
How to Store, Freeze & Reheat
Once your bread has cooled completely, store it in an airtight container at room temperature for up to 3 days. If you want to keep it for longer, freeze it! Just wrap it tightly in plastic wrap and then in aluminum foil. It can last up to 3 months in the freezer, which is excellent for meal prepping.
When you’re ready to enjoy some frozen bread, simply remove it from the freezer and let it thaw at room temperature. If you prefer that just-out-of-the-oven warmth, you can pop it in the oven at 350°F (175°C) for about 10-15 minutes. It’s amazing how that smell brings back all the cozy moments from when it was first baked!
If you have leftover bread (though this rarely happens in my house!), it makes fantastic croutons or breadcrumbs. I love to save a loaf and transform it into delicious croutons that are perfect for salads or soups.
Conclusion
Baking my own bread with this 20-Minute Homemade Bread recipe has truly changed my kitchen adventures. It’s quick, simple, and so satisfying to see something so basic turn into a warm, delicious loaf. I hope you’ll try this recipe and enjoy discovering your favorite variations and uses. Happy baking, and may your kitchen always be filled with the delightful aroma of fresh bread!