
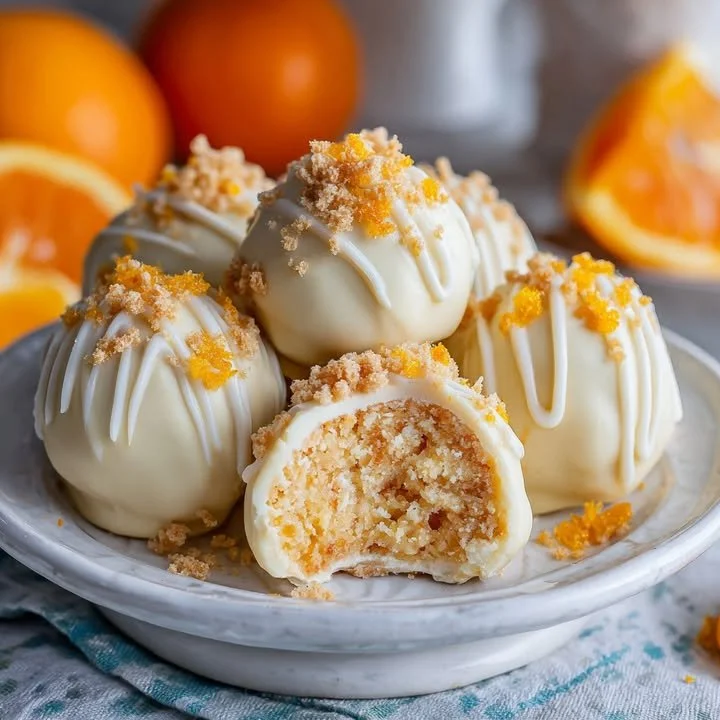
There’s something magical about the combination of white chocolate and orange that instantly makes me think of summer days, ice cream trucks, and lazy afternoons in the sun. Today, I’m thrilled to share my recipe for White Chocolate Orange Creamsicle Truffles. These little bites of heaven are like a creamy explosion of flavor that brings a taste of nostalgia to my kitchen. Trust me; once you try them, you’ll be dreaming of warm sunny days with every delightful bite!
Why You’ll Love This Recipe
These truffles have a fantastic, silky texture that melts in your mouth, and the citrus kick from the orange zest gives them an unforgettable twist. It’s a perfect treat to impress guests or simply to indulge yourself after a long day. They are incredibly easy to make, so you won’t have to spend hours in the kitchen. Plus, they’re so delightful that they’ll become a fast favorite in your household. (See the ingredients in the next page below…)
Ingredients
– 8 oz white chocolate, chopped
– 1/2 cup heavy cream
– Zest of 1 large orange
– 1/4 cup freshly squeezed orange juice
– 1/2 tsp vanilla extract
– Pinch of salt
– Extra white chocolate for coating
– Orange sprinkles or zest for garnish (optional)
Equipment Needed
– Mixing bowl
– Microwave-safe bowl or double boiler
– Whisk or spatula
– Baking sheet
– Parchment paper
– Melon baller or small scoop
– Refrigerator
Step-by-Step Instructions
First, I start by heating the heavy cream in a microwave-safe bowl until it’s hot but not boiling. Then, I pour it over the chopped white chocolate in another bowl and let it sit for about 3 to 5 minutes. This melting process is where the magic begins! Once the time is up, I use a whisk to stir the mixture until it’s smooth and glossy. The aroma of the sweet chocolate is just heavenly! (See the next page below to continue steps…)
Next, I add in the orange zest, orange juice, vanilla extract, and a pinch of salt to this luscious chocolate mixture. These flavors work together to create that refreshing creamsicle experience. I mix it gently but thoroughly, ensuring that all the ingredients are well-combined. Once it’s perfectly blended, I cover the bowl with plastic wrap and pop it in the fridge for about 2 hours. It’s exciting to think about how this mixture will turn into fabulous truffles!
Once the mixture is firm enough to handle — not too hard but definitely moldable — I grab my melon baller and start scooping out portions. I form them into cute little balls with my hands, and oh, what a delight it is to see them taking shape! I place the truffles on a lined baking sheet and put them back in the fridge for a quick chill while I prepare the white chocolate coating.
Now comes the fun part: melting more white chocolate for that beautiful outer layer. I put it in the microwave or double boiler and, once ready, I dip each chilled truffle into the melted chocolate, letting the excess drip off. If I’m feeling fancy, I sprinkle them with orange zest or colorful sprinkles before the coating sets. Let those truffles cool, and you’ll have a lovely treat worthy of any occasion!
Pro Tips for Best Results
When making these truffles, I found that the quality of white chocolate makes a significant difference. I tested this recipe using both baking chocolate and higher-end chocolate bars. The latter provided a creamier texture and richer flavor, so I recommend splurging a bit.
I also learned that if you let the cream mixture cool slightly before adding the orange juice and zest, the flavors meld together better, yielding a more intense orange flavor in the end. Don’t rush this step!
Lastly, if you’re a fan of texture, consider rolling some of the truffles in crushed graham crackers or nuts for an added crunch. It’s a small tweak that can elevate your truffles significantly!
Common Mistakes to Avoid
One mistake I often made was not letting the chocolate mixture cool sufficiently. If it’s too warm when you add the orange juice, it can seize and become grainy. Trust me; a little patience goes a long way in achieving that silky texture! (See the next page below to continue…)
Another pitfall is using cheap white chocolate. I once used a generic brand that didn’t have much cocoa butter, and the truffles just didn’t taste right. Always opt for high-quality chocolate for the best results!
Finally, be mindful of the temperature when dipping the truffles in chocolate. If the truffles are too warm, the coating can melt right off. Chill them before dipping; you’ll love the way they hold their shape!
Serving Suggestions
These White Chocolate Orange Creamsicle Truffles are perfect for any occasion, from summer picnics to holiday gatherings. I often present them in beautiful little cupcake liners on a platter for that added touch of elegance. They make such a visual impact and taste divine!
For a casual setting, they pair beautifully with a refreshing iced tea or a light lemonade, enhancing that fruity flavor and making for a delightful summer treat. If I’m indulging for a cozy movie night, I even enjoy them with a warm cup of coffee. The combinations are endless!
If I’m hosting a party, I like to serve them alongside other small desserts — think mini cheesecakes or brownie bites. It creates a delightful dessert table that’s sure to impress everyone!
Variations & Customizations
I’ve played around with adding other flavors to my truffles, and one of my favorites is using lemon zest in addition to the orange. It gives them a lovely tartness that perfectly balances the sweetness of the white chocolate. You can even switch it up by making a mix of different citrus, like lime or grapefruit!
For those who adore a little crunch, you can mix in chopped nuts like pistachios or almonds into the chocolate mixture. Not only does it add an appealing texture, but the nutty flavor complements the orange perfectly.
Lastly, if you’re feeling adventurous, consider dipping them in dark chocolate instead of white. It offers a deeper flavor that contrasts beautifully with the sweetness and citrus — it’s a decadent twist you’ll love!
How to Store, Freeze & Reheat
These delightful truffles can be stored in an airtight container in the refrigerator for up to 2 weeks. I always keep them stacked gently, ensuring they don’t stick together or lose their shape.
If you find yourself with extra truffles (which happens far too often!), you can freeze them. Just make sure to freeze them separately on a baking sheet first before transferring them to an airtight container. They can last up to 3 months in the freezer! When you’re ready to enjoy, simply take them out and let them thaw for about 15 minutes at room temperature.
Reheating is not necessary, but if you prefer your truffles slightly softer, you can pop them in the microwave for just a few seconds, but be careful not to melt the chocolate coating — it’s all about finding that perfect balance!
Conclusion
Making White Chocolate Orange Creamsicle Truffles in my kitchen has become a delightful tradition. They remind me of sun-soaked days and carefree laughter, and I am confident they will bring a bit of joy to your home, too. I hope you enjoy creating these delicious bites as much as I have. Happy baking, friends!