
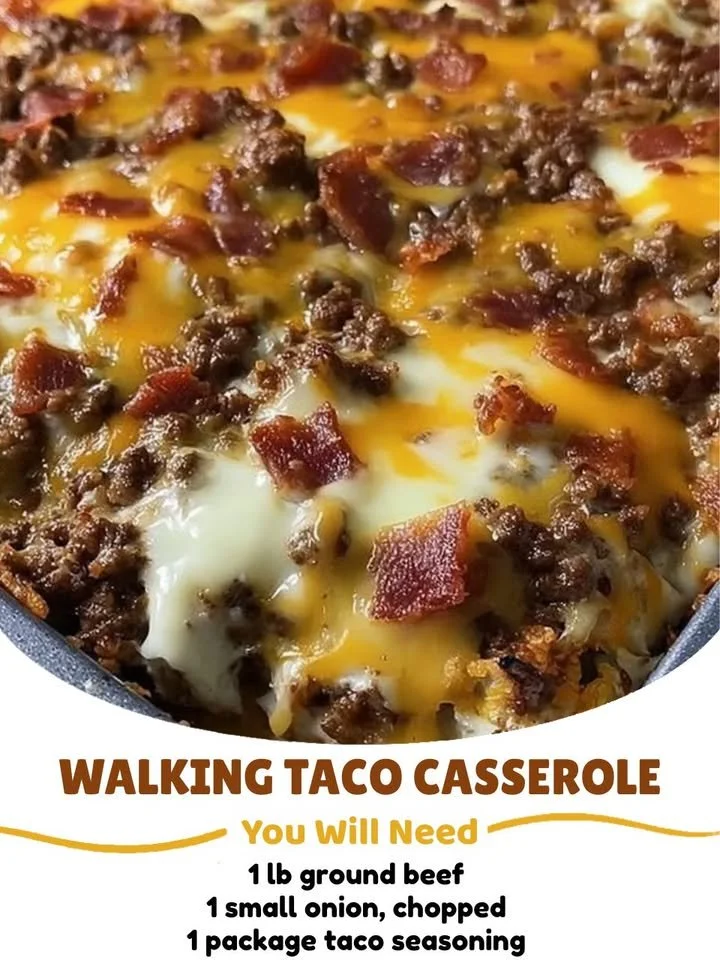
When I’m in the mood for something hearty, comforting, and fun, one dish pops into my mind: Walking Taco Casserole Bake. This dish takes all the tasty elements of a walking taco—those satisfying layers of seasoned meat, zesty toppings, and crunchy chips—and transforms them into a warm, baked delight. It’s perfect for cozy nights with family or when I have friends over for game day. The best part? It’s easy to make and even easier to devour!
Why You’ll Love This Recipe
I absolutely adore this recipe because it combines flavors and textures that come together to create a delicious meal everyone will enjoy. The crispy taco chips contrasted with the savory beef, gooey cheese, and a touch of freshness from the toppings—it’s a fiesta right in the dish! The aroma fills my kitchen as it bakes, reminding me of summer cookouts and family gatherings. And cleanup is a breeze too! All you need is one dish. (See the ingredients in the next page below…)
Ingredients
– 1 pound ground beef
– 1 packet taco seasoning
– 1 can black beans, drained and rinsed
– 1 cup corn (fresh or frozen)
– 1 cup salsa
– 2 cups shredded cheddar cheese
– 3 cups tortilla chips
– 1 cup sour cream
– Sliced jalapeños, cilantro, and diced tomatoes for garnish
Equipment Needed
– Large skillet
– 9×13-inch baking dish
– Mixing spoon
– Measuring cups
– Oven
Step-by-Step Instructions
To start, I preheat my oven to 350°F (175°C). While it’s heating, I grab a large skillet and brown the ground beef over medium heat until it’s nice and crispy. I drain any excess grease and then stir in the taco seasoning according to the packet instructions. The smell of the meat cooking with the spices is simply heavenly! Once combined, I add the black beans, corn, and salsa, stirring everything until it’s well mixed and heated through. The colors are vibrant, and I can already see how delicious it will be! (See the next page below to continue steps…)
Next, I carefully layer half of the tortilla chips at the bottom of my baking dish. Then I pour the beef mixture over the chips, creating a fantastic base. The meat mixture is hearty and saucy, which is just what I want! After that, I sprinkle half of the shredded cheddar cheese over the beef layer, and you know it’s going to melt beautifully in the oven. I repeat the layers with the remaining chips, the rest of the beef mixture, and top with the remaining cheese. The layers create a lovely mountain of deliciousness.
Now it’s time for the baking! I slide the casserole into the preheated oven and let it bake uncovered for about 20-25 minutes, or until the cheese is bubbly and golden brown. My kitchen fills with an irresistible aroma, the kind that makes my mouth water. Once it’s done, I pull it out and let it cool for a few minutes before serving. The texture is fantastic, and I can’t wait to dig in!
Pro Tips for Best Results
I tested this recipe three ways to ensure it turned out perfectly every time. First, I tried using lean ground turkey instead of beef, and it was just as flavorful—just be sure to add a bit more seasoning. Next, for a little extra crunch, I experimented by baking the chips on top for the last few minutes. It created an amazing crunchy topping that my family loved! Lastly, I also discovered that mixing in some diced bell peppers adds a nice pop of color and sweetness.
Another personal touch I’ve found helpful is to let the casserole sit for 5-10 minutes before serving. This allows the layers to set and makes it easier to serve without everything falling apart. Trust me, it’s worth the wait! Finally, I enjoy adding a sprinkle of lime juice over the top before serving for that extra zesty kick.
When I make this dish, I always try to have extra toppings on hand, like fresh cilantro, jalapeños, and sour cream. These extras not only enhance the flavor but also give it a homemade feel that everyone appreciates.
Common Mistakes to Avoid
One common mistake I’ve made in the past is overcooking the ground beef. It’s easy to think more browning equals more flavor, but I’ve learned it can lead to a dry texture. I suggest browning just until it’s no longer pink—trust the toppings and seasoning to do the flavor work! Another mistake is not layering correctly; the chips should be on the bottom to absorb some of the moisture from the beef layer, giving them perfect texture.
I also learned the hard way that using stale chips leads to a disappointing experience. No one wants a mushy bottom layer! Always use fresh tortilla chips—they’ll hold up to the casserole while adding that fantastic crunch. Lastly, don’t forget to check the baking time. I’ve left it in a little too long before, and while it was still good, it lost some of that cheesiness that I love.
(See the next page below to continue…)
Serving Suggestions
I like to serve my Walking Taco Casserole Bake with a side of fresh tortilla chips and guacamole for those who love a little extra crunch. The combination of creamy guac alongside spicy salsa enhances the experience beautifully! Another fantastic addition is a colorful side salad. The freshness of the greens with a light vinaigrette balances the richness of the casserole nicely.
For a complete comfort meal, I often pair it with a tall glass of iced tea or a refreshing lemonade. The tartness of lemonade complements the savory flavors perfectly. If I’m feeling fancy, I might even whip up a batch of margaritas—because who doesn’t love a good margarita with a Tex-Mex dish?
If I have leftovers, I love to recook them in individual servings, popping them in the microwave for a quick lunch the next day. It still tastes fabulous, and I get to relive that delicious taco party!
Variations & Customizations
One thing I appreciate about this recipe is its versatility. I’ve tried substituting the ground beef with shredded rotisserie chicken for an equally mouthwatering dish. Additionally, I’ve gone vegetarian by using black beans, lentils, or quinoa as the protein base. It’s a game changer and keeps things interesting week to week!
Another fun variation is to switch up the cheese. While cheddar is classic, I’ve experimented with pepper jack for a bit of heat or a combination of mozzarella and feta for a twist. The flavor dimensions expand, and each bite tells a different story!
For those who like their food spicy, consider mixing in some diced green chiles or using a spicier salsa. I once used a chipotle salsa, and it gave the whole casserole an exciting smokiness that we couldn’t get enough of!
How to Store, Freeze & Reheat
After we finish enjoying our Walking Taco Casserole, I always make sure to store any leftovers properly. I let it cool completely before transferring it to an airtight container, which keeps it fresh for up to three days in the refrigerator. If I know I won’t finish it soon, I also like to freeze portions in freezer-safe containers. It’s perfect for those busy weeknights when I want dinner ready in a flash!
When I’m ready to reheat, I simply pop it into the oven at 350°F (175°C) until it’s warmed through. For microwave reheating, I recommend covering it to retain moisture, which keeps the texture from becoming rubbery. Whichever method I choose, I’m always sure to add a sprinkle of fresh cheese on top—because who doesn’t like gooey cheese?
Lastly, if I’m rewarming from frozen, I do it slowly in the refrigerator overnight and then bake it to get that crispy top again. It’s versatile and means I can enjoy my delicious creation all over again!
Conclusion
I hope you find joy in making this Walking Taco Casserole Bake as much as I do! It truly brings a taste of fun and flavor that is wonderful for any casual occasion. Whether it’s a dinner with family, a potluck, or a simple weeknight meal, it’s bound to become a favorite in your kitchen too. Happy baking!