
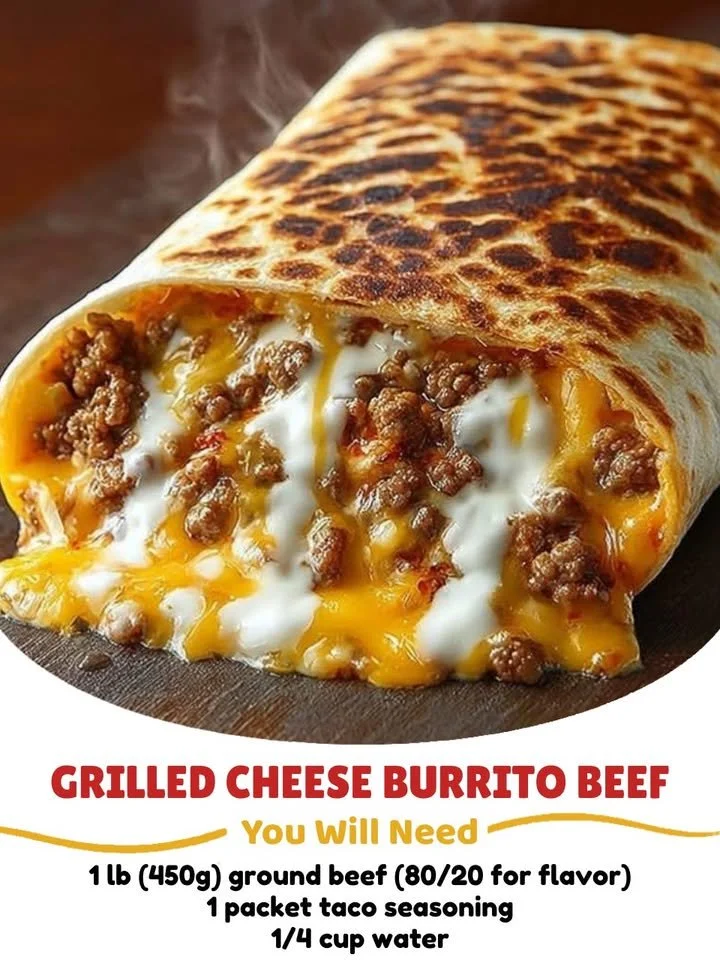
There’s something magical about the combination of grilled cheese and burritos – it’s a fusion that just makes sense! This Grilled Cheese Burrito Beef recipe has become a favorite in my kitchen, and I can’t wait to share it with you. The gooey melted cheese combined with perfectly seasoned beef, wrapped in a warm tortilla and grilled to golden perfection, is a comfort food that brings a smile to my face. So, let’s dive into this deliciousness together!
Why You’ll Love This Recipe
The best part about this Grilled Cheese Burrito Beef is how incredibly satisfying it is; it’s like having your cake and eating it too! This dish is versatile, rich in flavor, and oh-so-easy to make. Whether you’re preparing a quick weekday dinner or looking to impress at a weekend gathering, this recipe has got you covered. It’s the ultimate blend of cheesy goodness and savory beef, all wrapped up in one cozy package. I promise, once you try it, it’ll become a regular in your meal rotation. (See the ingredients in the next page below…)
Ingredients
– 1 pound ground beef
– 2 cups shredded cheese (cheddar and Monterey Jack work great)
– 4 large flour tortillas
– 1 packet taco seasoning
– 1 tablespoon olive oil
– 1/2 cup diced onions
– Salt and pepper to taste
– Sour cream and salsa for serving (optional)
Equipment Needed
– Large skillet
– Spatula
– Mixing bowl
– Griddle or non-stick pan
– Cheese grater (if you’re shredding your own cheese)
Step-by-Step Instructions
First things first, in my kitchen, I always like to start by heating the olive oil in a large skillet over medium heat. Once it’s nice and hot, I throw in the diced onions and sauté them until they become translucent and aromatic. The smell wafting through the kitchen at this point is fantastic! Next, I add the ground beef, breaking it apart with my spatula as it cooks. Once the beef is browned, I sprinkle in the taco seasoning along with a splash of water and let it simmer for a few minutes. This little step infuses the meat with flavor that makes the burrito shine! (See the next page below to continue steps…)
Now, let’s assemble our burritos! I take one of the tortillas and place a generous scoop of the seasoned beef mixture down the center. Then, I sprinkle a hearty amount of shredded cheese on top. I like to layer it on because who doesn’t want ooey, gooey cheese in every bite? Once that’s done, I fold in the sides of the tortilla and roll it up tightly. Finally, it’s griddle time! I heat a non-stick pan over medium heat and place the burrito seam-side down, cooking it for about 2-3 minutes on each side until golden brown and crispy.
While the burrito is cooking, I can’t help but steal a moment to enjoy the sounds of sizzling and the aroma enveloping my kitchen. It’s undeniably one of my favorite cooking moments! Once the burrito is nice and crispy, I take it off the heat, let it rest for a minute, and then slice it in half. The cheese oozes out in the most delightful way, and I’m left with a perfect, melty center that is just irresistible.
Pro Tips for Best Results
I’ve experimented with this recipe a few different ways, and let me tell you, using fresh ingredients always makes a world of difference. I recommend grating your cheese rather than using pre-shredded varieties; the texture and melting qualities are so much better! I also play around with spices sometimes – adding a pinch of smoked paprika or cayenne gives the beef an extra kick that I love.
Another tip I can share is to ensure your tortillas are warm before assembling the burritos. You can either warm them in the microwave for a few seconds or on the griddle for just a moment. This makes them more pliable and prevents cracking when you roll them up.
Lastly, letting the burrito rest for a minute after cooking really helps with the cheese setting a bit and prevents that overwhelming amount of gooeyness from spilling out everywhere when you cut into it. Trust me, it’s a game-changer!
Common Mistakes to Avoid
One common mistake I used to make was overstuffing my burrito. It’s so tempting to load on all that delicious beef and cheese, but if you overfill, you end up with a soggy mess. Less truly is more in this case. I usually aim for a nice balance where you can still roll it up without worrying about everything falling out. (See the next page below to continue…)
Another thing I learned the hard way is the importance of temperature control. Cooking the burrito on too high heat can lead to burnt tortillas while the insides remain cold. I now stick to medium heat to ensure an even golden brown finish every time.
Also, don’t skip on the resting step I mentioned earlier. I’ve impatiently cut into a burrito right after cooking, only to have cheese go everywhere! Allowing it to rest guarantees that delicious cheesy center holds its shape nicely.
Serving Suggestions
When it comes to serving these Grilled Cheese Burritos, I love pairing them with a side of homemade salsa or some zesty guacamole. The freshness from the salsa cuts through the richness of the burrito perfectly, creating a delightful balance in every bite.
If I’m feeling extra fancy, I might whip up a quick salad on the side, packed with chopped lettuce, diced tomatoes, and a squeeze of lime. The bright, crisp elements pair beautifully with the savory flavor of the burrito.
And let’s not forget about dipping sauces! I often set out a bowl of creamy sour cream infused with lime and cilantro for dipping. It adds a refreshing touch that enhances the overall eating experience.
Variations & Customizations
One of the joy of this recipe is how adaptable it is! If you’re not a beef person, you can easily substitute with shredded chicken, ground turkey, or even sautéed vegetables for a meatless version. The taco seasoning works just as well with any protein, making it versatile for different dietary preferences.
I also enjoy experimenting with different cheese blends. While cheddar and Monterey Jack are my go-tos, why not throw in some pepper jack for a spicier twist? Or for a gourmet approach, I might use some aged gouda for a rich, nutty flavor that elevates the entire dish!
Returning to the toppings, the sky’s the limit! Want to incorporate some beans or rice? Go for it! You can even layer in some fresh chopped cilantro, jalapeños, or avocado slices. It’s all about personal preferences and what you have on hand – the potential for customization is endless!
How to Store, Freeze & Reheat
If by some miracle you have leftovers (which I doubt!), you can store them in an airtight container in the fridge for up to three days. When ready to enjoy again, simply pop them in the oven at 350°F for about 10-15 minutes. This will help crisp up the exterior while warming the insides deliciously.
For longer storage, I also love freezing these burritos. I let them cool completely, wrap each burrito tightly in foil, and pop them into a freezer-safe bag. They can easily last for up to three months in the freezer. When it’s time to reheat, I suggest taking them out and letting them thaw overnight in the fridge before reheating in the oven for optimal results.
Lastly, if you’re in a rush, they can also be reheated in the microwave, but I recommend using a microwave-safe dish and covering them with a damp paper towel to keep them from drying out. Just keep in mind that the texture may not be as crisp!
Conclusion
In conclusion, this Grilled Cheese Burrito Beef has quickly become a favorite in my home. It’s delicious, fun, and simple to make, making it a perfect dish for any occasion. I hope you enjoy making this dish as much as I do, and I’m excited for you to savor every gooey bite. Happy cooking!