
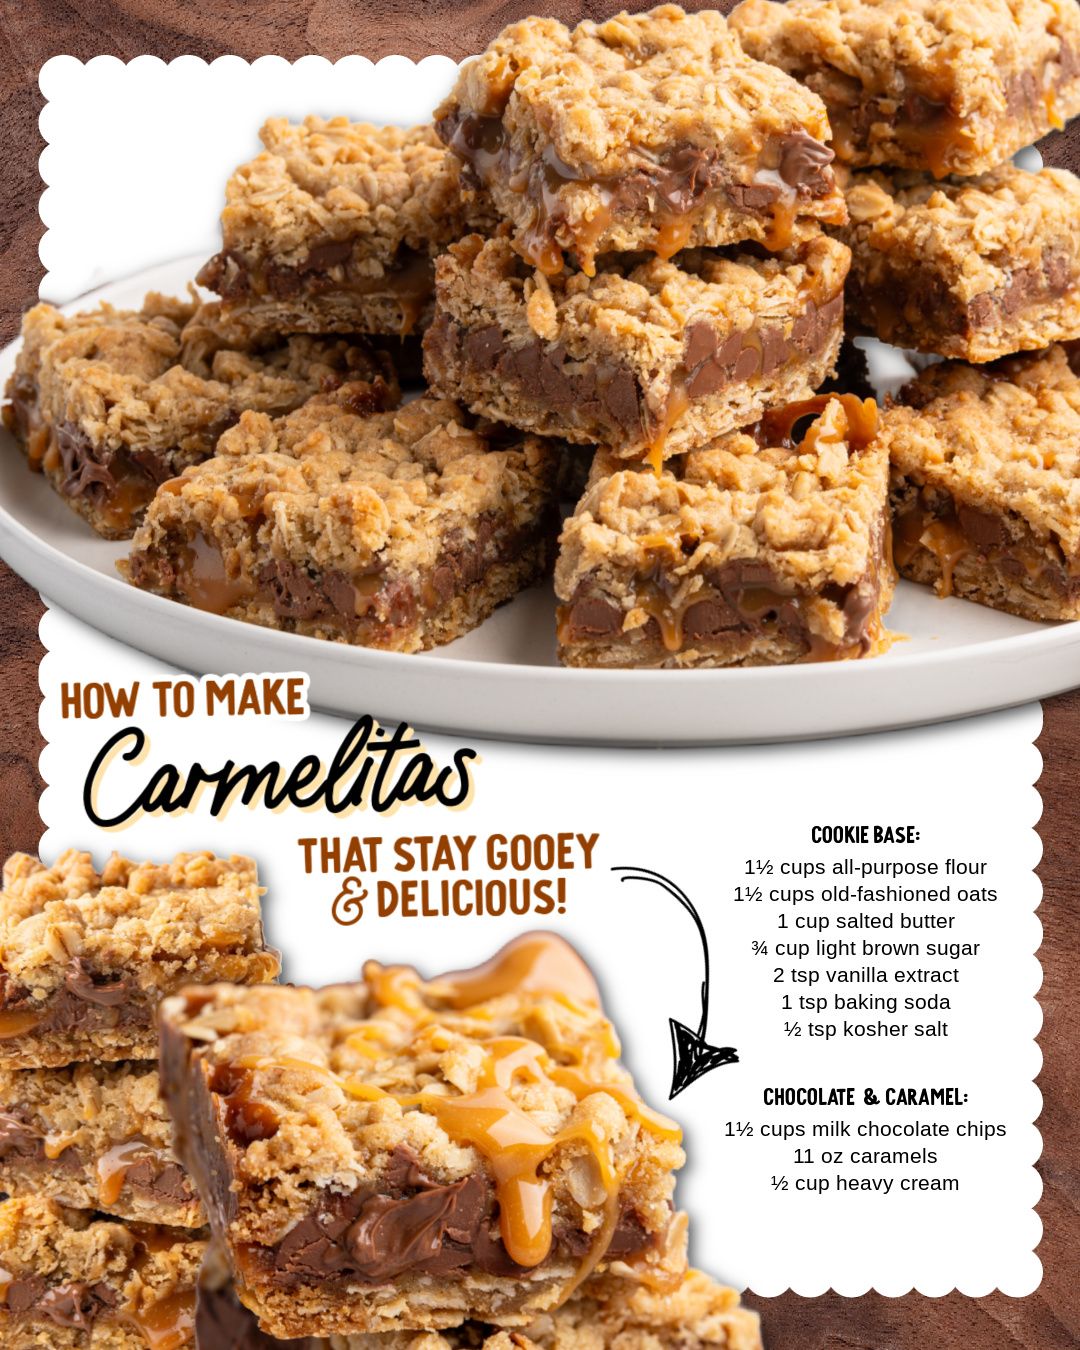
I found this recipe for Carmelitas tucked into my great-aunt’s handwritten recipe box, the word “GOOEY” underlined three times in the margin. Intrigued, I set out to recreate it. In my kitchen, the smell of toasting oats and brown sugar butter filled the air as I pressed the crumbly base into the pan. Then came the magic: unwrapping the little caramel squares and watching them melt into a pool of liquid gold with the heavy cream. Layering that with chocolate chips felt decadent. As they baked, a rich, buttery, chocolate-caramel perfume took over. The first warm, messy bite—the crisp oat crust giving way to a river of molten caramel and melted chocolate—was a revelation. It was a perfect, nostalgic bite of pure indulgence.
Why You’ll Love This Recipe
You will adore this recipe because it masterfully combines three of the best dessert textures: a buttery, crisp oatmeal crust, a layer of rich, gooey caramel, and pockets of melted chocolate. It’s incredibly satisfying to make, from pressing the crumbly base to watching the caramel bubble. The bars are substantial yet elegant, striking the perfect balance between familiar comfort and special occasion treat. They are the ultimate answer for anyone who loves the combination of oatmeal cookies, chewy caramel, and melty chocolate, all in one irresistible, handheld square.
Ingredients
For the Oatmeal Cookie Base & Topping:
- 1 ½ cups all-purpose flour
- 1 ½ cups old-fashioned rolled oats
- 1 cup (2 sticks) salted butter, melted
- ¾ cup packed light brown sugar
- 2 teaspoons pure vanilla extract
- 1 teaspoon baking soda
- ½ teaspoon kosher salt
For the Chocolate & Caramel Filling:
- 1 ½ cups milk chocolate chips
- 11 oz soft caramels, unwrapped (about 35-40 individual pieces)
- ½ cup heavy cream
Let’s talk ingredients. Using salted butter in the crust is my secret—it enhances the toffee-like flavor of the brown sugar and balances the sweetness. The old-fashioned rolled oats are essential for texture; quick oats will become mushy. For the caramels, the classic Kraft squares are perfect and reliable. Do not use caramel sauce or ice cream topping; you need the chewy, set quality of melted caramels. The heavy cream is non-negotiable for creating a smooth, luscious caramel layer that stays soft. Lower-fat milk can cause the caramel to seize or become grainy. Trust me, it makes a huge difference.(See the next page below to continue…)
Equipment Needed
- A 9×9 inch square baking pan
- Parchment paper
- A medium mixing bowl
- A small saucepan
- A spatula
Step-by-Step Instructions
We start by building our foundation. Preheat your oven to 350°F (175°C). Line your 9×9 pan with parchment paper, letting it overhang on two sides for easy removal later. In your mixing bowl, combine the flour, oats, brown sugar, baking soda, and kosher salt. Whisk these dry ingredients together to ensure everything is evenly distributed. Now, pour in the melted butter and vanilla extract. Stir with a spatula until the mixture is completely moistened and forms a crumbly dough that holds together when pinched. The smell is already heavenly—like the best oatmeal cookie you’ve ever imagined.
Take about two-thirds of this crumb mixture and press it firmly and evenly into the bottom of your prepared pan. I use the bottom of a measuring cup to really press it down into a solid, compact layer. This is your crust, and a good firm press is what prevents the gooey filling from making it soggy. Bake this crust layer alone for 10 minutes. You’re not cooking it through, just setting it. This par-bake creates a barrier that will hold up to the liquid caramel. Remove the pan from the oven, but leave the oven on.
While the crust bakes, make your caramel filling. In your small saucepan, combine the unwrapped caramels and heavy cream. Cook this over low heat, stirring constantly, until the caramels are completely melted and the mixture is smooth and glossy. This takes about 5-7 minutes. Be patient and keep the heat low to avoid scorching. Once smooth, remove it from the heat. Now, assemble the magic. Sprinkle the milk chocolate chips evenly over the hot crust. Then, carefully and slowly pour the warm caramel sauce over the chocolate chips, aiming to cover as much surface as possible.(See the next page below to continue…)
Finally, take the remaining one-third of your crumb mixture and sprinkle it evenly over the top of the caramel layer. Don’t press it down; you want a loose, crumbly topping. This will bake into a delicious, crisp finish. Return the pan to the oven and bake for another 15-18 minutes. The topping will be golden brown, and you’ll see the caramel bubbling vigorously around the edges. That bubbling is your cue that it’s perfectly gooey inside.
Pro Tips for Best Results
The key to perfect, sliceable-yet-gooey bars is the cooling time. You must let them cool completely in the pan on a wire rack, and then refrigerate them for at least 3-4 hours, or ideally overnight. I tested cutting them warm, cooled, and chilled. The chilled bars cut into clean, beautiful squares, and the caramel had the most amazing, chewy-gooey texture. If you cut them warm, they’ll be a delicious but soupy mess.
When making the caramel, resist the urge to increase the heat. Low and slow is the mantra. If the caramel gets too hot, it can become overly hard when cooled or even burn. I stir constantly with a silicone spatula, scraping the bottom and sides of the pan. A perfectly smooth, pourable caramel is the heart of this dessert.
For an even more robust flavor, I sometimes toast the old-fashioned oats before adding them to the dry mix. I spread them on a baking sheet and toast at 350°F for 8-10 minutes until fragrant and lightly golden. Let them cool before using. This adds a deep, nutty dimension to the crust that pairs wonderfully with the caramel.
Common Mistakes to Avoid
The first mistake I made was using quick oats instead of old-fashioned. The quick oats absorbed too much moisture and turned the crust and topping mushy, losing that essential hearty, chewy texture. The sturdy old-fashioned oats provide necessary structure and a satisfying bite. Don’t make this swap.(See the next page below to continue…)
Don’t skip the step of par-baking the bottom crust. I tried adding the filling directly to the unbaked crust once, and the caramel seeped down and created a greasy, undercooked bottom layer. That 10-minute pre-bake sets the stage and creates a crucial barrier that keeps your base crisp.
Avoid overbaking the final product. You’re looking for a golden-brown topping and bubbling caramel around the edges—not a dark brown topping. Overbaking will cause the caramel to harden too much when cooled, turning it into a tooth-pulling taffy instead of a soft, chewy layer. The 15-18 minute window is usually perfect.
Finally, don’t skimp on the chilling time. Impatience is the enemy of the perfect Carmelita. If you try to cut them before they are fully chilled and set, the layers will slump and run together. The refrigeration time allows the caramel to firm up to the ideal, sliceable consistency. It’s the most important step for that signature “gooey” texture.
Serving Suggestions
I love serving these chilled, cut into neat squares, and presented on a simple white platter. The layers are beautiful to look at. Sometimes, I’ll drizzle a tiny bit of extra melted chocolate or a sprinkle of flaky sea salt over the top just before serving for an extra touch of elegance.
For the ultimate indulgence, I’ll gently warm an individual square in the microwave for about 10 seconds and serve it à la mode with a scoop of high-quality vanilla bean ice cream. The contrast of the cold ice cream with the slightly warmed, gooey caramel and chocolate is absolutely divine.
These bars are a fantastic make-ahead dessert for parties or potlucks. They hold their shape perfectly, travel well in their pan, and can be served straight from the fridge. They’re always a conversation starter and disappear quickly from any dessert table.
Variations & Customizations
For a delightful twist, swap the milk chocolate chips for semi-sweet or dark chocolate chips. You can also add ½ cup of chopped toasted pecans or walnuts to the crumb topping for a nutty crunch that pairs wonderfully with the caramel.
If you love sea salt with caramel, sprinkle a light pinch of flaky sea salt over the caramel layer just before adding the final crumb topping. You can also use a combination of chocolate chips, like half milk and half semi-sweet, for a more complex chocolate flavor.
For a different fruit note, you can sprinkle ½ cup of dried cranberries or chopped dried apricots over the chocolate chip layer before adding the caramel. The tart fruit cuts through the sweetness beautifully and adds another layer of flavor and texture.
How to Store, Freeze & Reheat
Once set and cut, store these bars in an airtight container in the refrigerator. They will keep their perfect texture for up to 5 days. The chilled environment keeps the caramel at that ideal chewy consistency. I always store mine in the fridge.
You can freeze Carmelitas for longer storage. Freeze the whole, uncut slab or individual squares on a parchment-lined baking sheet until solid, then wrap tightly and store in a freezer-safe container for up to 2 months. Thaw overnight in the refrigerator. The texture holds up remarkably well.
To reheat, I recommend only warming individual servings. A 10-15 second burst in the microwave will soften the caramel and chocolate beautifully for a warm, comforting treat. I do not recommend reheating the whole pan, as it can cause the layers to separate and become oily.
Conclusion
Vintage Carmelita Dessert Bars are a treasure—a perfect harmony of texture and flavor that feels both timeless and incredibly special. They’ve brought so much sweet satisfaction to my kitchen and have become my go-to dessert when I want to impress with minimal fuss. I hope this recipe finds its way into your baking rotation, creating its own delicious memories for years to come. So melt that butter, unwrap those caramels, and get ready to bake up a pan of pure, gooey joy. You’re about to make a classic that everyone will beg you to make again.