
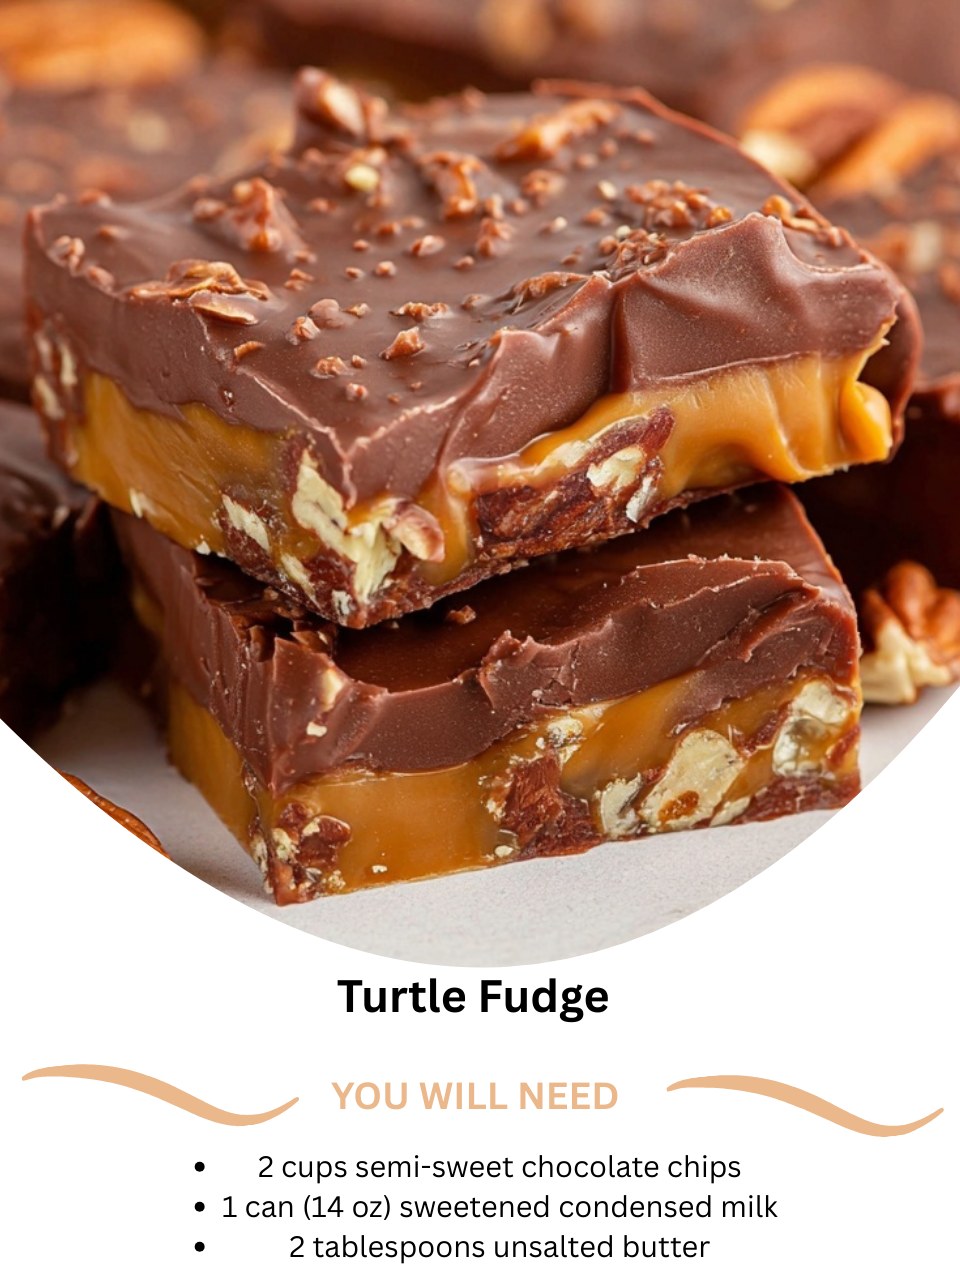
I first made this Turtle Fudge on a cozy winter evening, craving the iconic candy shop flavor of chocolate, caramel, and pecans all in one luxurious bite. As the semi-sweet chocolate melted into the sweetened condensed milk, the deep, rich aroma filled my kitchen like my favorite chocolate shop. Swirling in that thick, homemade salted caramel and pressing toasted pecans into the top was pure kitchen therapy. The moment I sliced into the chilled block, revealing layers of fudge, gooey caramel, and crunchy nuts, I knew I’d created something truly special—a decadent, shareable version of the classic candy that’s now a non-negotiable part of my holiday baking.
Why You’ll Love This Recipe
You are going to fall head over heels for this recipe because it packs the entire, beloved turtle candy experience—rich chocolate, chewy caramel, buttery pecans—into one incredibly creamy and easy-to-make fudge. It’s a show-stopping dessert that looks like you spent hours in a professional kitchen, but it comes together with simple steps and no candy thermometer. From my experience, this is the treat that disappears fastest from any dessert table, delighting everyone with its perfect balance of textures and that unbeatable sweet-and-salty combination.
Ingredients
- 2 cups high-quality semi-sweet chocolate chips
- 1 (14 oz) can full-fat sweetened condensed milk
- 2 tablespoons unsalted butter
- 1 teaspoon pure vanilla extract
- A generous pinch of fine sea salt
- ½ cup thick salted caramel sauce (store-bought or homemade)
- 1 ½ cups pecan halves, toasted and divided
(See the next page below to continue…)
Equipment Needed
- An 8×8 inch baking pan
- Parchment paper
- Medium-sized, heavy-bottomed saucepan
- Rubber spatula
- Small saucepan or microwave-safe bowl (for caramel)
- Baking sheet (for toasting pecans)
Step-by-Step Instructions
First, let’s build our flavor foundation by toasting the pecans. I spread them on a baking sheet and toast them in a preheated 350°F oven for 6-8 minutes, until they’re deeply fragrant and take on a slightly darker hue. This step is non-negotiable—it transforms them from a simple nut into a rich, buttery, and complex ingredient. I let them cool completely, then roughly chop 1 cup of them, saving the prettiest ½ cup of halves for the top. Now, I line my 8×8 inch pan with parchment paper, leaving overhangs on two sides to create a sling. This guarantees I can lift out the fudge in one perfect block for slicing later.
Now, for the rich chocolate fudge base. In my heavy-bottomed saucepan, I combine the semi-sweet chocolate chips, the entire can of sweetened condensed milk, and the butter. I place this over the lowest heat setting my stove offers. Patience is key here. I stand by the stove with my spatula, stirring almost constantly and scraping the bottom thoroughly. We’re melting everything gently to avoid scorching the milk. You’re waiting for it to transform into a gloriously smooth, glossy, and thick chocolate lava.
When the mixture is completely smooth and no chips remain, I immediately remove the pan from the heat. Off the heat, I vigorously stir in the vanilla extract and that pinch of salt. Don’t skip the salt—it makes a huge difference by cutting the sweetness and making the chocolate flavor pop. Now, I fold in the 1 cup of chopped, toasted pecans. The mixture will become very thick and studded with nuts. I pour about two-thirds of this mixture into my prepared pan and press it into a firm, even bottom layer.(See the next page below to continue…)
Working quickly, I warm the caramel sauce slightly so it’s pourable but not hot. I drizzle almost all of it over the chocolate-pecan layer in the pan, reserving about two tablespoons. I don’t spread it; I let it pool beautifully. Then, I carefully spoon the remaining one-third of the chocolate fudge over the top in big dollops. With a knife, I gently swirl the layers together just a few times—you want distinct ribbons of caramel. Finally, I press the reserved ½ cup of pecan halves into the top and drizzle the last bit of caramel over everything. I let the pan cool completely on the counter before refrigerating for at least 4 hours, or ideally overnight, to set.
Pro Tips for Best Results
I tested the caramel three different ways: with store-bought ice cream topping, with a simple homemade sauce, and with a thick, spoonable dulce de leche. The thick, spoonable caramel is the undisputed winner. A runny caramel will make the fudge layers soggy and prevent clean slicing. If using store-bought, choose a thick caramel dessert topping or warm it in a pan to reduce it slightly. I’ve tried this step both ways, and trust me, a thick caramel works better for both texture and presentation.
Here’s what I learned the hard way about the pecans: they must be completely cool before being folded into the chocolate. I once got excited and stirred in warm pecans. The residual heat slightly melted the fudge around each nut, creating oily pockets. Let them cool on that baking sheet until they’re room temperature. Also, toasting is mandatory. Raw pecans are bland and won’t stand up to the rich chocolate and caramel.
For the cleanest, most beautiful slices that showcase all the layers, your knife and chilling time are everything. After the full overnight chill, I lift the block out using the parchment sling. I run my sharpest knife under very hot water, wipe it dry, and make my cuts, reheating and drying the knife after each slice. This hot-knife trick melts through the caramel and pecans without dragging, giving you pristine squares where every layer is visible.
Common Mistakes to Avoid
The biggest mistake is using high heat to melt the chocolate base. Impatience leads to scorched milk and seized, grainy chocolate. I did this on my first attempt, and the fudge had a burnt, sandy texture. Don’t do what I did! The lowest possible heat is your only option. If you’re nervous, use a double boiler. It’s foolproof for that perfect, silky-smooth base every time.(See the next page below to continue…)
Don’t use a thin, runny caramel sauce. This error will result in a fudge that never sets properly in the middle and has a soggy, wet layer that makes slicing impossible. The caramel needs body. If your sauce is thin, simmer it in a separate pan for a few minutes to thicken it up before using. This one tip will save your batch.
Another error is over-swirling. In my excitement, I once used a chopstick and swirled the caramel and chocolate into a homogenous brown layer. You want beautiful, distinct ribbons. Use a knife for 3-4 broad, gentle swirls. Think “marbling,” not “mixing.” This preserves the stunning visual contrast between the dark chocolate and golden caramel.
Finally, don’t skimp on the chilling time, especially with the caramel layer. I’ve tried slicing it after two hours, and the caramel was still too soft, causing the squares to slump. A full four-hour chill is the minimum, but overnight is truly non-negotiable for the caramel to firm up and give you that perfect, sliceable texture that holds all the glorious layers together.
Serving Suggestions
I love serving this fudge at a cool room temperature. I take it out of the fridge about 10-15 minutes before serving. This brief warming allows the caramel to soften just enough to be beautifully gooey. Arranged on a wooden board or a simple white platter, it looks rustic, decadent, and utterly inviting. A very light sprinkle of flaky sea salt on top right before serving can elevate it even further.
For the ultimate dessert pairing, I like to serve it with a strong cup of black coffee or an espresso. The bitterness is the perfect counterpoint to the rich sweetness. It’s also fantastic with a glass of cold milk or, for a special occasion, a small glass of bourbon or a tawny port. The flavors complement each other wonderfully.
When gifting, I place the squares in a festive tin or box lined with wax paper. I always add a tag that says “Turtle Fudge” because the flavor combination is such a beloved classic. It’s a heartfelt, homemade gift that feels incredibly generous and is perfect for teachers, neighbors, hostesses, and anyone with a serious sweet tooth.
Variations & Customizations
For a “Salted Caramel Turtle” fudge, be generous with the salt. Use a salted caramel sauce and finish the top with an extra sprinkle of flaky sea salt after the final caramel drizzle. The intensified salty-sweet contrast is absolutely addictive and makes the flavors even more dynamic.
You can create a “Dark Chocolate Turtle” fudge by using a mix of semi-sweet and dark chocolate chips, or all dark chocolate if you prefer a less sweet, more intense base. The deeper chocolate pairs even more robustly with the caramel and pecans. You could also add a teaspoon of instant espresso powder to the chocolate base to enhance its depth.
For a “Pretzel Turtle” twist, add a salty-crunchy element by pressing a few mini pretzel twists or pieces into the top along with the pecans. You could even sprinkle ¼ cup of crushed pretzels over the caramel layer before adding the final chocolate dollops. The sweet, salty, crunchy combination is a guaranteed crowd-pleaser.
How to Store, Freeze & Reheat
For storing, I keep the fudge in an airtight container in the refrigerator, with sheets of parchment paper between the layers. It stays fresh and maintains its perfect texture for up to two weeks. The fridge is essential for keeping the caramel firm. It can sit out during a party, but for longer storage, always return it to the cold.
This fudge freezes exceptionally well. I wrap the whole block (or individual squares) very tightly in plastic wrap, then seal them in a heavy-duty freezer bag, pressing out all the air. It will keep beautifully for up to 3 months. The texture and flavor remain perfect after a slow thaw, making it ideal for making ahead for the holidays.
To thaw, I transfer the wrapped fudge from the freezer directly to the refrigerator and let it thaw slowly overnight. This prevents any condensation from forming on the surface, which can make the caramel sticky and soften the pecans. There’s no need to reheat it. Once thawed, it’s ready to serve, tasting just as rich and decadent as the day it was made.
Conclusion
This Turtle Fudge is more than just a candy to me; it’s a little masterpiece of textures and flavors that never fails to bring pure delight. The process of layering the chocolate, caramel, and nuts feels wonderfully creative, and the result is always met with awe. I hope this recipe becomes a cherished tradition in your kitchen, creating sweet moments and satisfying the most serious of chocolate-caramel cravings. Now, go toast those pecans—your own batch of layered, nutty, gooey bliss is waiting.