
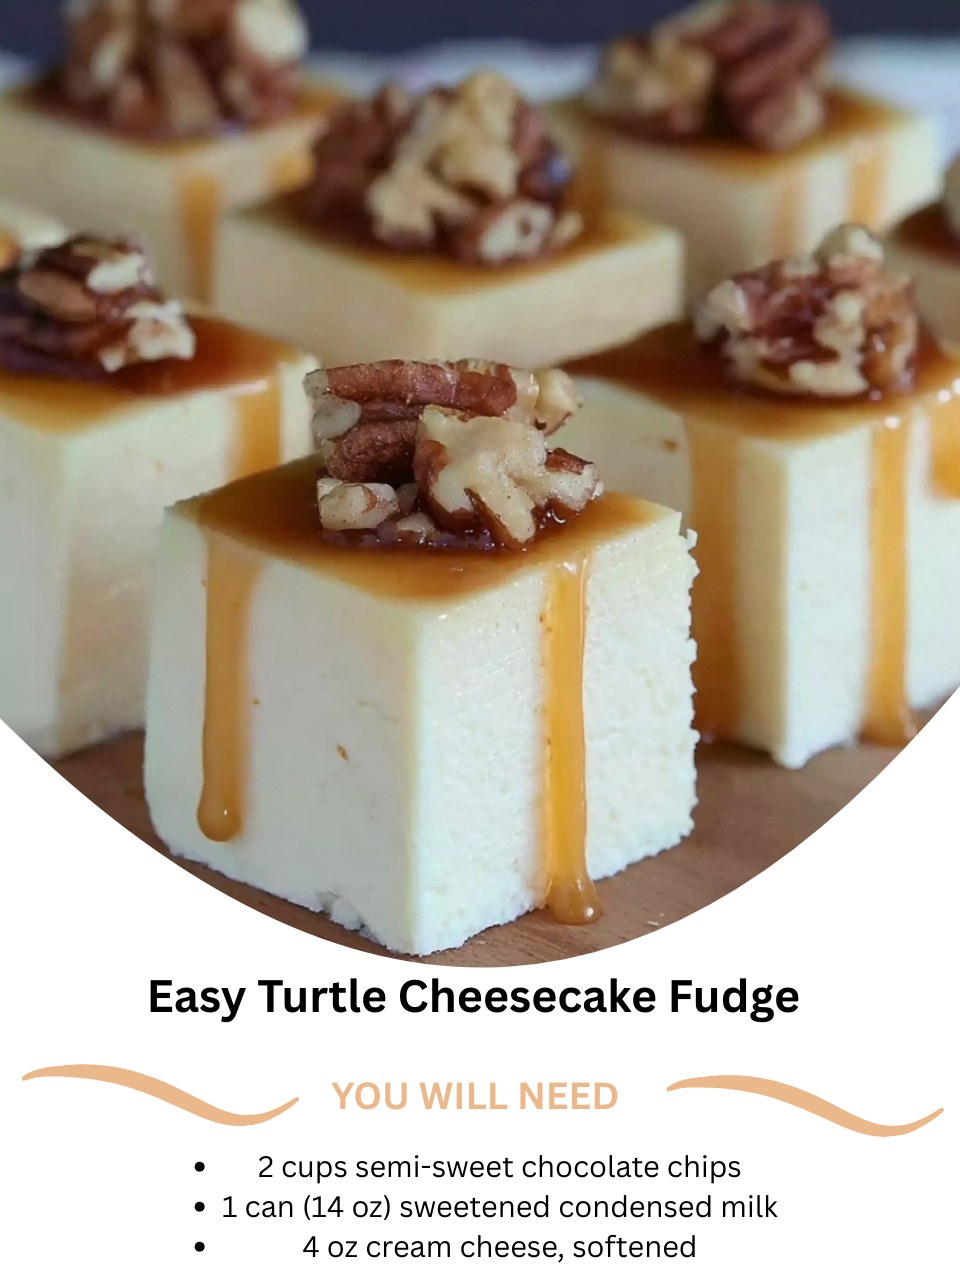
I dreamt up this Easy Turtle Cheesecake Fudge when I couldn’t decide between making a decadent cheesecake or a batch of rich fudge for a party. Why not both? As the cream cheese swirled into the melted chocolate and sweetened condensed milk, my kitchen filled with a magical aroma that was part rich cocoa, part tangy cream cheese, and pure comfort. Swirling in salted caramel and pressing toasted pecans into the top felt like creating edible art. The first bite was a revelation—creamy, tangy, chocolatey, and nutty all at once. It instantly became my ultimate “wow factor” dessert, a showstopper that’s secretly simple to make.
Why You’ll Love This Recipe
You are going to absolutely adore this recipe because it’s a glorious, no-bake mashup of three legendary desserts: rich turtle candy, creamy cheesecake, and smooth fudge. It delivers an incredible depth of flavor and a luxurious, tangy-creamy texture that’s unlike any other fudge you’ve tried. From my experience, this is the treat that sparks the most conversation and recipe requests. It looks and tastes incredibly complex, but the method is straightforward and foolproof, making you look like a total kitchen genius with minimal effort.
Ingredients
- 2 cups high-quality semi-sweet chocolate chips
- 1 (14 oz) can full-fat sweetened condensed milk
- 4 oz full-fat cream cheese, very soft at room temperature
- 1 teaspoon pure vanilla extract
- A generous pinch of fine sea salt
- ½ cup thick salted caramel sauce, plus 2 tbsp for drizzling
- 1 cup pecan halves, toasted and roughly chopped
(See the next page below to continue…)
Equipment Needed
- An 8×8 inch baking pan
- Parchment paper
- Medium-sized, heavy-bottomed saucepan
- Rubber spatula
- Hand mixer or sturdy whisk
- Medium mixing bowl
- Baking sheet (for toasting pecans)
Step-by-Step Instructions
First, let’s set ourselves up for success. I spread the pecan halves on a baking sheet and toast them in a preheated 350°F oven for 6-8 minutes until they’re fragrant and take on a bit of color. This step makes a huge difference, transforming their flavor from mild to deeply nutty and buttery. I let them cool completely, then give them a rough chop. Now, I line my 8×8 inch pan with parchment paper, leaving overhangs on two sides to create a sling. This is my non-negotiable first step for perfect, crumble-free slices later.
Now, for the creamy, tangy base. In my medium mixing bowl, I beat the very soft cream cheese with a hand mixer (or a lot of elbow grease with a whisk) until it’s completely smooth and lump-free. This is crucial—any lumps now will stay in your fudge. I set this aside. In my heavy-bottomed saucepan, I combine the semi-sweet chocolate chips and the entire can of sweetened condensed milk. I melt this over the lowest possible heat, stirring constantly with a spatula until it’s a perfectly smooth, glossy river of chocolate.
When the chocolate mixture is velvety, I immediately remove it from the heat. Working quickly, I whisk in the beaten cream cheese, vanilla extract, and pinch of salt. I whisk vigorously until the mixture is completely uniform—no white streaks! It will be thick, shiny, and incredibly fragrant. Now, I pour about two-thirds of this chocolate-cheesecake mixture into my prepared pan and smooth it into an even layer.(See the next page below to continue…)
Here comes the fun, flavorful part. I take the ½ cup of thick salted caramel sauce and drizzle it in long lines over the chocolate layer. Then, I drop big spoonfuls of the remaining chocolate mixture over the caramel. With a knife or toothpick, I gently swirl everything together just a few times—you want beautiful ribbons, not a muddy mix. Finally, I sprinkle the toasted chopped pecans evenly over the top and press them in gently. I finish with a final artistic drizzle of the reserved 2 tablespoons of caramel. I let the pan cool on the counter before covering and refrigerating it for at least 6 hours, or ideally overnight, to set completely firm.
Pro Tips for Best Results
I tested the cream cheese incorporation three different ways: adding it cold, adding it at room temperature, and beating it first. Beating the room-temperature cream cheese until smooth before adding it is the undisputed winner. I tried adding cold cream cheese directly to the hot chocolate, and it created stubborn little lumps I couldn’t whisk out. Taking the minute to beat it first ensures a flawlessly smooth, creamy texture throughout. I’ve tried this step both ways, and trust me, this one works better.
Here’s what I learned the hard way about the caramel: thickness is everything. A thin, runny ice cream topping will bleed into the fudge and make it soggy, preventing clean layers and a proper set. You need a thick, spoonable caramel sauce or dulce de leche. If your caramel is thin, simmer it in a small pan for a few minutes to reduce and thicken it before using. This one tip safeguards your texture and ensures those gorgeous, gooey swirls.
For the cleanest slices that showcase all the beautiful layers, patience and a hot knife are your best tools. After the full overnight chill, I lift the block out using the parchment sling. I run my sharpest knife under very hot water, wipe it dry, and make my cuts. I reheat and wipe the knife after every 2-3 cuts. This little trick melts through the caramel and nuts without dragging, giving you pristine, professional-looking squares where every swirl is visible.
Common Mistakes to Avoid
The biggest mistake is using cold cream cheese straight from the fridge. It will not incorporate smoothly into the warm chocolate and will leave you with a lumpy, uneven fudge. I made this mistake the first time—don’t do what I did! Take the cream cheese out at least an hour ahead, and beat it until it’s completely soft and smooth. This is the foundation of the creamy “cheesecake” texture.(See the next page below to continue…)
Don’t rush the melting of the chocolate. Using high heat will scorch the milk and seize the chocolate, giving you a grainy, burnt-tasting mess. The lowest possible heat with constant stirring is the only way. If you’re unsure, use a double boiler. It’s a foolproof method for achieving that perfectly silky chocolate base every single time.
Another error is over-swirling. In my excitement to make it pretty, I once overdid it with a chopstick and blended the caramel completely into the chocolate, losing the beautiful marbled effect. You want distinct, tantalizing ribbons of caramel. Use a knife for just 3-4 broad, gentle figure-eight motions. Less is truly more here.
Finally, don’t skimp on the chilling time. This fudge is denser and creamier than most due to the cream cheese, and it needs a long, cold set. I tried cutting it at 4 hours once, and it was still too soft, smushing under the knife. A full 6 hours is the absolute minimum, but overnight is truly non-negotiable for achieving that perfect, firm-yet-creamy sliceable texture.
Serving Suggestions
I love serving this fudge chilled, straight from the fridge. The cold makes the creamy texture even more luxurious and helps the squares hold their perfect shape. I arrange them on a dark slate or white ceramic platter to make the chocolate, caramel, and pecans really pop. Sometimes, I’ll add a few whole pecans or a sprinkle of sea salt flakes on the platter for decoration.
For a truly decadent dessert pairing, I like to serve it with a cup of strong black coffee or an espresso. The bitterness cuts through the rich sweetness and creaminess perfectly. It’s also fantastic with a glass of cold milk or, for a special occasion, a small glass of tawny port or a cream sherry. The flavors complement each other wonderfully.
When gifting, which I do often for the holidays, I place the squares in a pretty box or tin lined with parchment or wax paper. I always add a tag that says “Turtle Cheesecake Fudge” because the flavor combination is such a delightful surprise. It’s a gift that feels incredibly thoughtful, luxurious, and sure to impress any dessert lover.
Variations & Customizations
For a “Chocolate-Peanut Butter Turtle Cheesecake” version, replace ½ cup of the chocolate chips with peanut butter chips when melting the base. You could also swirl ¼ cup of warm peanut butter into the fudge along with the caramel for an irresistible twist on the classic flavor combo.
You can create a “White Chocolate Raspberry Turtle” fudge by using white chocolate chips instead of semi-sweet. Swirl seedless raspberry jam instead of (or in addition to) the caramel, and use toasted almonds instead of pecans. The result is a beautiful, fruity, and nutty confection with a stunning color contrast.
For a “Mocha Turtle” twist, add 1-2 teaspoons of instant espresso powder to the chocolate and sweetened condensed milk as it melts. The coffee flavor enhances the chocolate and adds a wonderful grown-up depth that pairs beautifully with the caramel and pecans.
How to Store, Freeze & Reheat
For storing, I keep the fudge in an airtight container in the refrigerator. Due to the cream cheese, it’s essential to keep it chilled. It stays fresh and maintains its perfect texture for up to 1 week. Place parchment paper between layers if stacking. It can sit out for an hour or two during a party, but should be returned to the fridge promptly.
This fudge freezes very well. I wrap the whole block (or individual squares) very tightly in plastic wrap, then seal them in a heavy-duty freezer bag, pressing out all the air. It will keep beautifully for up to 2 months. The texture may be slightly denser after thawing, but the flavor will be just as amazing.
To thaw, I transfer the wrapped fudge from the freezer directly to the refrigerator and let it thaw slowly overnight. This prevents condensation and helps maintain the perfect texture. Do not thaw at room temperature. There is no need to reheat it. Once thawed, serve it chilled for the best experience.
Conclusion
This Easy Turtle Cheesecake Fudge is more than just a recipe to me; it’s a little edible celebration of everything decadent and delicious. It combines my favorite flavors and textures in one unforgettable bite, and the joy it brings to others is the best part of making it. I hope this recipe inspires you to create your own moments of sweet, creamy, nutty bliss. Now, go soften that cream cheese—your own batch of swirled, tangy, chocolatey magic is waiting to be made.