
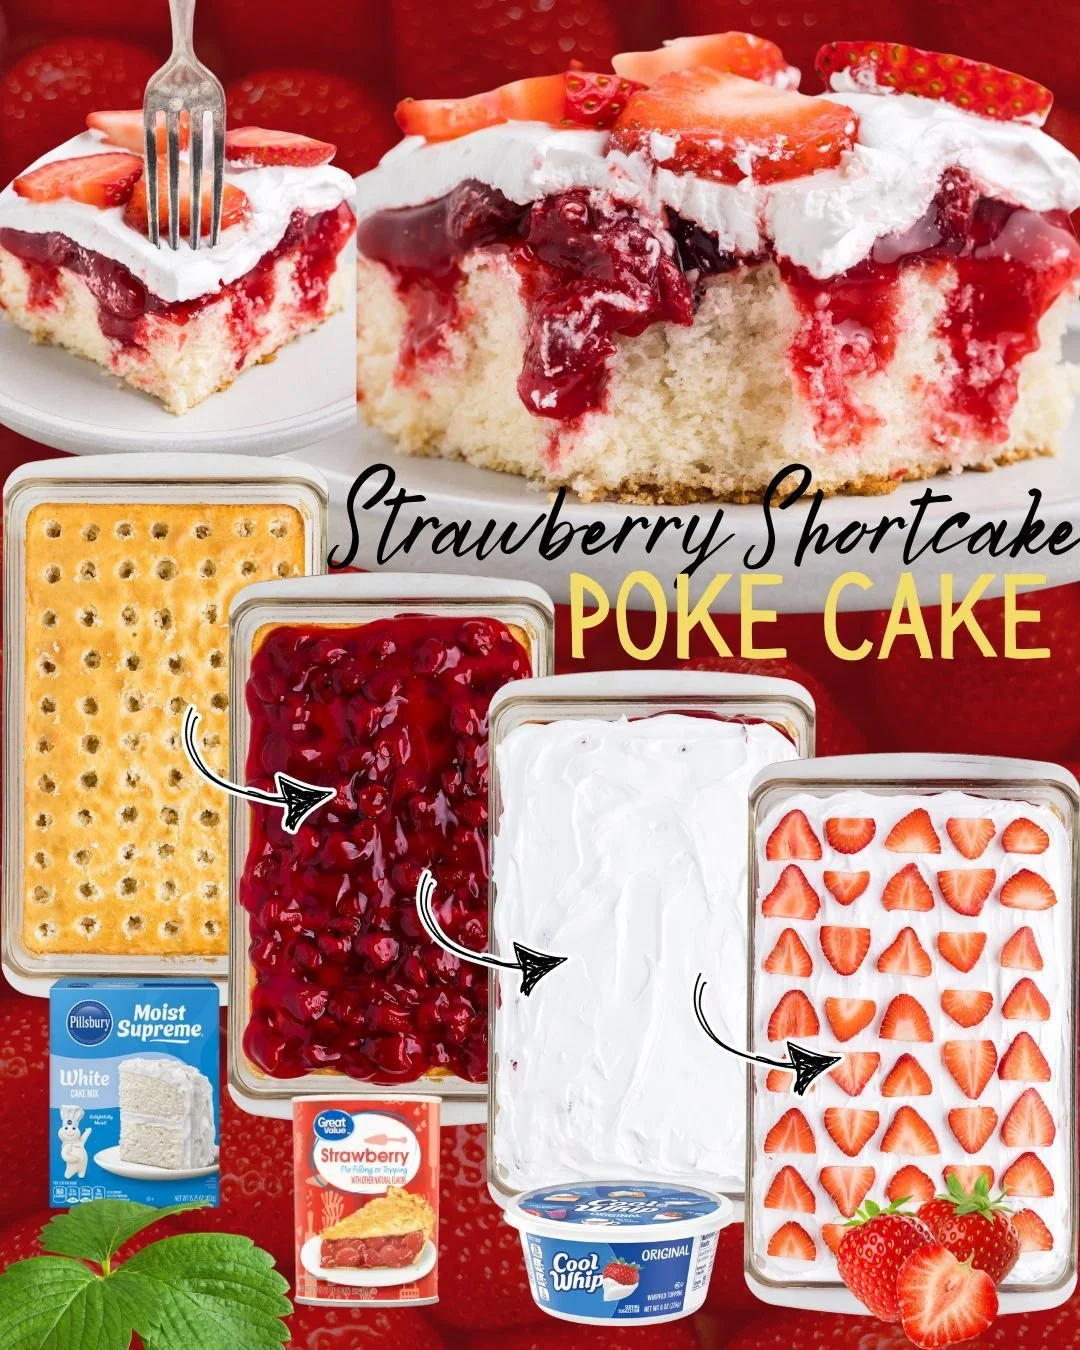
Let the cake cool in the pan for about 15 minutes before using a toothpick or skewer to poke holes all over the top—this part is so much fun! Next, prepare the strawberry jello according to the package instructions and pour it over the warm cake. I love watching the vibrant red liquid seep into the holes, infusing every bite with delicious strawberry flavor. Allow the cake to cool completely, then refrigerate it for a couple of hours (or even overnight) to let the jello set.
Once the cake is chilled, it’s time to make the whipped topping. In a mixing bowl, whip together the heavy cream and powdered sugar until soft peaks form. This fluffiness is what gives the cake its signature look and creamy texture! Spread the whipped topping over the cake, and then decorate with the sliced strawberries on top. Each slice, adorned with strawberries and fluffy cream, makes my heart flutter!
Pro Tips for Best Results
During my testing, I played around with the cake mix and discovered that using an egg substitute or a flavored mix (like lemon) adds a fun twist to the traditional vanilla flavor. Don’t be afraid to experiment! Just remember, the jello is key to the “poke” effect, so keep it as directed for the best soaking results.
I also recommend letting the cake chill for at least four hours if you can wait! This hesitation allows the jello to seep thoroughly and meld with the cake, resulting in a more flavorful treat. Trust me, the longer you can resist— the better it gets!
Finally, if you’d like to add a bit more texture, consider folding in some crushed graham crackers into the whipped cream. I tested this, and the result was an even creamier rich taste that reminded me of a dreamy cheesecake!
Common Mistakes to Avoid
One of the biggest mistakes I made was not letting the cake cool sufficiently before pouring the jello on top. This led to it not soaking properly—so make sure to be patient! Letting the cake cool for at least 15 minutes will ensure the proper texture. (See the next page below to continue…)