
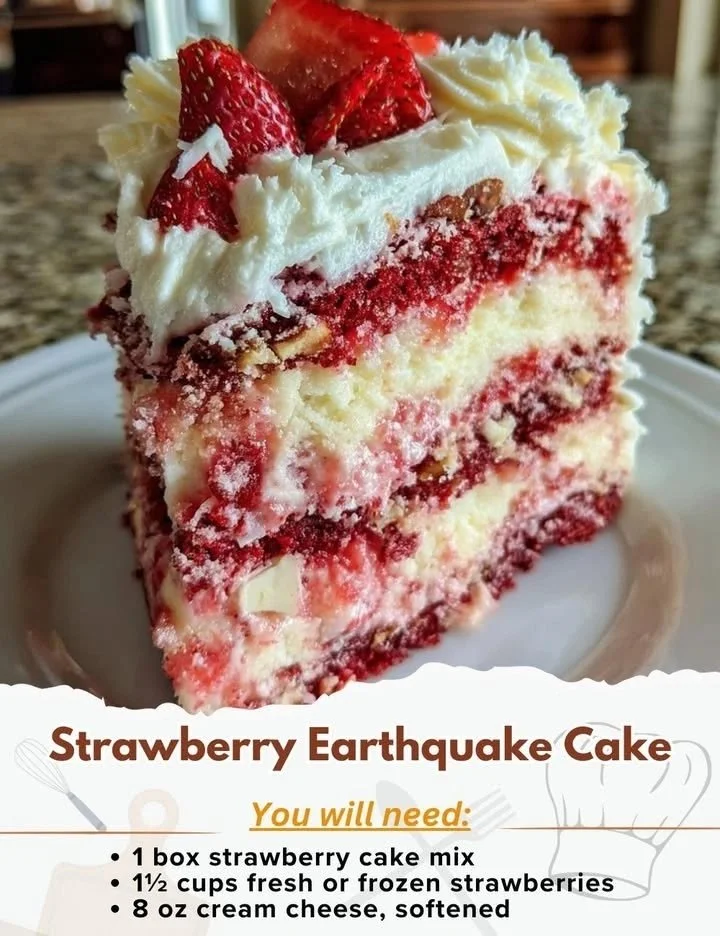
As I stood in my kitchen with a basket full of ripe, juicy strawberries, I couldn’t help but feel inspired. There’s something magical about fresh strawberries, and when you incorporate them into a cake, it elevates dessert to a whole new level. That’s where my love for Strawberry Earthquake Cake comes in! This delightful dessert is a blend of rich flavors and textures, with a charming twist that makes it as fun to make as it is to eat.
Why You’ll Love This Recipe
If you’re like me and love the idea of a cake that combines fluffy cake layers with a gooey cream cheese filling and those sweet bursts of strawberries, then you are in for a treat. The mix of flavors and textures in this cake creates a delightful experience for your taste buds. Plus, it’s visually stunning, making it a perfect centerpiece for any gathering. I assure you, each bite of this cake will leave you craving more! (See the ingredients in the next page below…)
Ingredients
– 1 box of yellow cake mix
– 1 cup water
– 1/3 cup vegetable oil
– 3 large eggs
– 8 oz cream cheese, softened
– 1 cup powdered sugar
– 2 cups strawberries, diced (fresh or frozen)
– 1/2 cup shredded coconut (optional)
– 1/2 cup chopped nuts (optional)
– 1/2 tsp vanilla extract
Equipment Needed
– 9×13 inch baking dish
– Mixing bowls
– Electric mixer or whisk
– Rubber spatula
– Measuring cups and spoons
– Knife and cutting board
Step-by-Step Instructions
To embark on this delicious adventure, let’s start by preheating your oven to 350°F (175°C). While my oven is warming up, I like to grease my 9×13 inch baking dish to ensure that our cake won’t stick. In a mixing bowl, I combine the yellow cake mix, water, vegetable oil, and eggs; I whisk them together until everything is blended and smooth. The batter will have a lovely yellow hue and smell divine. At this point, I can hear the oven chiming, ready for me! (See the next page below to continue steps…)
Next, I pour half of the cake batter into my prepared baking dish, making sure it’s evenly distributed. Now, it’s time to make the creamy filling! In a separate bowl, I beat the softened cream cheese and powdered sugar together until they blend into a fluffy dream. I then dollop this filling over the cake batter, taking care to spread it out gently. I scatter the diced strawberries on top—there’s something so satisfying about watching those ruby red pieces create a beautiful mosaic on the cream cheese layer. Finally, I cover everything with the remaining cake batter, ensuring the strawberries and cream cheese are tucked in nicely.
Now, we’re ready to send our cake to the oven! I bake it for about 30-35 minutes, but the real trick is to keep an eye on it. The edges should be lightly golden, and a toothpick inserted in the center should come out clean. While it’s baking, my kitchen fills with a warm, buttery aroma that makes my mouth water. After removing it from the oven, I let the cake cool for a bit before cutting into it.
Pro Tips for Best Results
I’ve tested this cake multiple times to really nail down the perfect method. One tip I can share is to use fresh strawberries when they’re in season. The flavor is so much brighter, and the cake really benefits from that! If you’re using frozen strawberries, just make sure they are thawed and well-drained to prevent excess moisture in the cake.
Another thing I’ve learned is to be cautious with the cream cheese filling. Make sure your cream cheese is softened at room temperature. I find that using an electric mixer helps achieve that light, airy texture. If it’s too cold, it can clump and not blend smoothly with the sugar.
Lastly, if you want an added depth of flavor, consider adding a splash of almond extract along with the vanilla. It pairs beautifully with strawberries and gives a lovely twist to the classic flavor profile.
Common Mistakes to Avoid
One mistake I used to make was assuming the cake was ready when it looked golden on the outside. I once pulled it out too early, and let me tell you, a gooey center isn’t what you want! Always stick a toothpick in to check the doneness, and trust me, it’s a worthwhile step. (See the next page below to continue…)
Another thing to be cautious about is overmixing the batter. Once you’ve combined the wet and dry ingredients, mix just until everything is incorporated. Overmixing can lead to a tough cake rather than a tender one, and we definitely want a soft, melt-in-your-mouth texture.
I’ve also found that ignoring the cooling time can lead to a disastrous result. When you cut into the cake too soon, the cream cheese filling is too hot and runny. Trust me; patience is key! Let it cool for at least 30 minutes to an hour before indulging in its deliciousness.
Serving Suggestions
When it comes to serving Strawberry Earthquake Cake, I love to dust a little powdered sugar on top for a simple yet elegant finish. It adds a touch of sweetness to the beautiful, colorful cake. You can also serve it with a scoop of vanilla ice cream or a dollop of whipped cream for that extra indulgent experience.
I enjoy pairing this cake with freshly brewed coffee or a warm cup of tea. The flavors harmonize beautifully, making each bite feel like a cozy hug. If I’m feeling extra fancy, I’ll even serve it with a fresh fruit salad on the side to lighten things up.
This cake also makes a lovely gift! Whenever I take it to gatherings, it disappears quickly, and I often get requests for the recipe. It’s always a joy to share my kitchen creations with friends and family.
Variations & Customizations
If you’re feeling adventurous, why not experiment with different fruits? Raspberries, blueberries, or even peaches can all work beautifully. Each fruit will bring its unique flavor, and it’s a perfect way to tweak the recipe based on what you have on hand.
Another fun idea is to switch up the nut type or omit them entirely if nuts aren’t your thing. I’ve tried walnuts and pecans in this cake, and both add a delightful crunch, complementing the soft cake nicely. You can also skip the nuts altogether and focus purely on that luscious strawberry flavor if desired.
Lastly, don’t be afraid of experimenting with dessert sauces! A drizzle of chocolate or caramel sauce over a slice of warm cake can take it to the next level, transforming it into a decadent dessert perfect for any occasion.
How to Store, Freeze & Reheat
To store your Strawberry Earthquake Cake, I recommend covering it with plastic wrap or aluminum foil to keep it fresh. It can stay at room temperature for up to two days, but for longer storage, I place it in the refrigerator, where it can last up to a week.
If you’re like me and want to prepare this cake in advance, freezing is a great option! Once cooled completely, I slice it and wrap the individual pieces tightly in plastic wrap before placing them in a freezer-safe container. This way, I can enjoy a slice whenever I need a sweet pick-me-up!
When it’s time to enjoy that frozen slice, I usually let it thaw in the refrigerator overnight. If I’m in a hurry, I simply pop it in the microwave for about ten seconds to soften it up a bit. It’s comforting to have a tasty treat ready to go when I crave a bite of strawberry bliss!
Conclusion
In the end, Strawberry Earthquake Cake is not just a dessert; it’s a combination of flavors, colors, and memories waiting to be made in your kitchen. I cherish the moments spent baking this cake and sharing it with loved ones. Give it a try and bring a little slice of joy into your day! I promise you won’t regret it. Happy baking!