
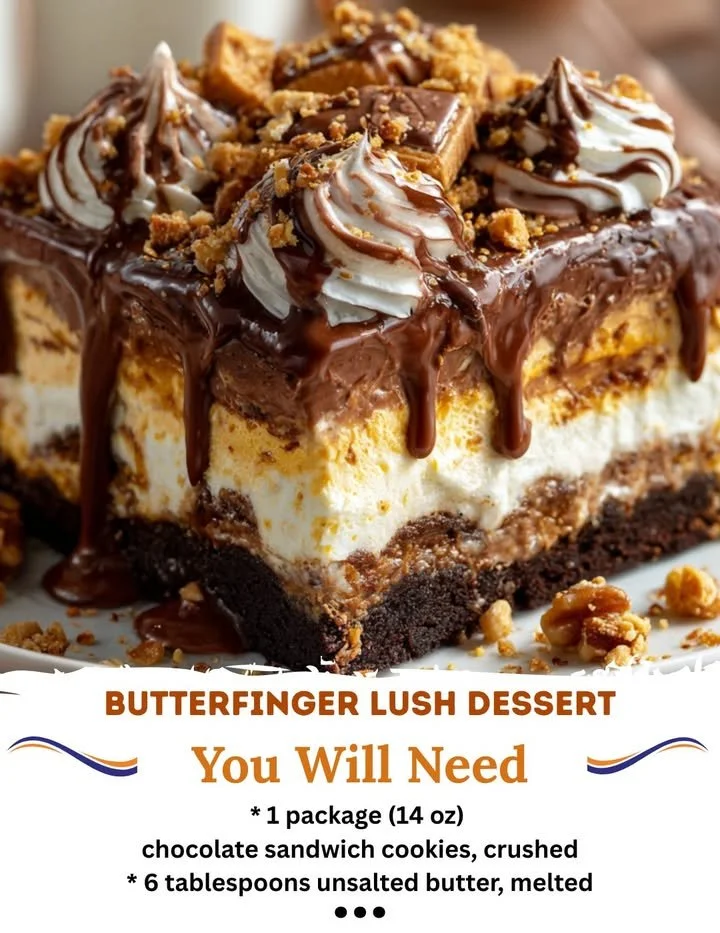
One of my all-time favorites is the Butterfinger Lush Dessert. If you love the sweet and salty combo of Butterfinger candy bars paired with a creamy lush base, then you’re in for a real treat. This dessert is layered, decadent, and simply irresistible. It’s perfect for family gatherings, potlucks, or even just a cozy evening at home. Let me take you through how I make this delightful dish!
Why You’ll Love This Recipe
I think what makes this Butterfinger Lush Dessert so special is the combination of textures and flavors. The buttery crust complements the rich, creamy layers, and the crunched-up Butterfinger gives it that extra bit of crunch and sweetness that is just divine. Plus, it’s super easy to whip up, which is always a win in my kitchen! I love how it looks stunning when served—definitely a showstopper! (See the ingredients in the next page below…)
Ingredients
– 1 cup of crushed graham crackers
– 1/2 cup of unsalted butter, melted
– 1 package (8 oz) of cream cheese, softened
– 1 cup of powdered sugar
– 1 cup of whipped topping
– 1 package (3.4 oz) of vanilla pudding mix
– 2 cups of milk
– 2 cups of crushed Butterfinger candy bars
– Additional whipped topping for garnish
Equipment Needed
– 9×13 inch baking dish
– Mixing bowls
– Electric mixer (or a whisk if you’re feeling strong!)
– Measuring cups and spoons
– Spatula
Step-by-Step Instructions
First, I start by preparing the crust. In a mixing bowl, I combine the crushed graham crackers and melted butter, stirring until everything is nicely blended. Once mixed, I press the mixture firmly into the bottom of my baking dish to create a smooth, even layer. The smell of buttery graham crackers wafting through my kitchen is heavenly! I pop this crust into the fridge while I prepare the creamy layers. (See the next page below to continue steps…)
Next, I whip up the cream cheese layer by beating the softened cream cheese with the powdered sugar until it’s smooth and creamy. I fold in the whipped topping, which gives it that cloud-like texture I adore. This layer spreads so easily over the crust, and I take my time to make it look just right. It’s the perfect base for the decadent layers to follow!
Moving on, I make the vanilla pudding layer next. In a separate bowl, I whisk together the pudding mix and milk until it thickens. After it’s set, I layer this over the cream cheese mixture. I recommend letting this sit for a few minutes to ensure it’s as thick as possible—this helps prevent any mixing of layers. The rich vanilla aroma is just mouth-watering!
Finally, I sprinkle the crushed Butterfinger candy bars generously over the pudding layer. If you love Butterfingers as much as I do, you’ll want to make sure to get an even distribution! I finish it off with a nice dollop of whipped topping on the top, creating a beautiful crown of creaminess. I usually let it chill in the refrigerator for at least a couple of hours before serving, so the layers meld together beautifully.
Pro Tips for Best Results
Having made this dessert several times, I’ve learned a few tips that really make a difference. First, make sure your cream cheese is at room temperature before you start. It blends much more smoothly and you won’t end up with any lumps. Trust me, a little preparation goes a long way!
I also prefer to crush my Butterfinger bars by hand instead of using a food processor. This way, I get a nice mix of fine crumbs and larger chunks, giving each bite a variety of textures that I absolutely love!
Lastly, I always chill the dessert overnight if time allows. The flavors come together wonderfully, and the dessert cuts into perfect squares when it’s well chilled. You’ll be rewarded with a dessert that not only looks good but tastes amazing!
Common Mistakes to Avoid
One mistake I initially made was not letting the pudding layer thicken enough. If you don’t let it set properly, it might ooze into the cream cheese layer, making everything a bit messy. Trust me—it’s worth the wait! (See the next page below to continue…)
Another error I’ve seen is using margarine instead of butter for the crust. It doesn’t provide that rich flavor and texture that real butter gives—so make sure to stick with unsalted butter for the best results!
Also, be cautious with the whipped topping. If you overmix it when incorporating into the cream cheese, it could lose that airy fluffiness. A gentle fold is all that’s needed to keep that light texture!
Lastly, take care to store it properly in the fridge. I’ve had a few instances where I didn’t cover it well enough, and it absorbed other smells in the fridge, which could compromise the lovely flavors. An airtight container is a must for freshness!
Serving Suggestions
This Butterfinger Lush Dessert is fabulous on its own, but I love getting a bit fancy with my presentation! Sometimes, I drizzle chocolate sauce over the top just before serving for extra decadence. It looks beautiful and adds an additional layer of flavor that complements the Butterfinger so well.
For gatherings, I often cut it into small squares, serve them on a platter with some chocolate shavings and maybe a sprig of mint for a pop of color. Just a small touch makes it seem so special for guests!
Lastly, it pairs beautifully with a warm cup of coffee or even a scoop of vanilla ice cream if you really want to indulge. The warm and cool combination is wonderful, and it’s a hit with everyone who tries it!
Variations & Customizations
One fun variation I’ve tried is swapping out the Butterfinger for other candies. Snickers bars work great if you love caramel and nuts, or even Oreos for a cookies and cream vibe! The base layers remain the same, but the flavor shifts to something uniquely delicious.
You could also make this dessert a bit healthier by using Greek yogurt instead of cream cheese and whipped topping. It still remains rich and creamy, and you’ll cut back on some calories without losing the flavor. Plus, the tangy yogurt adds a nice depth!
Finally, I’ve experimented with adding a layer of fruit—like sliced bananas or strawberries—between the layers. Not only does this add a fresh taste, but it also makes the dessert feel a bit lighter while still being indulgent.
How to Store, Freeze & Reheat
Storing Butterfinger Lush Dessert is super easy. I generally cover it with plastic wrap or store it in an airtight container in the refrigerator, where it can last for about 3-4 days—if it lasts that long!
If you want to make it ahead of time, you can prepare it a day in advance, which can actually enhance the flavors as they meld together overnight in the fridge.
While I don’t recommend freezing it, if you end up with leftovers, you can freeze individual servings. Just be sure to wrap them tightly if you decide to go this route. When you’re ready to enjoy, simply thaw it in the refrigerator overnight—it should be nice and creamy once again!
Conclusion
Making Butterfinger Lush Dessert has quickly become a cherished ritual in my kitchen. It’s not just about indulging in something sweet; it’s about the joy of sharing it with friends and family. Each layer tells a story, and the flavors come together to create something truly special. I hope you get to enjoy this dessert as much as I do—happy baking!