
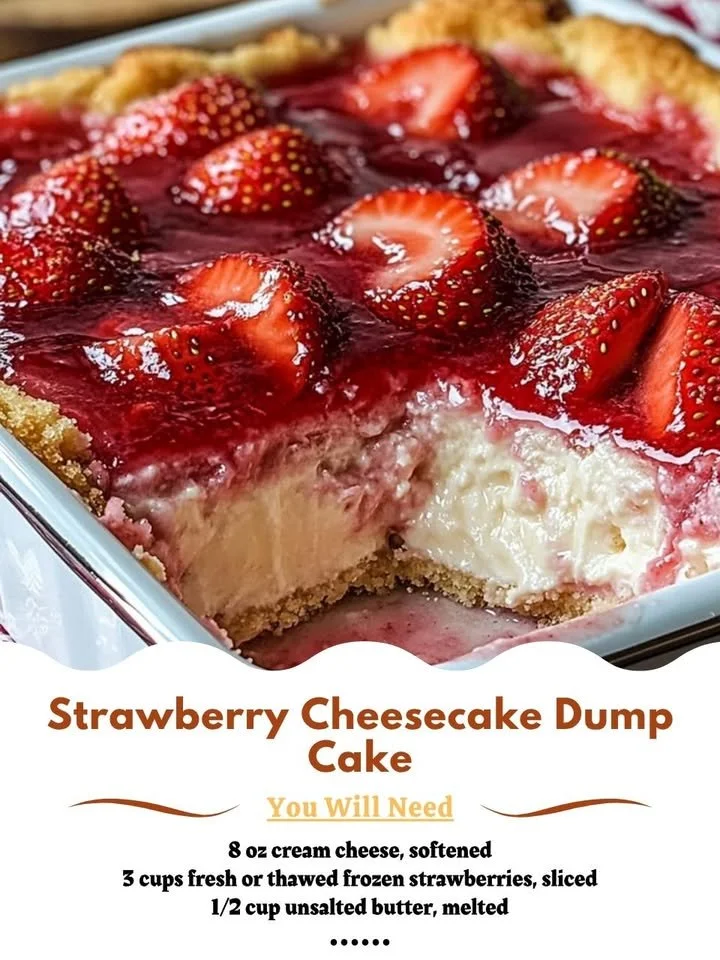
There’s nothing quite like walking into a kitchen filled with the delightful aroma of dessert baking, especially when it’s something as comforting as a Strawberry Cheesecake Dump Cake. It’s that perfect blend of sweet, creamy, and fruity that evokes warm memories of family gatherings and sunny days. Today, I want to share my go-to recipe for this charmingly easy dessert that offers all the flavors of a traditional cheesecake without any of the fuss.
Why You’ll Love This Recipe
This Strawberry Cheesecake Dump Cake makes dessert prep a breeze! Just dump, bake, and enjoy – it’s as easy as that. One of the best parts is that you can whip it up in less than an hour, and the taste is absolutely divine. Trust me, you won’t believe how deliciously creamy and fluffy this cake is, especially with the seasonal strawberries on top. The combination creates a luscious texture that melts in your mouth. (See the ingredients in the next page below…)
Ingredients
– 1 box of vanilla cake mix
– 1 cup of unsalted butter (melted)
– 1 large cream cheese (8 oz, softened)
– 1 cup of powdered sugar
– 1 1/2 cups of fresh strawberries (sliced)
– 1 teaspoon of vanilla extract
– 1 cup of milk
– 1/2 teaspoon of salt
– Optional: whipped cream for serving
Equipment Needed
– 9×13 inch baking dish
– Mixing bowls
– Electric mixer (or whisk)
– Spatula
– Measuring cups and spoons
Step-by-Step Instructions
To start, preheat your oven to 350°F (175°C) – the anticipation of that warm cake baking fills my kitchen with such joy! In a mixing bowl, I blend the softened cream cheese with the powdered sugar until smooth and creamy, then I add in my vanilla extract. This mixture is completely heavenly, and it reminds me of standing by the counter with a spoon, taking playful tastes. Once it’s combined, I like to layer the sliced strawberries evenly on the bottom of my greased baking dish. This is the first step towards the fruity goodness that’ll peek through later. (See the next page below to continue steps…)
Next, it’s time for the cake mix! I sprinkle it evenly over the strawberries, making sure every bit of strawberry is hidden under that comforting layer. In a separate bowl, I mix the melted butter, milk, and salt, creating a delightful blend that I drizzle over the cake mix. There’s something so satisfying about the swirls of butter merging with the dry cake mix. After that, I grab my spatula and gently spread it out to cover everything. No need to go overboard at this stage; it’s all going to meld beautifully as it bakes!
Finally, I pop my baking dish into the preheated oven and let it do its magic for about 45-50 minutes. The scent wafting through my kitchen at this point is simply irresistible! While it’s baking, the edges become lightly golden, and that cream cheese layer bubbles up beautifully, creating a delightful ooze that is pure bliss. When it’s done, I let it cool for a bit before serving it warm, either on its own or topped with a dollop of whipped cream.
Pro Tips for Best Results
I’ve tested this recipe a few ways to make sure it turns out perfect every time, and here are my top tips! Firstly, don’t skip letting the cream cheese soften completely – this really impacts the texture and integration with the sugar. I usually pull it out of the fridge at least an hour before I start baking. Secondly, I like to toss the sliced strawberries in a spoonful of sugar before layering them in the baking dish. This extra step enhances their sweetness and adds an even deeper flavor to the cake.
Another tip is to check your cake’s doneness with a toothpick. Because ovens can vary, I start checking for doneness around the 40-minute mark. You want the middle to be set but still a little gooey for that perfect dump cake texture. It’s all about that balance!
Lastly, I recommend serving it fresh out of the oven for the best taste. The warm, creamy filling mixed with the buttery cake layers delivers such a comforting vibe that I can’t help but go back for seconds (or thirds!).
Common Mistakes to Avoid
One common mistake I’ve made in my baking journey is not smoothing out the cake mix layer enough. It’s tempting just to sprinkle it on top and call it good, but trust me; ensuring an even layer helps it rise and cook properly. A patchy layer can lead to uneven baking. (See the next page below to continue…)
Another pitfall I encountered is underestimating the cooling time. I know how tempting it is to dig in right away, but allowing the cake to cool for 10-15 minutes will help it set perfectly and be easier to serve. If you skip this part, you might end up with a deliciously messy presentation!
Lastly, watch out for overbaking. I learned this the hard way! While we all want that golden brown top, leaving it too long can dry out your dump cake. Keep an eye on that timer and trust your instincts; the smell will guide you too!
Serving Suggestions
When it comes to serving my Strawberry Cheesecake Dump Cake, I find that a scoop of vanilla ice cream on top takes it to a whole new level. The coldness pairs harmoniously with the warm cake, giving you that perfect contrast in textures. If you’re feeling extra festive, drizzle some chocolate sauce over the top before adding your whipped cream.
Another fun idea is to serve slices alongside a fresh berry compote. Just toss some berries in a pot with a bit of sugar and simmer until everything is syrupy. This adds a lovely tartness that complements the cheesecake flavor beautifully.
Lastly, I sometimes like to top it off with fresh mint leaves for that pop of color and a hint of freshness. It makes the dish look so elegant and inviting when serving guests, even if it is a simple cake!
Variations & Customizations
While I adore the classic version, the options are endless! You can easily switch up the fruit to match whatever is in season. Blueberries, raspberries, or even peaches can create delightful twists while maintaining that creamy cheesecake core. For instance, I’ve made a blueberry version that had everyone asking for the recipe!
Another customization I enjoy is adding a hint of lemon zest or almond extract to the cheesecake mixture. This subtly enhances the flavors and gives it a refreshing twist that’s perfect for summer gatherings. Just a teaspoon can brighten up the entire dessert!
If you’d like to try a gluten-free version, there are great gluten-free cake mixes available now that still deliver on taste. Pair that with your favorite gluten-free cookies crumbled on top for a delightful texture contrast, and you’ll have a crowd-pleaser!
How to Store, Freeze & Reheat
Storing this cake is quite simple; I usually cover it with plastic wrap or aluminum foil and keep it in the refrigerator for up to three days. Sometimes, I find that letting it sit overnight allows the flavors to meld even more, making it even tastier on the second day!
If you want to freeze your leftovers (which I highly recommend for that inevitable late-night craving!), just cut the cake into individual portions, wrap each piece tightly in plastic wrap, and then place them in a freezer bag. It’ll stay good for about three months, and it’s so nice to have this treat ready to go when the craving strikes.
Reheating is effortless as well! I simply pop a slice in the microwave for about 20-30 seconds or until warmed through (not too long, or you’ll lose that lovely gooey texture). You might even want to top it with a bit of fresh whipped cream right before serving!
Conclusion
Baking the Strawberry Cheesecake Dump Cake not only fills your kitchen with delicious aromas but also brings a bit of joy to everyone who gets a taste. It’s easy, scrumptious, and the perfect dessert for any occasion. I hope you enjoy making this cake as much as I do; it’s truly a wonderful addition to any table, and the smiles it brings are every bit worth the effort!