
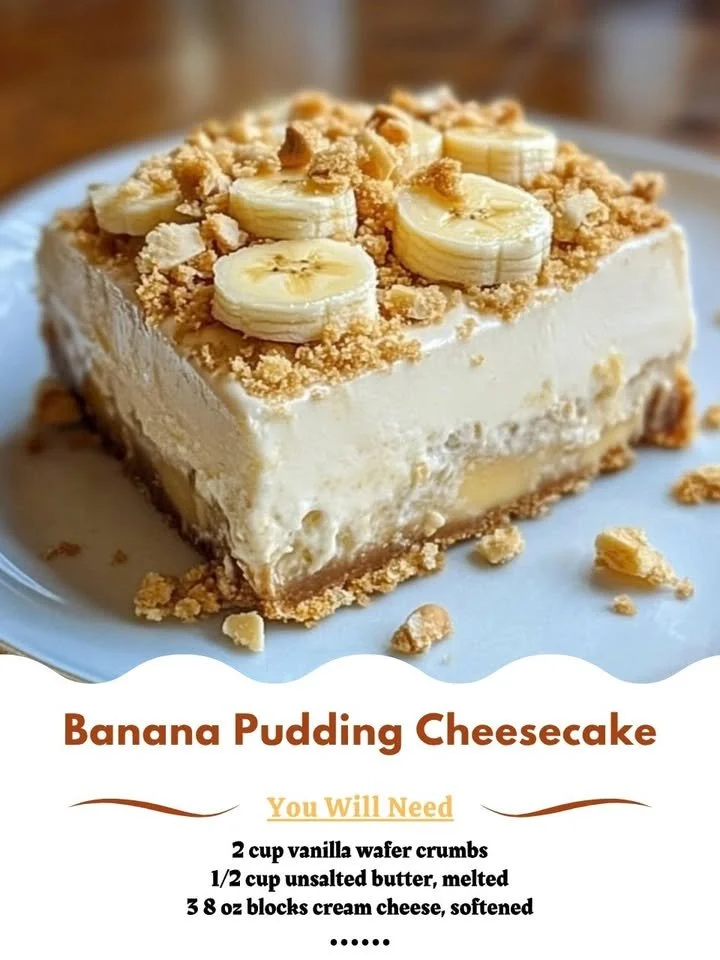
Banana Pudding Cheesecake. It’s the perfect way to bring together the creamy richness of cheesecake with the nostalgic flavors of banana pudding, creating a dessert that’s both comforting and exciting. I can’t wait for you to try this recipe and taste the love that goes into every layer!
Why You’ll Love This Recipe
This Banana Pudding Cheesecake is not just your average cheesecake; it’s a delightful tribute to the beloved banana pudding that many of us grew up with, infused with a rich cheesecake filling. The creamy texture combined with the hints of vanilla and the crunch of the cookies create a harmony that’s utterly irresistible. Plus, it’s an impressive dessert to serve at gatherings or simply to enjoy at home. The best part? It’s quite simple to make! (See the ingredients in the next page below…)
Ingredients
– 1 ½ cups of crushed Nilla wafers (for the crust)
– ½ cup unsalted butter, melted
– 2 cups cream cheese, softened
– 1 cup granulated sugar
– 1 teaspoon vanilla extract
– 3 large eggs
– 1 cup sour cream
– 1 cup ripe bananas, mashed
– 1 package (3.4 oz) instant vanilla pudding mix
– 2 cups milk
– Whipped cream, for topping
– Additional banana slices, for garnish
Equipment Needed
– Mixing bowls
– Electric mixer or whisk
– 9-inch springform pan
– Measuring cups and spoons
– Rubber spatula
– Offset spatula or knife
– Refrigerator for chilling
Step-by-Step Instructions
To start making this scrumptious Banana Pudding Cheesecake, preheat your oven to 325°F (160°C). In a mixing bowl, combine the crushed Nilla wafers with the melted butter, mixing until everything is nicely coated and resembles wet sand. Press this mixture into the bottom of your springform pan to create the crust. Bake for about 10 minutes, then set aside to cool. This crust offers a buttery crunch that complements the creaminess of the filling beautifully. (See the next page below to continue steps…)
Next, in a large bowl, beat the cream cheese and sugar together until smooth and creamy. I love using an electric mixer for this part; it makes the process quick and the texture perfectly smooth. Add in the vanilla extract, and then gently mix in the eggs one at a time, making sure they are fully incorporated. Finally, fold in the sour cream and mashed bananas until everything blends harmoniously. The aroma at this stage is mouthwatering – a sweet banana scent that fills the kitchen!
Pour the cheesecake mixture over the cooled crust and smooth the top with an offset spatula. It’s such a satisfying step, seeing the creamy filling spread evenly. Now, you’ll want to bake the cheesecake for about 55-60 minutes. The center may still jiggle slightly—it will continue to set as it cools. Once it’s done, turn off the oven and crack the door open, letting it cool slowly for about an hour. This step helps prevent cracks in your cheesecake, which we all want to avoid!
After the cheesecake has cooled, refrigerate it for at least four hours, but I often let mine sit overnight. This waiting game is tough, but I promise it’s worth it! It gives the flavors time to meld and ensures a smoother slice when you’re ready to serve. When you’re ready to enjoy it, top with whipped cream and fresh banana slices, and stand back as your friends and family swoon over this delightful dessert.
Pro Tips for Best Results
I tested this cheesecake recipe three different ways to refine the flavors and textures. One of my favorite discoveries was using ripe, sweet bananas; they really enhance the banana flavor. Overripe bananas work best because they’re sweeter and creamier, leading to a better texture in the filling.
Don’t forget to let your cheesecake cool gradually in the oven after baking. I learned this the hard way when I once rushed to cool it on the counter—my beautiful cheesecake developed cracks! A slow cooling period not only helps with cracks but also allows the flavors to settle.
Finally, if you’re looking to serve this dessert for a special celebration, consider making it a day ahead of time. Not only does it save you time on the day of the event, but the flavors deepen and develop overnight, making each bite a little more magical.
Common Mistakes to Avoid
One common mistake I see when making cheesecakes is overmixing the batter once the eggs are added. I once got a tad too excited while mixing, and the result was a cheesecake that puffed up and cracked. It’s best to mix just until the ingredients are combined to maintain a smooth texture. (See the next page below to continue…)
Another pitfall is not letting the cheesecake cool properly before refrigerating. I used to be impatient and would put it straight into the fridge, leading to a dense texture that wasn’t as delightful. Give it time to breathe!
Using the wrong size pan can also cause headaches. A 9-inch springform pan works perfectly for this recipe. If you use a smaller pan, you risk batter spilling over. Trust me, the mess isn’t worth it!
And lastly, if you’ve got leftover bananas, resist the urge to toss them in until right before serving. I once sprinkled banana slices on top before chilling, and they turned brown and unappealing. Instead, slice and add them right before serving for a fresh look!
Serving Suggestions
This Banana Pudding Cheesecake is simply divine on its own, but I also love to serve it with a drizzle of caramel sauce over the top. It adds a delightful sweetness and complements the bananas really well. Plus, the golden caramel contrasts beautifully with the creamy cheesecake.
If you’re feeling fancy, I sometimes layer the cheesecake with extra banana pudding in between layers; it’s a fun surprise when you cut into it! I found that the creamy pudding combined with the cheesecake gives an extra banana punch and makes the dessert all the more indulgent.
Lastly, a sprinkle of crushed Nilla wafers on top not only enhances the presentation but gives that satisfying crunch in each bite. It’s the little details that make a big difference in turning this dessert from delicious to unforgettable!
Variations & Customizations
If you want to switch things up, consider adding a layer of chocolate into your cheesecake. Simply melt some chocolate and swirl it through your batter for a chocolate banana pudding cheesecake! This combination is sinful and sure to impress any chocolate lover.
You can also experiment with different flavors in the crust. Try using crushed graham crackers or even chocolate cookies for a unique twist. Each type of cookie will bring its own flavor profile, making the cheesecake irresistible in its own way.
For those needing a gluten-free option, you can easily make this cheesecake gluten-free by using gluten-free cookies for the crust. I have tested it, and the flavor remains just as delightful, so you won’t miss out on anything!
How to Store, Freeze & Reheat
Storing this cheesecake properly is essential to keep it fresh. I recommend covering it in plastic wrap or transferring it to an airtight container if you plan to keep leftovers. It will stay good in the fridge for about a week, although I bet you won’t have any left by then!
If you want to prep ahead, you can freeze the cheesecake. Just make sure it’s wrapped tightly in plastic wrap and then again in aluminum foil to prevent freezer burn. It can last up to three months in the freezer. When you’re ready to enjoy it, thaw it in the refrigerator overnight before serving.
Reheating isn’t necessary for this dessert, but if you enjoy a warm slice, I suggest popping it in the oven at a low temperature for a few minutes. Just be cautious not to overheat it; nobody wants a rubbery cheesecake!
Conclusion
So there you have it! My heart is full just sharing this recipe with you, as it blends flavors and memories in the most delightful way. I hope you give this Banana Pudding Cheesecake a try and savor every creamy, dreamy bite. Happy baking!