
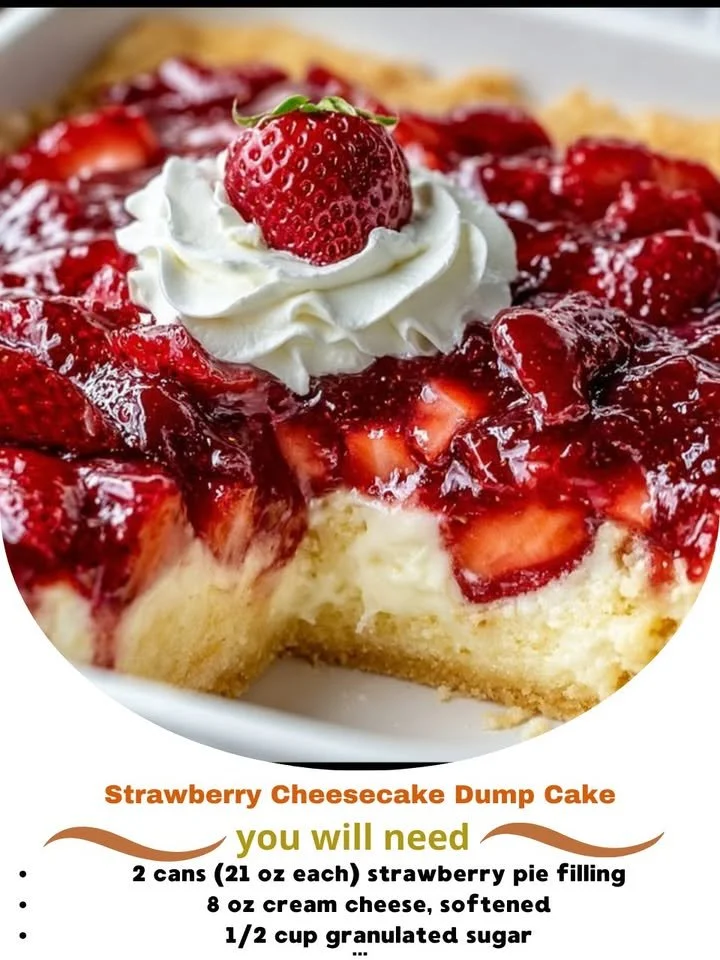
When I think of spring, my mind immediately wanders to bright berries and luscious desserts. One of my all-time favorites is Strawberry Cheesecake Dump Cake. This dish combines the sweet, juicy goodness of strawberries with the creamy, indulgent texture of cheesecake, all topped with a yummy cake layer. It’s simple, quick, and perfect for gatherings or just enjoying as a treat at home. Let me take you through the delicious journey of making this fabulous dessert in my kitchen!
Why You’ll Love This Recipe
You’ll love this recipe because it’s practically foolproof! The best part is how easy it is to throw together. No need for complicated mixing or waiting for dough to rise. Just dump, bake, and enjoy! Plus, who could say no to a dessert that offers both the freshness of strawberries and the richness of cheesecake? It’s a crowd-pleaser that comes together in no time and fills your home with the most delightful aroma. You’ll want to make it again and again, trust me! (See the ingredients in the next page below…)
Ingredients
– 2 cups fresh strawberries, sliced
– 1 cup cream cheese, softened
– 1 cup granulated sugar
– 1 teaspoon vanilla extract
– 1 box (15.25 oz) yellow cake mix
– 1/2 cup unsalted butter, melted
– 1 cup milk
– 1 tablespoon cornstarch
– Optional: whipped cream for serving
Equipment Needed
– 9×13 inch baking dish
– Mixing bowls
– Electric mixer (or a whisk for the adventurous)
– Spatula
– Measuring cups and spoons
Step-by-Step Instructions
First things first, preheat your oven to 350°F (175°C). As I got that going in my kitchen, I took a moment to wash and slice the strawberries. I love how vibrant and fresh they smell! Next, I grabbed a mixing bowl and beat together the softened cream cheese, granulated sugar, and vanilla extract until it became smooth and creamy. This step is essential because it creates that delicious cheesecake filling. Now, if only you could smell my kitchen right now! (See the next page below to continue steps…)
Next, in another bowl, I combined the yellow cake mix with the melted butter and milk, stirring until just mixed. Don’t overdo it; I learned that the hard way. This cake layer is meant to be light and fluffy! Now comes the fun part. In the greased baking dish, I poured half of the cake mixture first, followed by the cream cheese mixture I had just made. Spread it evenly over the cake layer. Lastly, I topped everything off with the remaining cake mixture and the sliced strawberries.
I then placed the whole concoction into the preheated oven and let it bake for about 40-45 minutes. I love the way it makes my whole home smell like a bakery! When the edges turn golden and the center is set, it’s time to take it out. Remember, the dessert will continue to firm up as it cools, so be patient!
Pro Tips for Best Results
From my experience, I’ve found that using fresh strawberries really makes a difference in this recipe. I once tried it with frozen strawberries, and while it was still good, the texture and flavor just didn’t compare. Fresh berries add that vibrant color and flavor that is simply irresistible!
Another tip is to let the cake sit for a bit after it comes out of the oven. I know the temptation to dive right in is undeniable, but letting it cool for at least 30 minutes really allows the flavors to meld together and makes it easier to cut. Plus, you can serve it warm, and the texture is to die for!
Finally, if you want to elevate your dessert, consider adding a drizzle of chocolate or caramel sauce on top when serving. I’ve tried this a couple of times, and wow, what a game-changer! It takes an already fantastic dessert to a whole new level.
Common Mistakes to Avoid
One of the most common mistakes I made when I first started making this dessert was not properly preparing my baking dish. I recommend greasing it generously with butter or non-stick spray. Trust me, you don’t want your lovely creation to stick to the bottom! It can be heartbreaking when you want to serve a slice, and it ends up falling apart. (See the next page below to continue…)
Another pitfall is overworking the cake batter. When I first made this, I whisked it too much, and the cake ended up dense instead of light and fluffy. A gentle fold is all you need to combine those ingredients without activating the gluten in the flour too much.
Also, timing is crucial! I’ve had occasions where I got distracted and left it in the oven a bit too long. Overbaking can turn that lovely cheesecake layer into a rubbery disappointment. So keep an eye on it, and if it’s starting to look golden around the edges but still slightly jiggly in the center, it’s probably perfect!
Serving Suggestions
When it’s time to serve, I love to cut generous squares of this cake and dish them up warm with a dollop of whipped cream on top. The creaminess complements the fruity layer beautifully! You could even add some fresh strawberry slices as a garnish for that extra wow factor.
I also enjoy pairing this dessert with a scoop of vanilla ice cream. The creaminess of the ice cream melting into the warm cake is pure bliss. If you’re feeling adventurous, a sprinkle of crushed graham crackers on top adds a delightful crunch reminiscent of traditional cheesecake crust.
If you have leftovers (because let’s be honest, this is hard to resist), I recommend serving it the next day as a brunch treat. It tastes just as delightful, and if you warm it up just a tad, it feels like a cozy hug in a bowl!
Variations & Customizations
One fun variation I tried was swapping strawberries for blueberries! The flavor was different, but still absolutely delightful. You could also mix in some chocolate chips or nuts for added texture and flavor. Sometimes I sprinkle some shredded coconut on top for an extra twist.
If you’re a fan of citrus, a bit of lemon zest in the cream cheese mixture can brighten up the flavors significantly. I’ve done this when I wanted a fresher, lighter taste, and it’s been a hit every time!
Finally, for those who want a gluten-free option, you can always swap out the yellow cake mix for a gluten-free version. I tried this with a gluten-free vanilla cake mix, and it was excellent. My friends didn’t even notice the difference!
How to Store, Freeze & Reheat
To store your Strawberry Cheesecake Dump Cake, simply cover it with plastic wrap or aluminum foil and place it in the refrigerator. It will be good for about 3-4 days, but trust me, it won’t last that long!
If you’re looking to freeze leftovers, cut them into servings and place them in an airtight container. It freezes well for about 2-3 months. Just remember to label it with the date; trust me, you’ll thank yourself later!
When you’re ready to indulge again, simply thaw it in the refrigerator overnight. To reheat, pop it in the microwave for a few seconds or in the oven at 350°F (175°C) for about 15 minutes. The warm cake resuscitates the flavors, and you’ll feel like you’re enjoying a fresh slice again!
Conclusion
In wrapping up, making Strawberry Cheesecake Dump Cake has become a cherished tradition in my kitchen. It’s an easy recipe that never fails to impress. With its creamy texture, sweet strawberry flavor, and that unmistakable cake layer, it’s no wonder this dessert stays at the top of my favorites list! I hope you enjoy making it just as much as I do. Happy baking!