
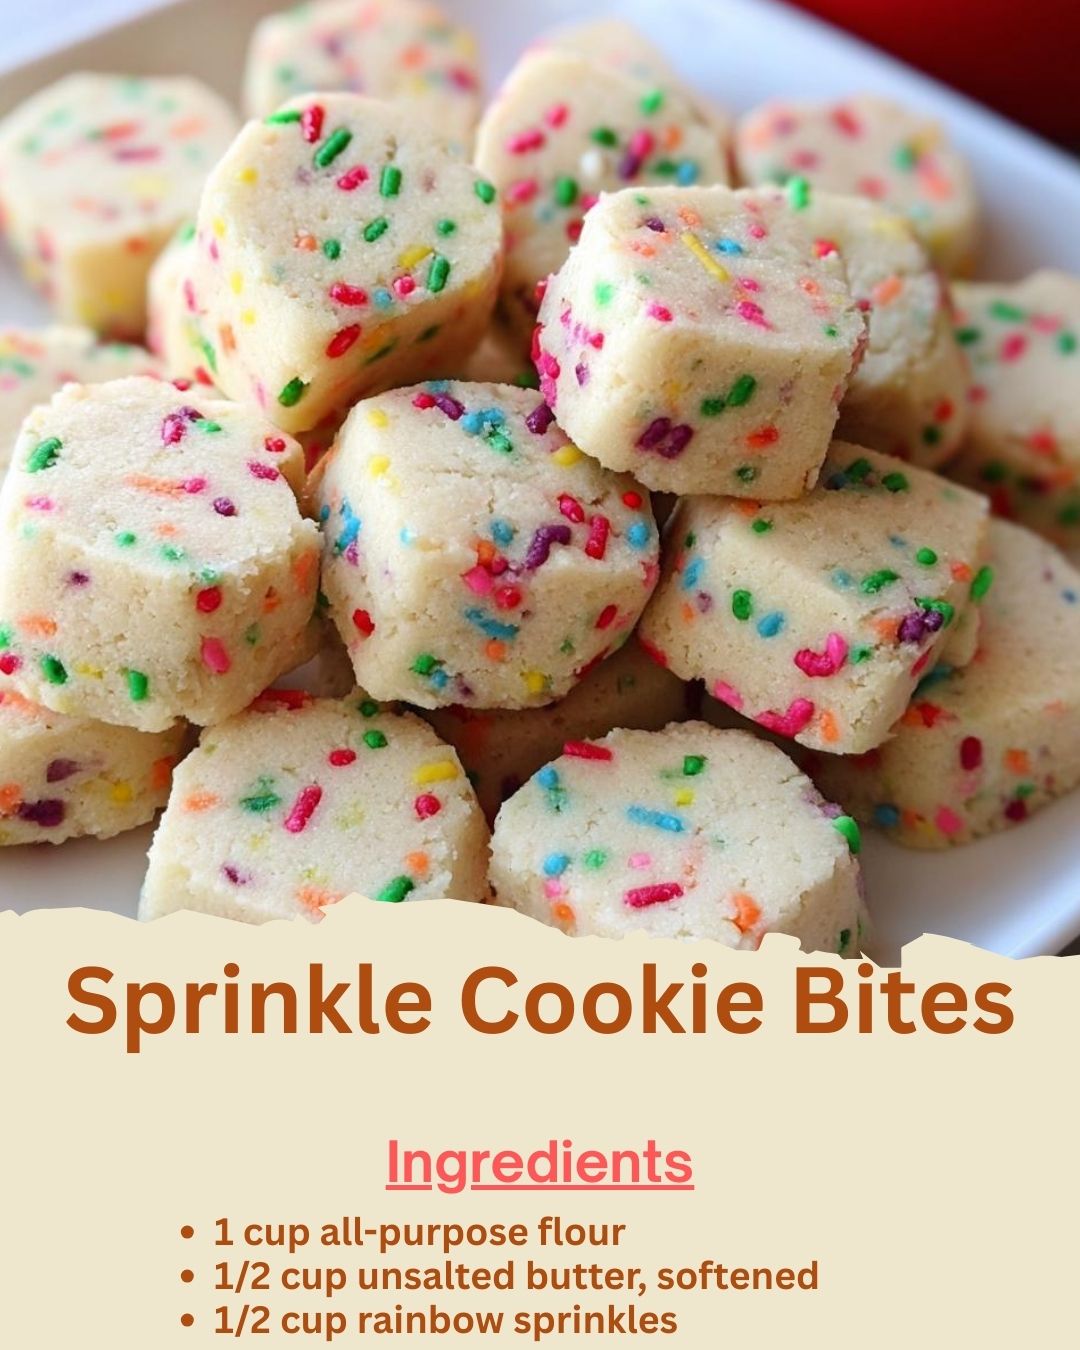
I first whipped up these Sprinkle Cookie Bites on a rainy afternoon with my niece, looking for a project that was quick, easy, and guaranteed to spark joy. As we creamed the butter and sugar, the whole kitchen filled with a sweet, vanilla-kissed aroma, and when we poured in that half-cup of rainbow sprinkles, it was like unlocking a treasure chest of color. The moment they came out of the oven—tiny, golden, and studded with cheerful sprinkles—we couldn’t resist sneaking one while they were still warm. That first bite was pure, buttery happiness, crisp at the edges and tender within, a tiny celebration in cookie form. They’ve been my go-to for instant smiles ever since.
Why You’ll Love This Recipe
You are going to adore this recipe because it is the epitome of simple, joyful baking. With just a handful of ingredients and one bowl, you can create irresistibly cute, delicious cookies that look like a party. They’re perfectly sized for little hands (and for sneaking a few without guilt), and the process is so straightforward that it’s practically foolproof. Whether you’re baking with kids, need a last-minute treat, or just want to brighten your day, these cookie bites deliver a huge dose of fun with minimal effort. They’re little edible happiness bombs.
Ingredients
- 1 cup all-purpose flour
- 1/2 cup (1 stick) unsalted butter, softened
- 1/3 cup granulated sugar
- 1 large egg yolk
- 1/2 cup rainbow sprinkles (jimmies, not nonpareils)
- 1 teaspoon pure vanilla extract
- 1/4 teaspoon baking powder
- 1/8 teaspoon salt (See the next page below to continue…)
Equipment Needed
- Medium mixing bowl
- Handheld electric mixer or sturdy whisk
- Rubber spatula
- Measuring cups and spoons
- Baking sheets
- Parchment paper or silicone baking mats
- Small cookie scoop or teaspoon
- Wire cooling rack
Step-by-Step Instructions
Let’s start with the heart of the cookie: creaming the butter and sugar. I always make sure my butter is truly softened—it should be cool to the touch but leave a deep indent when I press it with my finger. I beat the butter and sugar together in my bowl for a good two minutes. I’ve tried rushing this step, and my cookies turned out dense and greasy. You want the mixture to look pale and fluffy; this incorporates air and is the secret to a light, tender bite. Once it’s beautifully creamy, I beat in the egg yolk and vanilla extract until everything is smooth and well combined.
While that’s mixing, I whisk together my dry ingredients in a separate bowl. I combine the flour, baking powder, and salt. That tiny bit of baking powder is crucial—it gives these little bites a slight lift so they’re not hockey pucks. Now, here’s a tip I learned the hard way: add the flour mixture to the butter mixture all at once. I used to add it gradually, but it’s such a small amount that it’s easier to just dump it in and mix on low speed (or by hand with a spatula) until just combined. You should still see a few streaks of flour.
This is the best part: adding the sprinkles! But not all sprinkles are created equal. You must use “jimmies”—the longer, cylindrical sprinkles. I made the mistake of using tiny nonpareils (the little balls) once, and they bled their color horribly, turning my dough a murky gray-green. Jimmies hold their color and stay vibrant. I fold in the entire half-cup with my spatula, turning the dough into a festive, colorful marvel. The dough will be soft but should hold together when pinched. (See the next page below to continue…)
For baking, I preheat my oven to 350°F and line my sheets with parchment paper. I use a small cookie scoop (about 2 teaspoons) to portion the dough, rolling each scoop briefly in my hands to smooth it into a small ball. I place them about an inch and a half apart on the sheet—they don’t spread a ton. I bake them for 9-11 minutes. The key is to pull them out when the edges are just starting to turn a light golden brown, but the centers still look soft. They will finish setting as they cool on the rack, leaving them crisp on the outside and wonderfully soft inside.
Pro Tips for Best Results
My top tip is all about the sprinkles. I tested three kinds: nonpareils, jimmies, and sanding sugar. Jimmies were the clear winner. Nonpareils bled color, and sanding sugar just dissolved. For the brightest, most festive cookies that won’t turn your dough a strange color, jimmies are non-negotiable. Also, don’t skip the salt! It might seem like a tiny amount, but it makes a huge difference by balancing the sweetness and making the buttery flavor sing. I’ve made them without it, and they tasted flat.
Chilling the dough, even briefly, is a game-changer for texture. After I portion the dough balls, I pop the entire baking sheet into the freezer for 10 minutes before baking. I’ve tried baking them right away, and they spread a bit more and were slightly thinner. That short chill helps them keep their perfect, plump, round shape. If you’re in a rush, you can skip it, but for the ideal cookie bite texture, trust me, it’s worth the short wait.
Use an egg yolk, not a whole egg. I tested this both ways, and the yolk-only version is superior. The white adds extra liquid and can make the cookies puff and spread differently, sometimes leading to a drier texture. The yolk adds richness and tenderness without excess moisture, giving you that perfect, melt-in-your-mouth crumb. Save the white for an omelet or a cocktail!
Common Mistakes to Avoid
The first mistake I made was using cold butter. I was impatient and tried to cream rock-hard butter with the sugar. Not only did it strain my mixer, but it never achieved that light, fluffy consistency, and my baked cookies were dense and tough. Properly softened butter is the absolute foundation of this recipe. If you forget to take it out, you can cut it into small cubes and let it sit for 15-20 minutes—it works in a pinch.(See the next page below to continue…)
Overmixing the dough after adding the flour is a sure path to tough cookie bites. Once you add the dry ingredients, mix only until the flour disappears. I used to keep mixing to make sure it was “perfectly smooth,” and I ended up with cookies that were more crumbly than tender. The less you work the dough, the more delicate and delicious the final texture will be. A few remaining flour streaks are okay—they’ll get worked in when you fold in the sprinkles.
Using the wrong type of sprinkle will lead to color disaster. As I mentioned, nonpareils (the little balls) bleed their dye into the dough as soon as they get wet from the butter and egg. My first batch looked like they were made with murky, tie-dyed dough instead of bright, cheerful batter. It’s a sad sight. Always check your sprinkle package and look for the word “jimmies” or the longer, rod-shaped sprinkles.
Overbaking is the quickest way to lose the magic of these tiny treats. Because they’re so small, they go from perfect to overdone in a minute. I once left them in for just 90 seconds too long, and the bottoms got too dark and the texture turned dry. Set a timer for 9 minutes and check them. They should look just set around the edges but soft on top. They will continue to bake on the hot sheet, so err on the side of underdone.
Serving Suggestions
I love serving these cookie bites piled high in a colorful bowl or mason jar. They’re the perfect grab-and-go snack for playdates, picnics, or movie nights. For a kid’s party, I sometimes serve them with a side of vanilla frosting or whipped cream for dipping—it turns them into an interactive activity and doubles the fun. Their small size makes them ideal for little fingers and for creating ice cream cookie sandwiches with a single scoop.
For a more elegant, yet still playful, presentation at a baby shower or birthday brunch, I skewer two or three cookie bites onto colorful paper straws or lollipop sticks and stand them up in a vase or a piece of floral foam. It creates a stunning and edible “sprinkle cookie bouquet” that always gets compliments and makes for a wonderful centerpiece that guests can snack on.
If I’m gifting them, I love using clear cellophane bags. I’ll fill a bag with a generous handful, tie it with a bright ribbon, and attach a homemade tag. They also make wonderful “thank you” treats for teachers, neighbors, or hostesses. Their cheerful appearance is a gift in itself, and because the recipe is small-batch, it’s easy to whip up a few gifts in no time.
Variations & Customizations
You can easily tailor these to any holiday or theme by switching the sprinkle colors. For Christmas, I use red and green jimmies; for the Fourth of July, red, white, and blue. I’ve even made pastel versions for Easter. The base recipe stays exactly the same—just swap out the rainbow sprinkles for your chosen color scheme. It’s the easiest way to make a festive treat for any occasion.
For a different flavor profile, try replacing the vanilla extract with another extract. I’ve used almond extract (just 1/2 teaspoon, as it’s stronger) for a lovely, bakery-style flavor. Lemon or orange extract is also fantastic, especially with corresponding colored sprinkles. You could even fold in a teaspoon of citrus zest for an extra burst of freshness. It’s a simple swap that makes the cookie bites taste completely new.
If you want to add a little texture, try a mix-in. After folding in the sprinkles, you can gently fold in 1/4 cup of mini chocolate chips, toffee bits, or even finely chopped dried fruit. Just keep any add-ins small so they don’t overwhelm the petite size of the cookie bites. A mix of sprinkles and mini white chocolate chips is a particular favorite in my house.
How to Store, Freeze & Reheat
To keep them fresh, I store the completely cooled cookie bites in an airtight container at room temperature. They will stay perfectly soft and delicious for up to 5 days. If I’m layering them, I place a piece of parchment paper between layers to prevent them from sticking together. I do not recommend storing them in the refrigerator, as it can dry them out and make them stale faster.
These cookie bites freeze exceptionally well, which I do often for last-minute needs. Once completely cool, place them in a single layer in a freezer bag or container. They will keep for up to 3 months. You can also freeze the unbaked dough balls! Portion them onto a tray, freeze until solid, then transfer to a bag. Bake from frozen, adding 1-2 minutes to the bake time. Having a stash of ready-to-bake dough in the freezer is a lifesaver.
Reheating is a breeze and makes them taste freshly baked. To revive a batch, I simply spread them on a baking sheet and warm them in a 300°F oven for 3-4 minutes. For just one or two, 5-7 seconds in the microwave does the trick, softening them perfectly. I don’t recommend microwaving a whole batch, as they can become unevenly soft.
Conclusion
Baking these Sprinkle Cookie Bites is a little act of kitchen magic—transforming a few simple ingredients into tiny, joyful treasures. They never fail to brighten my day and bring smiles to anyone who tries them. I hope this recipe brings a pop of color and a lot of happiness to your kitchen, just as it has to mine. Now, go grab those rainbow sprinkles and get ready to make some edible sunshine. Happy baking