
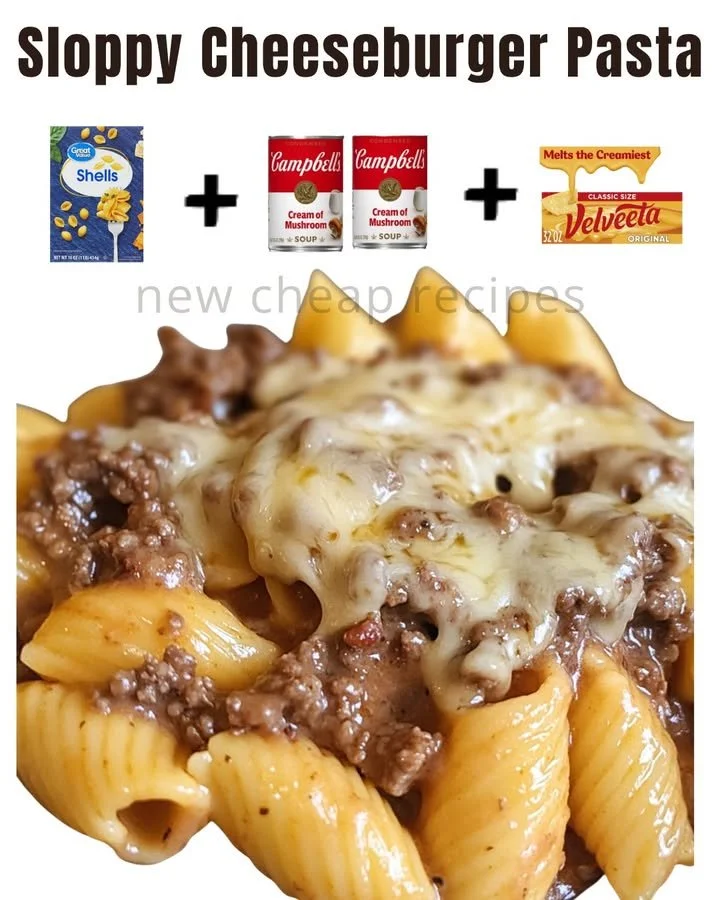
I stumbled upon the recipe for Sloppy Cheeseburger Pasta one rainy day while looking for something comforting to make. As I read through the ingredients, I could already picture my kitchen filled with mouthwatering aromas of beef, cheese, and spices. The thought of mixing my two all-time favorite comfort foods made my heart skip a beat! When I finally sat down to enjoy this dish, I felt wrapped in a cozy blanket of flavors, and I knew I had found a new favorite meal that would be a regular in my kitchen.
Why You’ll Love This Recipe
You’re going to fall in love with this recipe for so many reasons! First, it combines the rich, savory flavors of a cheeseburger with the comforting creaminess of pasta. It’s quick and easy to whip up, making it perfect for busy weeknights or lazy weekends when you want something to satisfy your cravings without spending hours slaving over the stove. Plus, the best part is you can make it all in one pot—less mess and more time to enjoy every cheesy bite. Trust me, you’ll be coming back for seconds!
Ingredients
- 1 pound ground beef or turkey
- 12 ounces pasta (elbow macaroni works great)
- 1 cup shredded cheddar cheese (See the next page below to continue…)
- 1 cup diced tomatoes (canned or fresh)
- 1 cup beef broth
- 1 cup milk
- 1 tablespoon mustard
- 1 tablespoon Worcestershire sauce
- 1 teaspoon garlic powder
- 1 teaspoon onion powder
- Salt and pepper to taste
Equipment Needed
- Large skillet or dutch oven
- Wooden spoon or spatula
- Measuring cups and spoons
- Colander (for draining pasta)
- Cheese grater (if shredding your own cheese)
Step-by-Step Instructions
When I start making Sloppy Cheeseburger Pasta, I first brown the ground beef in a large skillet over medium heat. I make sure to break it up with my wooden spoon as it cooks, keeping an eye out for the magic moment when it turns a beautiful golden brown. This usually takes about 5 to 7 minutes. The sizzling sounds and the rich aroma of seasoned beef immediately transport me to memory lanes filled with backyard barbecues.
Once the meat is cooked, I drain any excess grease (don’t skip this step; otherwise, the dish can become too oily). Then, I toss in the diced tomatoes, beef broth, milk, mustard, Worcestershire sauce, garlic powder, and onion powder. I stir everything together to ensure the beef is well mixed with the liquid ingredients. The colors come alive, and the smell? Oh, it’s heavenly! This part takes me back to the times my mom would let me help her in the kitchen, stirring together sauces that always seemed to taste better when I was part of them.
Next, I bring the mixture to a gentle simmer and add the pasta. I let them cook together, allowing the pasta to absorb all those fabulous flavors. This usually takes about 8 to 10 minutes. I remind myself constantly to stir occasionally to prevent any pasta from sticking to the bottom. Trust me, this step makes a difference—no one wants a clump of gooey mess on their plate! (See the next page below to continue…)
As the pasta reaches al dente perfection, I remove the skillet from the heat and gently fold in the shredded cheese. This is the moment that truly transforms the dish—I get so giddy as I watch the cheese melt and ooze into every crevice. Once it’s all melted and creamy, it’s finally time to dish out and enjoy this gooey, cheeseburger-inspired feast!
Pro Tips for Best Results
I’ve tested this recipe three different ways regarding the type of cheese I use. And if I may offer some advice: always go for freshly shredded cheese instead of pre-packaged. The pre-shredded stuff isn’t as creamy when melted, which is crucial for that comforting cheesy texture we all love!
Also, don’t skip the Worcestershire sauce; it adds a depth of flavor that truly elevates the dish. I made the mistake of not using it once, and the pasta definitely missed that savory punch. Trust me; it’s a small but mighty ingredient!
Lastly, if you find yourself with some leftover pasta, which doesn’t happen often when I serve it, don’t panic! Just reheat it slowly on the stovetop with a splash of milk to revive that creamy goodness.
Common Mistakes to Avoid
I made the mistake of cooking the pasta separately the first time I tried this dish—big no-no! It ended up too dry and didn’t meld well with the other ingredients. By cooking everything together, you’ll ensure the pasta soaks in that delicious cheesy flavor, resulting in a perfect creamy texture. (See the next page below to continue…)
Another error I see people make is not tasting as they cook. I know it can be easy to rely solely on measurements and assume it’s perfect, but sometimes, you need a little more salt or seasoning to truly bring out the flavors. So, trust your taste buds!
Don’t use low-quality ground meat either. I learned the hard way that it can alter the taste significantly. Opt for ground beef or turkey with a decent fat content for a juicier, more flavorful pasta.
Lastly, I’ve done this before—trying to rush the melting cheese process. Patience is key; let it melt slowly after you’ve added it to the dish. It will create that luscious, gooey texture that makes every bite of this recipe worth savoring.
Serving Suggestions
I like serving my Sloppy Cheeseburger Pasta with a side of buttery garlic bread for that perfect contrast. The crispy edges balance out the creamy pasta, turning my plate into a hearty meal that feels complete. Plus, who doesn’t love dipping bread into cheesy goodness?
Another favorite of mine is a simple green salad with vinaigrette. It adds a refreshing crunch that perfectly complements the rich flavors of the pasta. The acidity from the dressing helps cut through the heaviness, leaving you satisfied without being overwhelmed.
Finally, for an extra kick, I sometimes sprinkle a dash of crushed red pepper flakes on top before serving. It adds a delightful heat that pairs so well with the cheeseburger flavor!
Variations & Customizations
I’ve experimented with this dish multiple times and found that swapping in different meats can yield fantastic results. For instance, ground chicken or sausage can give a completely different spin while enhancing the flavor profile.
If you’re looking for a vegetarian option, I’ve replaced the meat with lentils or even black beans. They absorb the delicious flavors beautifully and provide a hearty texture without losing the core of the dish. My friends who don’t eat meat loved it just as much!
For those who like a little extra crunch, I’ve also seen people top their pasta with crispy bacon bits or crumbled potato chips. It adds a lovely contrast, and honestly, who doesn’t love bacon?
How to Store, Freeze & Reheat
When I have leftovers (which is rare!), I store them in an airtight container in the fridge for up to 3 days. Just make sure it cools down to room temperature before sealing, as it helps prevent moisture buildup, which can make the pasta soggy.
If you want to freeze some, I suggest portioning it out in smaller containers. My experience shows that it keeps well for about a month. Just remember to thaw it in the fridge overnight before reheating for the best texture.
To reheat, I prefer using a skillet over medium heat, adding a splash of milk to bring back the creaminess. Stir occasionally to ensure it’s heated evenly. I’ve microwaved it before, but I always end up with dry, rubbery pasta. The stovetop method is definitely the way to go!
Conclusion
So there you have it—my take on the delightful Sloppy Cheeseburger Pasta! I hope you enjoy making this dish as much as I do. It’s become a cherished recipe in my kitchen, and I can’t wait for you to experience the warm, cheesy goodness that brings so much happiness to the table. Happy cooking!