
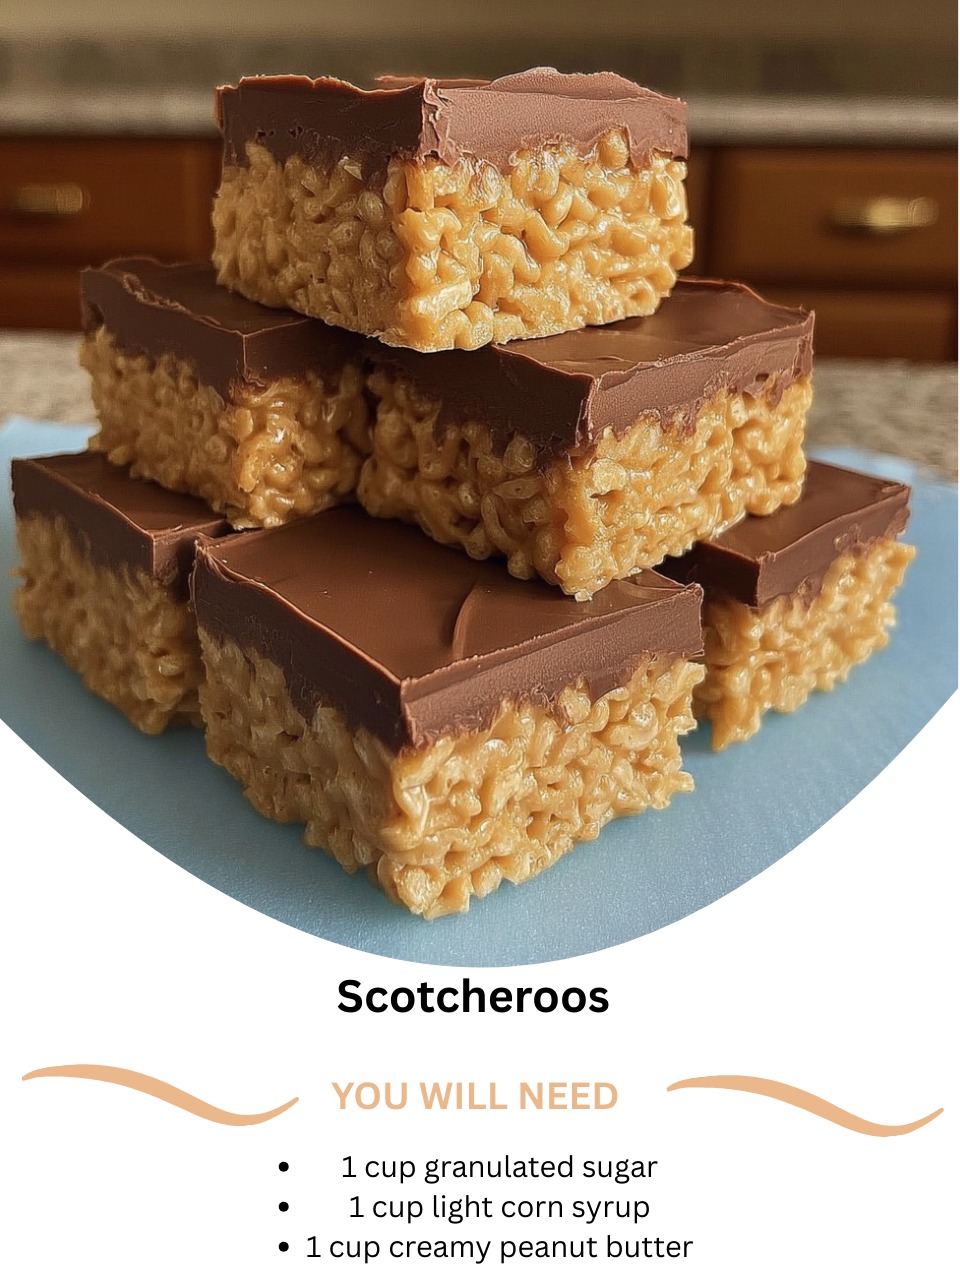
My first encounter with Scotcheroos was at a Midwestern potluck, a pan of golden, crispy bars topped with a glistening cloak of chocolate and butterscotch. I took one skeptical bite and was immediately hooked—the incredible crunch, the salty-sweet peanut butter binding, that rich topping. Making them at home for the first time, the process felt like kitchen alchemy. Melting the sugar and corn syrup into a bubbling syrup, then stirring in the peanut butter created a scent so rich and inviting it pulled my whole family into the kitchen. Pressing that warm, sticky cereal mixture into the pan and then pouring over the melted chips felt like crafting something magical. When I finally cut a square, that satisfying snap and the perfect layering of textures told me I’d found a forever favorite.
Why You’ll Love This Recipe
You will absolutely love this recipe because it delivers the most incredible textural experience and addictive flavor with almost zero chance of failure. There’s no baking involved, just some stovetop melting and stirring, making it a perfect project for any skill level or a hot summer day. The combination of crispy cereal, chewy peanut butter caramel, and the smooth chocolate-butterscotch topping is pure genius. They are sturdy, travel perfectly for potlucks, and have a nostalgic charm that makes them a guaranteed crowd-pleaser for kids and adults alike. Once you try a homemade Scotcheroo, you’ll never look at a regular rice cereal treat the same way again.
Ingredients
- 1 cup granulated sugar
- 1 cup light corn syrup
- 1 cup creamy peanut butter (use conventional like Jif or Skippy, not natural)
- 1 teaspoon pure vanilla extract
- 6 cups crisp rice cereal (like Rice Krispies)
- For the Topping:
- 1 cup semi-sweet chocolate chips
- 1 cup butterscotch chips (See the next page below to continue…)
Equipment Needed
- Large saucepan or Dutch oven
- 9×13 inch baking pan
- Parchment paper or aluminum foil
- Large heatproof spatula or wooden spoon
- Large mixing bowl (optional, but helpful)
- Medium microwave-safe bowl or small saucepan
- Butter or cooking spray for greasing
Step-by-Step Instructions
I always begin by preparing my pan. I line a 9×13 inch baking pan with parchment paper, leaving an overhang on the long sides—this is my lifeline for easy removal later. I lightly grease the parchment with butter or cooking spray. Then, I measure out all six cups of crisp rice cereal into my largest mixing bowl. Having everything ready is key because once the syrup is hot, you need to move quickly. In my large saucepan, I combine the granulated sugar and light corn syrup. I cook this over medium heat, stirring constantly, until the mixture just begins to bubble around the edges and the sugar is completely dissolved. This only takes a few minutes. I don’t let it come to a full, rolling boil.
As soon as the sugar is dissolved and the syrup is hot, I remove the saucepan from the heat. Immediately, I stir in the entire cup of creamy peanut butter and the vanilla extract. I stir vigorously until the peanut butter is completely melted and the mixture is smooth, glossy, and homogenous. The smell is absolutely intoxicating—like the inside of a perfect peanut butter cup. I then immediately pour this hot peanut butter syrup over the bowl of crisp rice cereal.
Working swiftly with my heatproof spatula, I fold the syrup into the cereal. I’m gentle but thorough, making sure every single piece of cereal gets coated in that glossy, sticky peanut butter mixture. The cereal will start to lose its “snap” sound as it gets coated. Once it’s evenly mixed, I quickly turn the mixture out into my prepared pan. Now, here’s a crucial step: I place a sheet of parchment paper or wax paper on top and use my hands to press the mixture firmly and evenly into the pan, getting it into all the corners. A good, hard press here ensures the bars are solid and won’t crumble when cut.(See the next page below to continue…)
I let the base sit for about 15-20 minutes to cool slightly while I make the topping. In a medium microwave-safe bowl, I combine the chocolate chips and butterscotch chips. I microwave them in 30-second bursts, stirring well after each, until they are completely melted and smooth. Alternatively, you can melt them together in a small saucepan over very low heat. I then pour this melted chip mixture over the slightly cooled cereal base. Using an offset spatula or the back of a spoon, I quickly spread it into a smooth, even layer that covers the entire surface. I let the pan sit at room temperature until the topping is completely set, which takes about 1-2 hours.
Pro Tips for Best Results
The type of peanut butter is non-negotiable. I tested this with natural peanut butter (the kind that separates), and the bars were oily, didn’t bind properly, and were a crumbly mess. Conventional, shelf-stable creamy peanut butter has the right emulsifiers and consistency to create that perfect, chewy, binding “glue” that holds the Scotcheroos together. Trust me on this one—it makes a huge difference.
Press, press, press! When transferring the cereal mixture to the pan, don’t just spread it. Use a sheet of parchment on top and really lean into it with the palms of your hands or the bottom of a flat measuring cup. A firmly packed base is the difference between a Scotcheroo you can pick up and a pile of peanut butter cereal. This ensures clean cuts and the right dense, crunchy-chewy texture.
For the topping, don’t overheat the chips. Chocolate and butterscotch chips can scorch or seize if zapped for too long. The low-and-slow method (30-second bursts with stirring) is foolproof. If the mixture seems thick, you can stir in a teaspoon of vegetable oil to make it more fluid for easier spreading.
Common Mistakes to Avoid
The most common mistake is letting the sugar-corn syrup mixture come to a rolling boil. If you boil it, it will become too hard when it cools, resulting in bars that are jaw-breakingly tough instead of delightfully chewy. My first batch was like peanut brittle with cereal in it because I got distracted. Don’t do what I did! Heat it just until the sugar dissolves and it starts to bubble at the edges, then immediately remove it from the heat.(See the next page below to continue…)
Don’t add the peanut butter to the syrup while the pan is still on the heat. The direct heat can cause the peanut butter’s oils to separate, making the mixture greasy. Always remove the saucepan from the burner first, then stir in the peanut butter and vanilla off the heat. The residual warmth is more than enough to melt it smoothly.
Another error is not coating the cereal quickly enough. The peanut butter syrup begins to set as it cools. If you dawdle, it will become harder to mix and you’ll end up with dry, uncoated cereal bits and a lumpy base. Have your cereal ready in the bowl and mix with purpose as soon as you pour the syrup over it.
Finally, avoid cutting the bars before the topping is fully set. If the chocolate-butterscotch layer is still soft, your knife will drag and make a mess. Be patient and wait until the topping is completely firm at room temperature. For the cleanest cuts, you can even chill the whole pan in the fridge for 20 minutes before slicing.
Serving Suggestions
I love cutting these into neat squares or rectangles and piling them high on a simple platter. They are the ultimate potluck, picnic, or bake sale treat—sturdy, non-messy, and always a hit. For a party, I sometimes cut them into smaller, bite-sized pieces and serve them in mini cupcake liners.
Scotcheroos are fantastic with a cold glass of milk—the classic pairing that never fails. They’re also a wonderful afternoon pick-me-up with a cup of coffee; the sweetness plays nicely against the bitterness. For a fun twist, I’ve even crumbled one over a bowl of vanilla ice cream.
For gifting, I arrange them in a festive tin or a clear cellophane bag tied with a ribbon. They travel incredibly well without smushing or melting (as long as it’s not a hot car), making them the perfect homemade gift to mail or hand-deliver.
Variations & Customizations
For a different flavor profile, you can swap the butterscotch chips in the topping for peanut butter chips or white chocolate chips. A topping of all dark chocolate is also delicious for a richer, less sweet finish. You can even sprinkle the wet topping with a little flaky sea salt for a gourmet touch.
Add some mix-ins to the cereal base for extra texture and flavor. I’ve stirred in ½ cup of roasted, salted peanuts or ½ cup of mini chocolate chips along with the cereal. For a seasonal twist during the holidays, you can use festive-colored cereal or sprinkle the topping with holiday sprinkles before it sets.
If you’re a fan of “Scotch” flavors, add ¼ teaspoon of butter extract to the peanut butter syrup for an extra-buttery note. For a chocolate-peanut butter version, you can replace one cup of the crisp rice cereal with chocolate-flavored crisp rice cereal.
How to Store, Freeze & Reheat
Once set and cut, I store Scotcheroos in an airtight container at room temperature. They keep perfectly for up to 5 days. I separate layers with parchment paper if I need to stack them. I do not recommend refrigerating, as the cold can cause the topping to sweat and the cereal to lose its crispness.
These bars freeze exceptionally well. Wrap individual bars or the whole block tightly in plastic wrap and then place in a freezer-safe bag. They will keep for up to 3 months. Thaw at room temperature for about an hour before serving. The texture holds up beautifully.
Since they are no-bake, there is no need to reheat. They are best enjoyed at room temperature or cool. If your kitchen is very warm and the topping seems soft, you can firm them up in the refrigerator for 15 minutes, but let them come back to room temp for the ideal chewy-crispy texture.
Conclusion
Scotcheroos are my secret weapon for effortless, guaranteed delight. They’ve taught me that sometimes the most legendary recipes are also the simplest, relying on fantastic textures and bold, comforting flavors. I hope you’ll give them a try, experiencing the fun of that sticky, peanut-buttery stir and the reward of that perfect, crisp-chewy bite. They’re more than a bar; they’re a bite of pure, uncomplicated joy and a surefire way to make any occasion a little sweeter.