
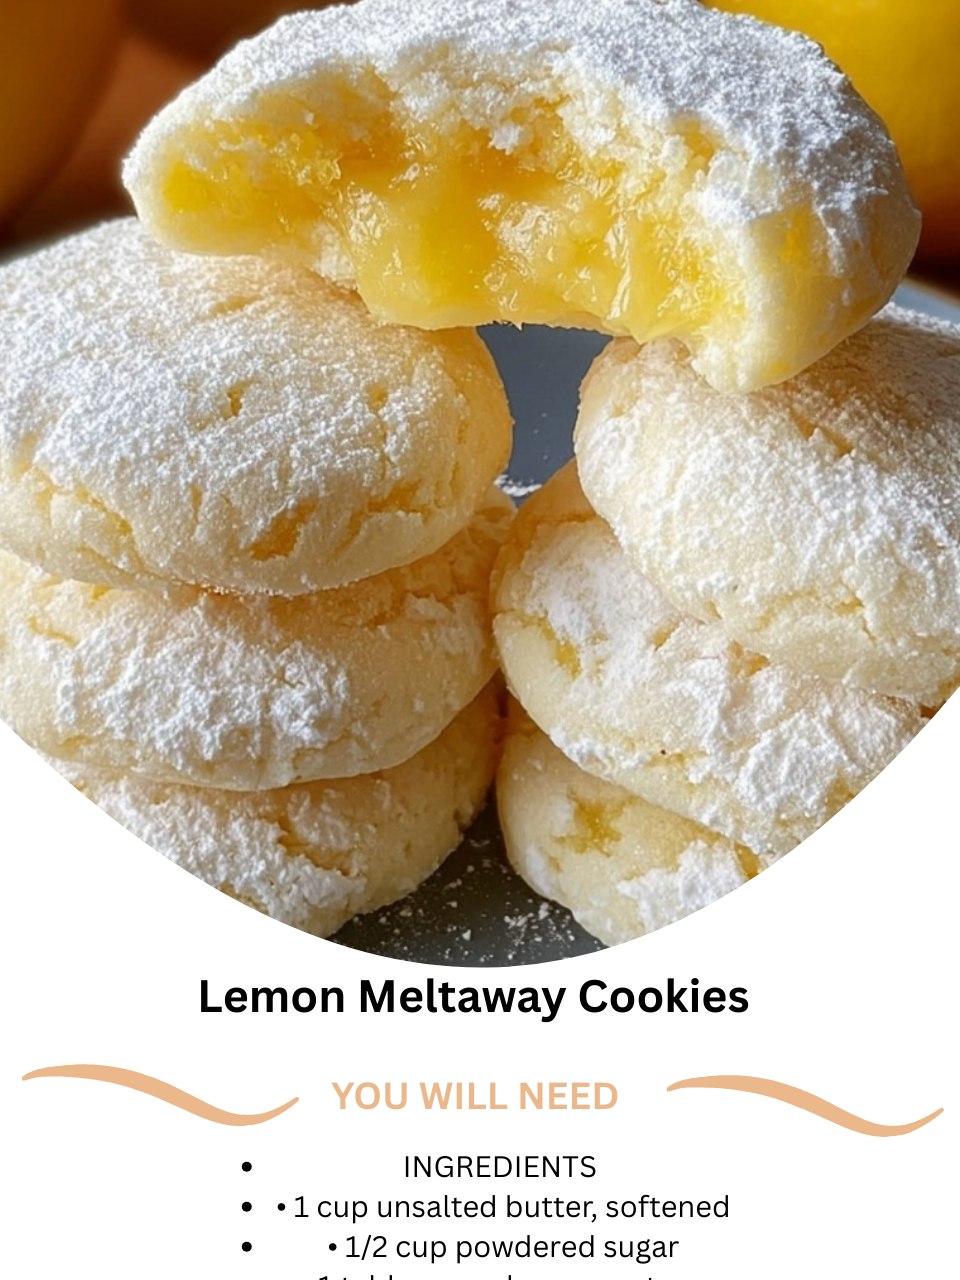
I first discovered Lemon Meltaway Cookies on a dreary winter afternoon, desperate for a taste of sunshine. As I creamed the butter and sugar, the fresh lemon zest I added released a bright, citrusy perfume that instantly lifted my spirits. My kitchen smelled like a spring morning, full of promise. The dough came together like a dream, soft and fragrant. When I pulled the first pale, golden-tinged batch from the oven and gave them their snowy coat of powdered sugar, they looked like little clouds. That first bite was pure magic: a crisp edge that gave way to a tender, buttery center that literally dissolved on my tongue, leaving behind the perfect, sunny kiss of lemon. They were an instant obsession.
Why You’ll Love This Recipe
You will fall head over heels for this recipe because it delivers an extraordinary sensory experience with a surprisingly simple process. The contrast between the crisp, sugary exterior and the ethereally tender, melting interior is nothing short of delightful. That burst of bright, fresh lemon flavor cuts through the rich butteriness, making these cookies feel both indulgent and refreshing. They are elegant enough for a tea party, easy enough for a weeknight treat, and guaranteed to impress anyone who tries them. In a world of dense, chewy cookies, these light, citrusy melts are a glorious standout.
Ingredients
- 1 cup (2 sticks) unsalted butter, softened at cool room temperature
- ½ cup powdered sugar, plus 1 cup more for rolling/dusting
- Zest of 2 large lemons (about 2 tablespoons packed)
- 2 tablespoons fresh lemon juice (about 1 large lemon)
- 1 teaspoon pure vanilla extract
- 2 ¼ cups all-purpose flour, spooned and leveled
- ¼ cup cornstarch (this is the secret for the “meltaway” texture—don’t skip it!)
- ¼ teaspoon salt (See the next page below to continue…)
Equipment Needed
- Electric hand mixer or stand mixer
- Large mixing bowl
- Zester or microplane
- Juicer
- Baking sheets
- Parchment paper or silicone baking mats
- Measuring cups and spoons
- Wire cooling rack
- Fine-mesh sieve
Step-by-Step Instructions
I always begin by zesting my lemons first, taking care to get only the bright yellow zest and not the bitter white pith underneath. The scent that fills the air is instant therapy. In my mixing bowl, I combine the softened butter and ½ cup of powdered sugar. I beat them together on medium speed for a minute, then add the fragrant lemon zest. This is where I turn the mixer to medium-high and let it run for a full 3-4 minutes. I watch as the mixture becomes incredibly pale, fluffy, and almost whipped. This aeration is the first key to the cookie’s delicate texture. I then beat in the fresh lemon juice and vanilla extract. The mixture might look slightly curdled at this point, but that’s perfectly fine—it will come together with the dry ingredients.
In a separate bowl, I whisk together the flour, cornstarch, and salt. The cornstarch is non-negotiable; it’s what gives these cookies their signature tender, sandy, melt-in-your-mouth quality. With my mixer on low, I gradually add the dry ingredients to the butter mixture in two or three additions. I mix only until the dough just comes together and begins to pull away from the sides of the bowl. It will be soft, slightly sticky, and incredibly fragrant. I turn the dough out onto a piece of plastic wrap, shape it into a flat disc, wrap it tightly, and chill it in the refrigerator for at least 1 hour. This firms up the butter, making the dough rollable and preventing excessive spreading.
Once chilled, I preheat my oven to 350°F (175°C) and line my baking sheets with parchment. I take the dough out and let it sit for 5-10 minutes to become just pliable enough to roll. On a lightly floured surface, I roll it out to about ¼-inch thickness. Using a small round or fluted cookie cutter (about 1.5 to 2 inches), I cut out the cookies, placing them about 1 inch apart on the sheets. I gather the scraps, re-roll once, and cut more. The dough bakes best when it’s cold, so if my kitchen is warm, I’ll pop the sheet of cut cookies into the freezer for a quick 10-minute chill before baking.(See the next page below to continue…)
I bake the cookies for 10-12 minutes, one sheet at a time on the center rack. They are done when the edges are just beginning to turn a faint, golden color. The tops should remain pale. They will not look fully set—this is crucial. Over-baking is the enemy of the “meltaway.” I let them cool on the baking sheet for exactly 5 minutes; they are too fragile to move when hot. After that, I transfer them to a wire rack to cool completely. While still slightly warm, I give them their first light dusting of powdered sugar using my sieve. Once completely cool, I give them a second, more generous dusting for that perfect snowy finish.
Pro Tips for Best Results
First, the lemon. For the most vibrant flavor, use the zest and juice of fresh, room-temperature lemons. I tested this with bottled lemon juice and the zest from a jar, and the flavor was flat and one-dimensional in comparison. The natural oils in fresh zest make all the difference. Roll your lemons on the counter firmly before juicing to get the most juice.
The cornstarch is the silent hero. I once tried making these without it, using all flour. The cookies were good, but they had a standard shortbread texture—they didn’t “melt.” The cornstarch inhibits gluten formation and creates that unique, fine, almost powdery tenderness that defines a true meltaway. Don’t even think about leaving it out.
Chilling the dough properly is essential. A warm dough will spread too much, resulting in thin, crisp cookies rather than tender, plump ones. If the dough gets too soft while you’re rolling, don’t hesitate to slide it onto a tray and pop it back in the fridge for 15 minutes. Patience here guarantees the perfect shape and texture.
Common Mistakes to Avoid
The biggest mistake is over-creaming or under-creaming the butter and sugar. Under-creaming (less than 3 minutes) results in a dense cookie. But I also made the mistake once of creaming for too long (over 6 minutes) on too high a speed, which incorporated too much air and caused the cookies to puff up and then collapse, creating a fragile, crumbly texture. The sweet spot is 3-4 minutes on medium-high until light and fluffy. Don’t do what I did—set a timer!(See the next page below to continue…)
Don’t roll the dough too thin. At ¼-inch thickness, you get the ideal balance of a slight crisp edge and that tender, melting center. If you roll them thinner, they will bake through too quickly and become brittle little crisps. If you roll them thicker, they may not bake evenly. Use rolling pin guides or two dowels if you have them for perfect, even thickness.
Another error is over-baking. These cookies rely on a gentle bake. They are done when you see the first hint of gold on the very bottom edge. If you wait for the tops to color or for them to look fully firm, they will be dry and lose their magical melting quality. They continue to set as they cool on the sheet.
Finally, avoid dusting with powdered sugar when the cookies are piping hot. The heat will melt the sugar into a sticky, clear glaze instead of a pretty, snowy dusting. Wait until they are just warm (after the 5-minute rest on the sheet) for the first light dusting, and do the final coat when they are completely cool.
Serving Suggestions
I love serving these cookies on a delicate, vintage plate alongside a pot of hot tea—Earl Grey or a chamomile blend are perfect. Their lightness and citrus note make them an ideal afternoon treat. They also pair beautifully with a glass of iced tea or lemonade on a warm day.
For a more elegant presentation, I sometimes drizzle the finished cookies with a simple lemon glaze (powdered sugar and lemon juice) instead of the double dusting, or dip half of each cookie in white chocolate. They become instantly fancy and are perfect for baby showers, bridal teas, or spring celebrations.
These cookies make a wonderful, thoughtful gift. I pack them in a small cardboard box with layers of parchment paper. Their delicate nature shows care, and their unique texture is always a delightful surprise. A little ribbon and a tag make it a perfect present.
Variations & Customizations
While lemon is classic, other citrus fruits work beautifully. Lime zest and juice create a fantastic, tropical-tasting meltaway. Orange zest and juice make a sweeter, warmer version that’s lovely in the fall and winter. You could even use a combination of lemon and lime for a “citrus blast.”
For a floral twist, you can replace the vanilla extract with ½ teaspoon of pure almond extract. It pairs wonderfully with the lemon and adds a sophisticated note. You could also add 1 teaspoon of poppy seeds to the dough with the dry ingredients for a lovely visual speckle and a subtle crunch.
You can also play with the shape. Instead of rounds, use a small flower-shaped cutter for a springtime look. For even simpler prep, you can roll the dough into two logs, chill, slice into rounds, and bake. This method skips the rolling pin altogether and still yields perfect cookies.
How to Store, Freeze & Reheat
Once completely cooled and sugared, I store these cookies in a single layer in an airtight container at room temperature. They will keep beautifully for up to 5 days. If I need to stack them, I place a sheet of parchment paper between the layers to protect the powdered sugar coating. Do not refrigerate, as it can introduce moisture and make them soggy.
Both the baked cookies and the unbaked dough freeze excellently. Freeze baked cookies in a single layer before transferring to a container. Thaw at room temperature. For the dough, you can freeze the disc or pre-sliced logs. Slice and bake frozen dough rounds, adding 1-2 minutes to the bake time.
There’s no need to reheat these cookies, as they are best enjoyed at room temperature. If you desire a slightly crisper edge, you can place them on a baking sheet in a 300°F oven for 3-4 minutes, but let them cool again before eating to regain their signature texture. Never microwave them.
Conclusion
Lemon Meltaway Cookies are my go-to when I need a little edible sunshine. They’ve taught me that baking perfection often lies in the subtle details: the fresh zest, the whipping time, the humble cornstarch. I hope you’ll give them a try, filling your kitchen with that bright, cheerful lemon scent and experiencing the pure joy of a cookie that truly lives up to its name. They are a delicate, delicious reminder that sometimes, the simplest things are the most extraordinary. Happy baking