
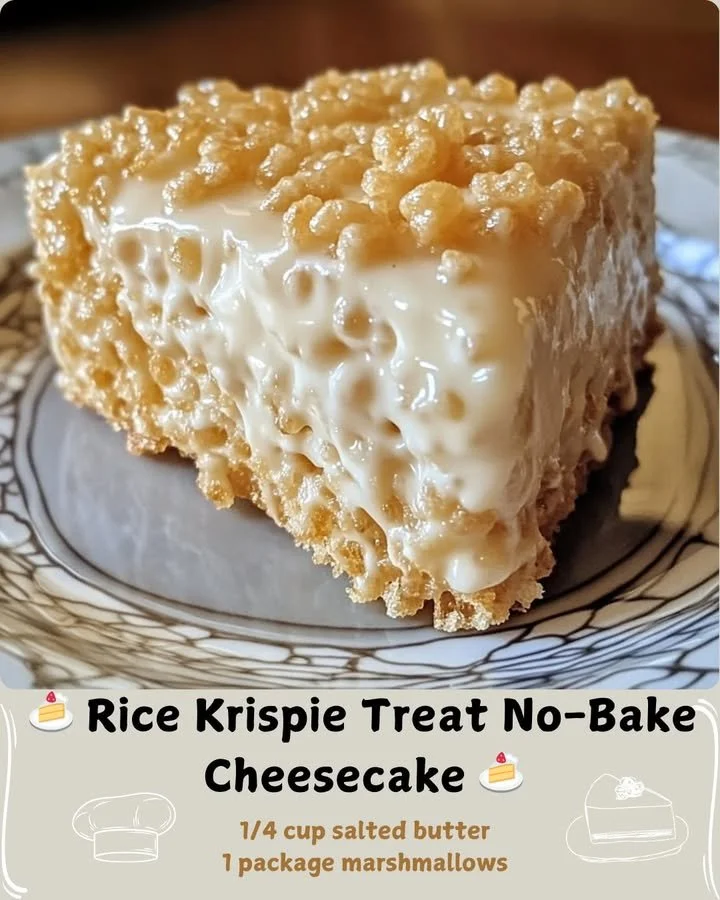
I’m excited to share a delightful recipe that’s perfect for any occasion: the Rice Krispie Treat No-Bake Cheesecake. This dessert combines the nostalgic crunch of Rice Krispies with the creamy richness of cheesecake, all without needing to turn on the oven. With a few simple ingredients, you’ll have a show-stopping treat that everyone will love!
Why You’ll Love This Recipe
This Rice Krispie Treat No-Bake Cheesecake is the perfect blend of textures and flavors—it’s crunchy, creamy, and sweet all at once. Plus, it’s incredibly easy to make, and there’s no baking involved! The kids can even help mix things up, making it a fun family activity. Trust me, once I made this for a gathering, it quickly became a favorite among friends and family alike! (See the ingredients in the next page below…)
Ingredients
– 4 cups Rice Krispies cereal
– 1 cup mini marshmallows
– 1/4 cup butter
– 8 oz cream cheese, softened
– 1 cup powdered sugar
– 1 tsp vanilla extract
– 1 cup heavy whipping cream
– Optional: chocolate drizzle or fresh fruit for topping
Equipment Needed
– Large mixing bowl
– Medium saucepan
– Electric mixer or whisk
– 9-inch springform pan
– Rubber spatula
– Measuring cups and spoons
Step-by-Step Instructions
First, let’s start by making the Rice Krispie base, which is super simple! In a medium saucepan, melt the butter over low heat. Once melted, add in the mini marshmallows and stir until they are completely melted and smooth. Remove the saucepan from heat, and immediately stir in the Rice Krispies cereal until they are evenly coated. The sweet aroma will fill your kitchen, and you might even have a hard time resisting the urge to sneak a taste! Once mixed, transfer this mixture to the springform pan and press it down firmly into an even layer. (See the next page below to continue steps…)
Next, it’s time to whip up the cheesecake filling! In a large mixing bowl, combine the softened cream cheese, powdered sugar, and vanilla extract. Using an electric mixer, beat these ingredients on medium speed until the mixture is smooth and creamy. As you mix, I love the way the smell of vanilla fills the air—so comforting! In a separate bowl, whip the heavy cream until stiff peaks form, then fold it gently into the cream cheese mixture. This folding technique is what gives the cheesecake its lovely fluffy texture.
Once the cheesecake filling is ready, pour it onto the cooled Rice Krispie base. Use a rubber spatula to spread it out evenly. If you feel like adding a personal touch, you can sprinkle some additional crushed Rice Krispies on top for some extra crunch. After that, cover the cheesecake with plastic wrap and refrigerate for at least 4 hours, or until set. I usually prepare this a day in advance; it’s such a time-saver on the day of the event!
When you’re ready to serve, carefully release the springform pan and slice into squares or wedges. Serve it chilled, and, if desired, drizzle some melted chocolate over the top or add fresh fruit to elevate its presentation. You can’t go wrong with this recipe, and the best part is that everyone loves it!
Pro Tips for Best Results
From my experience, the key to getting that perfect creamy consistency is making sure your cream cheese is fully softened before mixing. I’ve tried it with cream cheese right out of the fridge, and it just doesn’t blend as well. Let it sit on the counter for about 30 minutes before you mix, and trust me, you’ll notice the difference!
Another tip I swear by is to chill your mixing bowl for whipping the heavy cream. It sounds a little extra, but it really helps the cream whip up more quickly and achieve those lovely stiff peaks. I’ve even put my mixing bowl in the freezer for 10 minutes before whipping to maximize the results.
Lastly, don’t rush the chilling process! I made that mistake once, thinking I could serve it after just a couple of hours in the fridge, and the filling didn’t set properly. It was delicious but oozy! So give it the time it needs to firm up; your patience will be rewarded.
Common Mistakes to Avoid
One common pitfall I see is not pressing the Rice Krispie layer down firmly enough in the pan. If you don’t pack it tightly, it can end up crumbling when you try to slice into your cheesecake. Trust me, I’ve had a few crumble disasters in my kitchen because I was too gentle! (See the next page below to continue…)
Another mistake is skimping on the whipping time for the cream. If you don’t whip it long enough to form stiff peaks, the cheesecake can turn out too loose and won’t hold its shape when sliced. Patience is key here—take your time to whip it just right!
Also, when you’re folding the whipped cream into the cream cheese mixture, be gentle. I’ve rushed through before and ended up deflating the mixture, resulting in a denser filling rather than the light, airy texture I love. It may take a few extra folds, but the end result will be worth it.
Finally, make sure your cheesecake has enough time to chill in the fridge. I know it’s hard to wait, especially when the smell wafts around the kitchen, but if it doesn’t set long enough, it simply won’t slice well. I’ve learned my lesson on this one; it’s always best to let it chill overnight if possible!
Serving Suggestions
This Rice Krispie Treat No-Bake Cheesecake is versatile and can be served in so many ways! I love to enjoy it with a simple chocolate drizzle on top—it adds a sweet touch that everyone loves. Chocolate and cheesecake are a classic pairing that always go hand in hand.
If you’re feeling fruity, you can top each slice with fresh berries—strawberries, blueberries, or even rasp raspberries really brighten up the flavors and add a refreshing twist. I’ve found that the tartness of the berries complements the richness of the cheesecake beautifully.
Another fun idea is to serve it alongside a scoop of ice cream or whipped cream for extra indulgence—especially during warm summer evenings. You can even throw a little sprinkle of crushed nuts on top for a delightful crunch with every bite!
Variations & Customizations
There are so many fun ways to customize this recipe! One of my favorites is adding chocolate chips to the cheesecake mixture. Just fold in about a half cup of mini chocolate chips before pouring it onto the Rice Krispie base. It gives an added richness that chocolate lovers, like me, can’t resist!
If you’re not a fan of vanilla, you can swap it out for almond extract instead for a slightly different flavor profile. I’ve tried this variation, and it adds such a lovely nutty aroma that takes the cheesecake to a whole new level.
For a seasonal twist, you can add pumpkin puree and spice to create a fall-inspired version. Just mix in about 1 cup of pumpkin and a teaspoon of pumpkin pie spice, and you’ll have an entirely new dessert perfect for Thanksgiving gatherings!
How to Store, Freeze & Reheat
To store your cheesecake, simply keep any leftovers in an airtight container in the refrigerator. It’ll last about a week, though I can assure you it rarely sticks around that long in my house! The flavors just keep getting better as it sits.
If you want to prepare it ahead of time, you can freeze the cheesecake too! Just wrap it well in plastic wrap and then in foil to prevent freezer burn. It can stay frozen for up to three months. When you’re ready to enjoy it, transfer it to the fridge overnight to thaw.
As for reheating, this dessert is best enjoyed cold, so I wouldn’t recommend reheating it at all. Instead, just slice and serve straight from the fridge. It’s as simple and delicious as that!
Conclusion
I hope you’ve enjoyed this journey through my Rice Krispie Treat No-Bake Cheesecake recipe! It truly is a delightful and simple dessert that brings joy to every gathering. Whether you’re making it for a birthday party, a summer picnic, or just because, I can’t wait for you to try it. Remember, the best part about cooking is sharing the experience with loved ones, so enjoy every moment in your kitchen! Happy baking!