
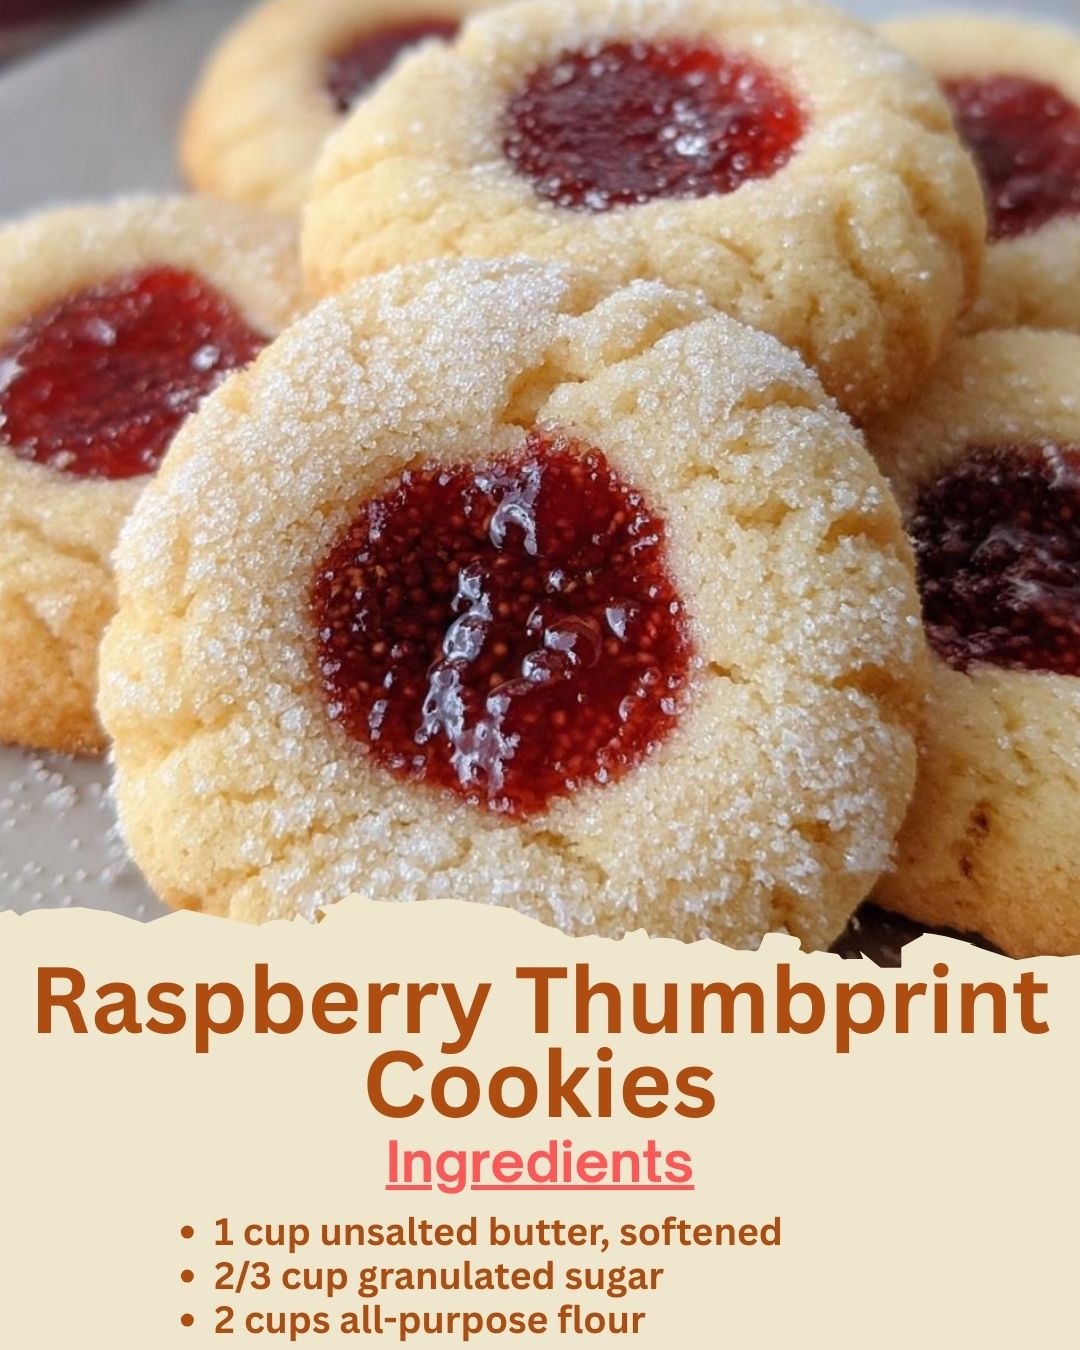
I first discovered these Raspberry Thumbprint Cookies on a grey, drizzly afternoon when I was craving a little spot of sunshine. As I mixed the butter and sugar in my sun-yellow stand mixer, the whole kitchen began to smell like sweet, toasted shortbread. When I pulled the first tray from the oven, their golden edges were just perfect, and those little wells of raspberry jam gleamed like tiny jewels. That first bite—a buttery, crumbly texture giving way to a burst of tart-sweet fruit—felt like a warm hug. They’ve been my go-to cookie for gifting and cozy moments ever since, a simple recipe that never fails to bring a smile.
Why You’ll Love This Recipe
You’re going to love this recipe because it delivers that perfect, classic cookie shop taste with a homemade heart. They’re impressively elegant yet deceptively simple to make, requiring no fancy piping or chilling. The process is genuinely therapeutic—there’s something so satisfying about pressing your thumb into each little dough ball. And trust me, the payoff is huge: you get a tender, melt-in-your-mouth cookie that balances rich butteriness with the bright, fruity punch of raspberry. It’s a timeless treat that feels both special and comforting.
Ingredients
- 1 cup (2 sticks) unsalted butter, softened
- 2/3 cup granulated sugar
- 2 cups all-purpose flour
- 1/2 teaspoon salt
- 1 teaspoon pure vanilla extract
- 3/4 cup seedless raspberry jam (or your favorite variety) (See the next page below to continue…)
Equipment Needed
- Stand mixer or handheld electric mixer
- Large mixing bowls
- Measuring cups and spoons
- Baking sheets
- Parchment paper or silicone baking mats
- Small spoon or piping bag for jam
- Wire cooling rack
Step-by-Step Instructions
Getting the butter to the right consistency is your first crucial step. I’ve learned the hard way that “softened” doesn’t mean melted or even shiny. You want it cool to the touch but able to hold a deep indent when you press it with your finger. I usually leave mine on the counter for about 45 minutes before starting. Cream it with the sugar on medium speed for a full two to three minutes. Don’t rush this! I once tried to shortcut it, and my cookies spread too much. You’re looking for the mixture to become noticeably paler and fluffy, which creates that lovely, light texture.
Next, I add the vanilla and salt directly to the creamed mixture before gently folding in the flour. I switch to a sturdy spatula for this part to avoid overworking the dough, which can make the cookies tough. The dough will be soft and slightly crumbly, but it should hold together when you squeeze a handful. If it seems too dry, a single teaspoon of cold water can help, but add it sparingly. Then, I roll tablespoon-sized portions into smooth balls. A little tip: I keep a small bowl of water nearby to dampen my palms, which prevents sticking without adding extra flour.
Now for the fun part—making the thumbprints! I line my baking sheets with parchment paper; it’s my non-negotiable for perfect, non-stick bakes. Place the dough balls about two inches apart. Using your thumb (or the rounded end of a wooden spoon handle), firmly press an indentation into the center of each ball. Don’t be shy here! I press almost to the baking sheet because the wells close up a bit during baking. If the edges crack, just gently pinch them back together—it’s very forgiving. (See the next page below to continue…)
Finally, I carefully fill each indentation with about half a teaspoon of raspberry jam. Using seedless jam is my strong preference, as seeds can burn. I use a small spoon, but a piping bag makes it incredibly neat. Then, into a preheated 350°F oven they go for 14-16 minutes. Watch for just the faintest golden brown around the bottom edges. They’ll look soft in the middle, but that’s okay—they firm up beautifully as they cool on the wire rack. The smell as they bake is absolutely divine.
Pro Tips for Best Results
My number one tip is all about the butter. I tested this three different ways: with cold butter, overly soft butter, and properly softened butter. The properly softened butter created cookies that were tender and held their shape perfectly. If your butter is too warm, the dough will be greasy and your cookies will spread. If you’re in a hurry, you can cut the cold butter into small cubes and let it sit for 15 minutes—it works in a pinch.
Don’t skip the salt. I know it seems like a small amount, but it makes a huge difference. It’s the secret ingredient that heightens the butter flavor and balances the sweetness of the jam. Using unsalted butter lets you control the salt level precisely. I once used salted butter by accident and skipped the added salt, and the cookies tasted strangely flat and one-dimensional in comparison.
For the most beautiful presentation, wait until the cookies are completely cooled before filling the thumbprints if you’re using a runny jam. I learned this the hard way when my first batch’s jam bled into the cookie. Alternatively, if you want the jam baked in (which I usually do for that glossy, set look), use a thicker, high-quality jam and don’t overfill. A little goes a long way, and it prevents a sticky, lava-like overflow onto your baking sheet.
Common Mistakes to Avoid
The first time I made these, I overmixed the dough after adding the flour. I was using my electric mixer the whole time, thinking it would save effort. Big mistake. What I got were dense, tough little hockey pucks instead of delicate, crumbly cookies. Now, I mix the flour in by hand just until no dry streaks remain. The dough might seem a bit shaggy, but it comes together when you roll it. Trust me, the hand-mixing step is worth the extra minute. (See the next page below to continue…)
Another classic mistake is placing the dough balls too close together on the baking sheet. I made this error, thinking they wouldn’t spread much. They ended up baking into one giant, bizarre thumbprint cookie slab. While they don’t spread like chocolate chip cookies, they do need their personal space—about two inches is perfect. This also allows for proper heat circulation, so the edges get that perfect, even golden color.
Using the wrong jam consistency can lead to frustration. I tried using a homemade, super-runny jam once, and it completely disappeared into the cookie during baking, leaving a sad, empty well. Now, I always opt for a good-quality, seedless raspberry jam that’s nice and thick. If yours seems loose, you can simmer it in a small saucepan for a few minutes to reduce and thicken it slightly before using. This one tip saved my cookies from becoming jam-less disappointments.
Finally, don’t skip the cooling rack. I know it’s tempting to leave them on the hot baking sheet, especially when you’re eager to try one. But I’ve done that, and the residual heat continues to cook the bottoms, often leading to overdone, darker bases. Transferring them to a wire rack stops the cooking process immediately and lets air circulate, which helps them set up with the ideal texture—crisp on the very edge and tender in the middle.
Serving Suggestions
I love serving these cookies still slightly warm with a cold glass of milk—it’s the ultimate childhood comfort combination. The way the cold milk contrasts with the warm, buttery cookie and the jam just barely starts to soften is pure magic. For a casual gathering, I’ll pile them high on a vintage cake stand; their simple beauty is decoration enough.
For a more elegant tea time or dessert platter, I like to pair them with something creamy to cut the richness. A small dollop of lightly sweetened whipped cream or a scoop of vanilla bean ice cream alongside turns them into a fantastic, easy dessert. The vanilla is a classic friend to both the shortbread and the raspberry, tying everything together beautifully.
They also make the most heartfelt homemade gift. I often bake a double batch and package them in clear cellophane bags tied with a ribbon, or layer them in a festive tin between sheets of parchment. I always include a small note with reheating instructions (a quick 5-second microwave zap revives that just-baked warmth!). People are always so touched by the personal touch.
Variations & Customizations
While raspberry is my personal favorite, this recipe is a wonderful canvas for other flavors. I’ve had great success with apricot preserves, which give a lovely sunny sweetness, and tangy red currant jelly for a more sophisticated twist. In the fall, a spiced apple butter filling is absolutely divine—just add a pinch of cinnamon to the dough to complement it.
You can also play with the dough itself. For a nuttier flavor and texture, try replacing 1/4 cup of the flour with finely ground almonds or hazelnuts. I did this for a holiday party, and the subtle nuttiness was a huge hit. For a festive touch, after the cookies come out of the oven and while the jam is still warm, you can sprinkle the edges with sanding sugar or drizzle them with a simple vanilla glaze.
If you’re a chocolate lover (who isn’t?), you have options here too. You can add 1/2 cup of mini chocolate chips to the dough, or for a decadent switch, fill the thumbprints with a chocolate-hazelnut spread instead of jam. I’ve tried it, and while it’s richer, it’s delicious. Just be careful not to overfill, as it can get quite messy. The beauty of this recipe is how easily it welcomes your own personal spin.
How to Store, Freeze & Reheat
For storing, I keep these cookies in an airtight container at room temperature. They stay perfectly fresh and delicious for up to 5 days. I place a sheet of parchment paper between layers to prevent them from sticking together. Do not store them in the fridge, as it can dry them out and make the texture less tender. The jam acts as a natural preservative, keeping them lovely and soft.
These cookies freeze like a dream, which I do all the time for last-minute guests. You can freeze them either baked or unbaked. For baked cookies, let them cool completely, then pack them in a freezer-safe container with parchment between layers. They’ll keep for up to 3 months. Thaw at room temperature for an hour. For unbaked dough, freeze the shaped dough balls on a tray, then transfer to a bag. You can bake them straight from frozen, just add 1-2 minutes to the baking time.
Reheating is simple and brings back that fresh-baked magic. My favorite method is to place a cookie on a microwave-safe plate and heat it for just 5-8 seconds. Any longer and the jam can become nuclear hot! Alternatively, you can warm a whole tray in a 300°F oven for about 5 minutes. This method is best if you’re reviving several at once and gives them a nice, crisp edge again.
Conclusion
Baking these Raspberry Thumbprint Cookies is more than just following a recipe—it’s about creating little edible moments of joy. From the simple pleasure of pressing your thumb into the dough to the stunning, jewel-like finish, every step feels special. I hope this recipe finds its way into your kitchen and becomes a cherished tradition for you, just as it has for me. Now, go preheat that oven—your own batch of buttery, fruity happiness awaits. Happy baking!