
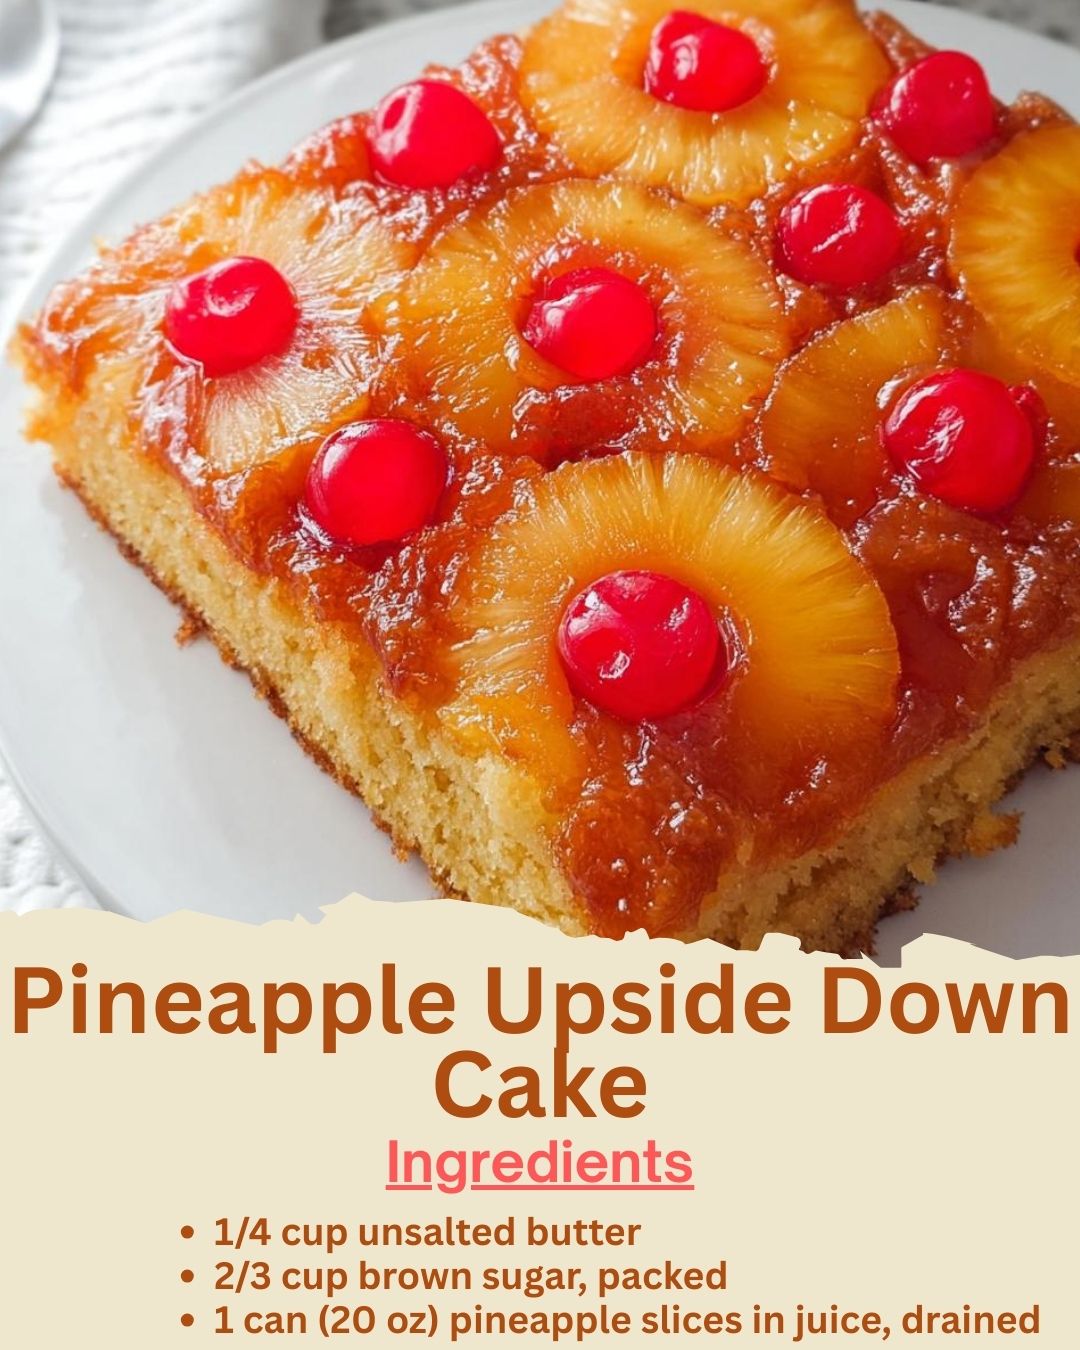
I baked my first Pineapple Upside Down Cake for a family potluck, drawn in by its nostalgic, sunshiny charm. As the butter and brown sugar bubbled together in my cast-iron skillet, the kitchen filled with the intoxicating scent of caramel. Arranging the pineapple rings and cherries felt like creating a beautiful mosaic. The moment of the flip was pure, heart-pounding drama—and when I lifted the pan to reveal that glistening, golden, jeweled top, I gasped. That first slice, with its sticky-sweet pineapple, buttery cake, and caramel-soaked cherries, tasted like a hug from my grandmother. It’s a dessert that’s as joyful to make as it is to eat.
Why You’ll Love This Recipe
You are going to love this recipe because it’s a showstopping dessert that’s deceptively simple to master. It feels wonderfully retro and special, yet the process is straightforward and incredibly rewarding. The magic of the dramatic “flip” never gets old, and the result is a moist, buttery cake with a gorgeous, caramelized fruit topping that’s impossible to resist. It’s a one-pan wonder that requires no fancy frosting or decoration—its beauty is baked right in. It’s the perfect cake to bring to a gathering, guaranteed to spark smiles and requests for the recipe.
Ingredients
For the Topping:
- 1/4 cup (1/2 stick) unsalted butter
- 2/3 cup packed light brown sugar
- 1 can (20 oz) pineapple slices in juice, drained (reserve 1/3 cup juice for the batter)
- Maraschino cherries (about 10-12), drained and patted dry
For the Cake Batter:
- 1 1/2 cups all-purpose flour
- 1 cup granulated sugar
- 1/2 cup (1 stick) unsalted butter, softened
- 1/2 cup milk (whole or 2%)
- 1/3 cup reserved pineapple juice
- 2 large eggs, at room temperature
- 2 teaspoons baking powder
- 1 teaspoon pure vanilla extract
- 1/2 teaspoon salt (See the next page below to continue…)
Equipment Needed
- 10-inch cast-iron skillet or a 9-inch round cake pan
- Medium mixing bowl
- Large mixing bowl
- Handheld or stand mixer
- Whisk
- Spatula
- Small saucepan
- Cooling rack
- Large serving plate or platter
Step-by-Step Instructions
Let’s start where the magic happens: the skillet. I place my 10-inch cast-iron skillet on the stovetop and melt the 1/4 cup of butter over medium heat. Once it’s melted and foamy, I sprinkle the packed brown sugar evenly over the butter. I stir constantly for about 2-3 minutes until the sugar dissolves completely into the butter, creating a smooth, bubbling caramel. This is the foundation of your topping, so don’t rush it. I immediately remove the skillet from the heat. Now, I carefully arrange my drained pineapple rings in the caramel. I place a maraschino cherry in the center of each ring and fill any gaps with extra cherries or pineapple chunks. The pan is hot, so I use tongs! I then set the whole skillet aside to let the caramel cool and thicken slightly while I make the batter.
While the caramel sets, I preheat my oven to 350°F and make the cake batter. In my large bowl, I cream together the softened butter and granulated sugar until light and fluffy—this takes about 3 minutes with my mixer. I beat in the eggs, one at a time, followed by the vanilla extract. In a separate bowl, I whisk together the flour, baking powder, and salt. In a small measuring cup, I combine the milk and the reserved 1/3 cup of pineapple juice. The pineapple juice is the secret ingredient here; it adds a subtle, sweet-tart flavor that makes the cake taste distinctly tropical.
Now, with the mixer on low, I alternately add the dry ingredients and the milk/juice mixture to the butter mixture. I start and end with the dry ingredients, adding them in three parts and the liquid in two. I mix just until the batter is smooth and no dry streaks remain. It will be a thick, luxurious batter. Using a spatula, I carefully dollop the batter over the arranged pineapple and cherries in the skillet. I gently spread it into an even layer, being careful not to disturb my pretty fruit pattern. The smell at this point—sweet pineapple, vanilla, and caramel—is absolutely heavenly.(See the next page below to continue…)
The cake goes into the preheated oven for 40-45 minutes. The true test is a toothpick inserted into the center coming out clean. I also look for the top to be golden brown and for the edges to pull away slightly from the sides of the skillet. Here comes the most crucial step: the flip! I remove the hot skillet from the oven and place it on a cooling rack. I do not wait. Within 2 minutes, I run a thin knife around the edge of the cake to loosen it. Then, I place my large serving plate upside down over the top of the skillet. With oven mitts on, I firmly hold the plate and skillet together and, in one confident motion, flip them over. I hold my breath, give the bottom of the skillet a few firm taps, and then slowly lift it away. The reveal is always a breathtaking moment of culinary magic.
Pro Tips for Best Results
My top tip is to use a cast-iron skillet if you have one. I’ve tested this in a regular cake pan, and while it works, the cast iron creates a more even, deeper caramel on the stovetop and provides superior heat distribution for baking. If you use a cake pan, melt the butter and brown sugar in a saucepan first, then pour it into the greased pan before arranging the fruit.
Do not let the caramelized skillet sit for too long before adding the batter. If it cools completely, the caramel can harden and stick. You want it to be just cool enough that it won’t cook the batter on contact, but still warm and pliable. About 10-15 minutes is the perfect window.
The flip must be done while the cake is still very warm. If you let it cool completely in the pan, the caramel will solidify and glue the cake to the skillet, making a clean release nearly impossible. Be brave and flip it within 2-5 minutes of pulling it from the oven. Trust me, this works better than waiting.
Common Mistakes to Avoid
The first mistake I made was not draining the pineapple well enough. Excess juice will water down your beautiful caramel, making it thin and runny instead of thick and sticky. I drain the slices in a colander and then press them gently between layers of paper towels. I also pat the cherries dry. This ensures a rich, gooey topping.(See the next page below to continue…)
Another error is overmixing the batter once the flour is added. This develops gluten and can make the cake tough instead of tender and moist. Mix on low speed and stop the moment the last streak of flour disappears. A few small lumps are perfectly fine.
Using dark brown sugar instead of light can be overpowering. Light brown sugar has the right level of molasses for a caramel that’s sweet and rich but not too heavy or bitter. Dark brown sugar can make the topping taste almost like burnt toffee. Stick with light brown sugar for the classic, perfect flavor.
Not loosening the cake edges before the flip is a recipe for disaster. That caramel acts like glue. Always, always run a thin knife or a small offset spatula around the entire perimeter of the cake while it’s still in the hot skillet. This breaks the seal and is the key to a clean, beautiful release onto your plate.
Serving Suggestions
I love serving this cake slightly warm. The caramel is at its most luxurious, and the flavors are vibrant. A simple dollop of freshly whipped cream or a scoop of vanilla ice cream on the side is pure heaven. The cool cream melting into the warm cake and caramel is an irresistible combination.
For a beautiful presentation, I garnish the platter with a few extra maraschino cherries or a sprinkle of toasted coconut. It’s such a festive, colorful cake that it really doesn’t need much else. I cut it into generous wedges right at the table so everyone can admire the spiral of pineapple and cherries.
This cake is a fantastic take-along dessert for barbecues, potlucks, or holiday dinners. I transport it on its serving plate, covered loosely with foil. It’s sturdy, travels well, and always stands out among the other desserts. It’s a guaranteed conversation starter.
Variations & Customizations
For a tropical twist, substitute some of the pineapple rings with slices of fresh mango or peach. You can also sprinkle 1/2 cup of shredded sweetened coconut over the caramel before adding the batter for a piña colada vibe.
To make individual servings, use a standard muffin tin! Place a cherry and a small pineapple chunk in the bottom of each greased cup, top with a teaspoon of the caramel mixture, and fill 2/3 full with batter. Bake for 18-22 minutes. They’re adorable and perfect for parties.
For a more “adult” flavor, add a tablespoon of dark rum or bourbon to the caramel after you remove it from the heat. Let it bubble for a second before arranging the fruit. It adds a wonderful depth that pairs beautifully with the pineapple.
How to Store, Freeze & Reheat
Store any leftovers covered loosely with plastic wrap or under a cake dome at room temperature for up to 2 days. The caramel will soften the cake over time, which is delicious. Do not refrigerate, as it will dry out the cake and harden the caramel.
This cake freezes surprisingly well. Cool it completely, then wrap the whole cake (or individual slices) tightly in plastic wrap and then foil. Freeze for up to 2 months. Thaw, still wrapped, at room temperature for several hours.
To reheat a slice, I prefer the microwave. Place it on a microwave-safe plate and heat for 15-20 seconds, just until the caramel becomes soft and gooey again. You can also warm the whole cake, covered with foil, in a 300°F oven for 10-15 minutes.
Conclusion
Baking this Pineapple Upside Down Cake is a delightful journey that ends with a spectacular, delicious reward. It’s a recipe that connects us to sweet memories while creating new ones in our own kitchens. I hope it brings as much light, warmth, and joyful eating to your home as it has to mine. Now, go melt that butter and brown sugar and get ready for the most satisfying flip of your life. Happy baking!