
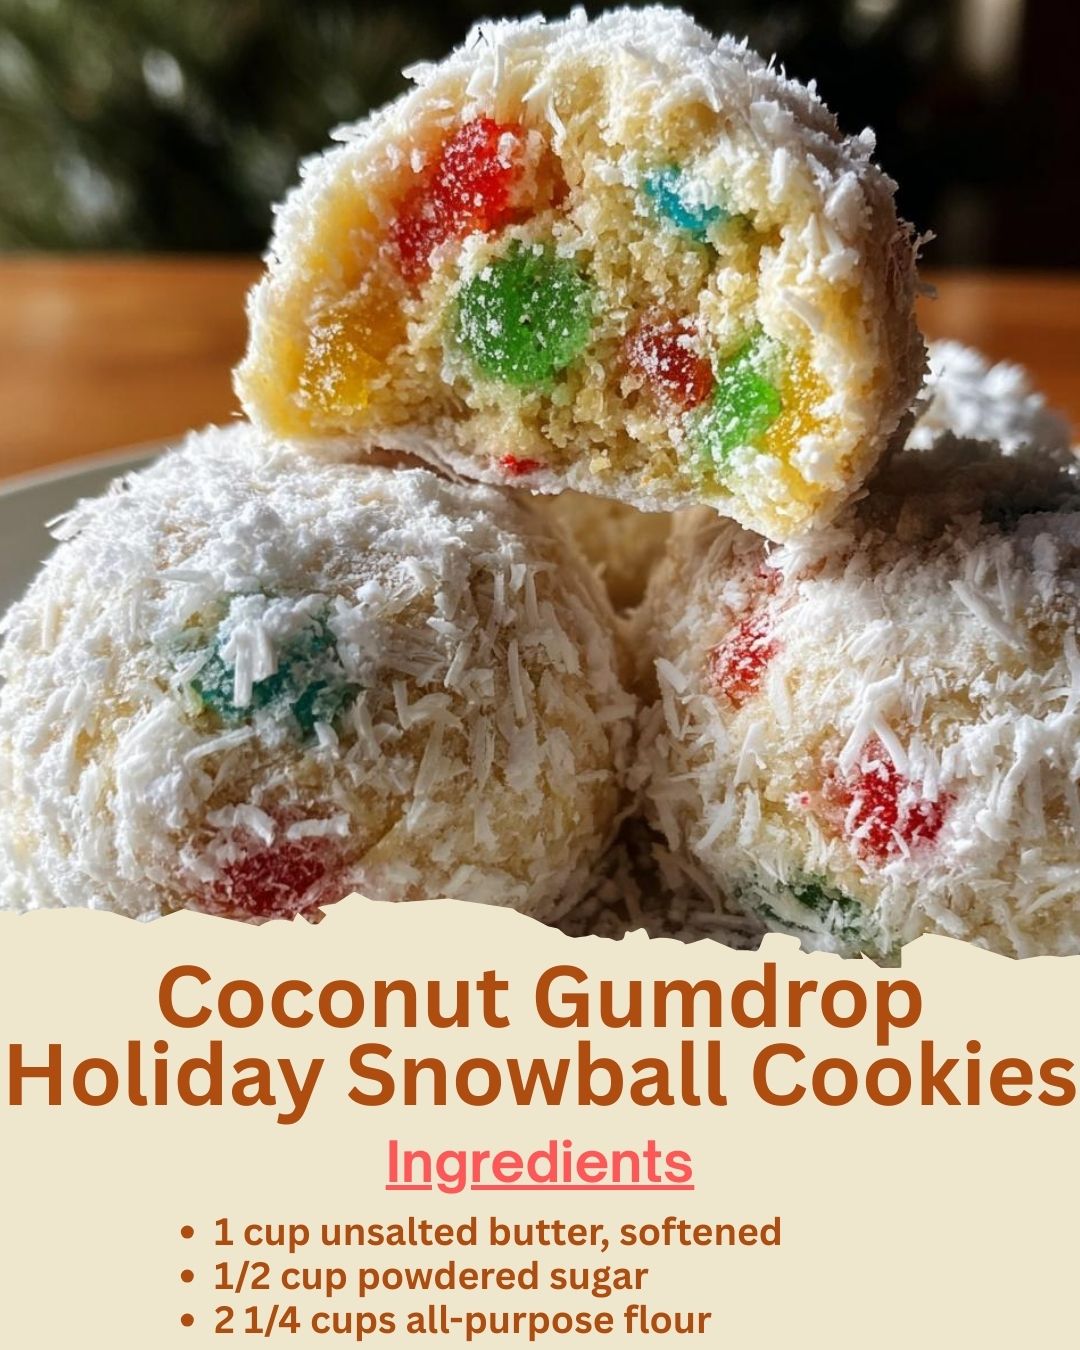
I dreamed up these Coconut Gumdrop Holiday Snowball Cookies one winter while sorting through my baking cupboard. I had a bag of colorful gumdrops and a yearning for something nostalgic yet new. As I creamed the butter and sugar, the kitchen filled with a sweet, buttery aroma, and when I folded in the coconut and chopped gumdrops, the dough became a festive rainbow. Watching them bake into golden little domes and then transform under a snowfall of powdered sugar was pure magic. That first bite—a tender, coconut-kissed cookie with a hidden jewel of sweet, chewy gumdrop—was a burst of holiday joy in every mouthful. They instantly became a new December tradition.
Why You’ll Love This Recipe
You are going to love this recipe because it takes the classic snowball cookie and fills it with a delightful, colorful surprise. It’s a wonderful twist that appeals to both kids and adults, combining the melt-in-your-mouth texture of a traditional Mexican wedding cookie with the playful fun of holiday candy. The process is simple, the results are stunningly pretty, and they make your cookie tray uniquely yours. They’re the perfect project for a cozy baking day, filling your home with warmth and ending with a treat that’s guaranteed to spark smiles and curious bites.
Ingredients
- 1 cup (2 sticks) unsalted butter, softened
- 1/2 cup powdered sugar, plus 1 extra cup for rolling
- 1 teaspoon pure vanilla extract
- 2 1/4 cups all-purpose flour
- 1/4 teaspoon salt
- 1 cup sweetened shredded coconut
- 3/4 cup gumdrops (fruit-flavored, not spice drops), finely chopped
- Optional: 1-2 tablespoons milk, if needed (See the next page below to continue…)
Equipment Needed
- Stand mixer or handheld electric mixer
- Large mixing bowl
- Medium mixing bowl
- Whisk
- Rubber spatula
- Baking sheets
- Parchment paper or silicone baking mats
- Small cookie scoop or tablespoon
- Wire cooling rack
- Shallow bowl for powdered sugar
Step-by-Step Instructions
Let’s start with the foundation: the dough. In my large mixing bowl, I cream together the softened butter and the 1/2 cup of powdered sugar for a good two to three minutes on medium speed. I’ve learned you can’t rush this—you want it to become pale, fluffy, and almost whipped. This incorporates air and creates that signature tender, crumbly texture. Once it’s beautifully light, I beat in the vanilla extract. The smell at this point is simple, sweet, and promising.
While that’s mixing, I whisk together my dry ingredients in a separate bowl. I combine the flour and salt. Then, I prepare the stars of the show: I finely chop the gumdrops. This is a sticky job, but I’ve found that spraying my knife or kitchen shears with a little cooking spray makes it much easier. I aim for pieces about the size of a pea—large enough to be a distinct, chewy surprise, but small enough to distribute well. In a third bowl, I toss the chopped gumdrops with about a tablespoon of the flour mixture. This little trick is crucial; it coats the sticky candy and helps prevent them from clumping together or sinking to the bottom of the cookie.
Now, with the mixer on low, I gradually add the flour mixture to the creamed butter. I mix just until the dough begins to come together. It will be crumbly. Then, I use a spatula to fold in the shredded coconut and the flour-coated gumdrops. I fold gently until everything is evenly distributed. The dough should hold together when squeezed. If it seems too dry and won’t form a ball, I add a single tablespoon of milk. I’ve found sometimes the gumdrops or coconut can vary in moisture. The dough will be soft but manageable.(See the next page below to continue…)
For baking, I preheat my oven to 350°F and line my sheets with parchment paper. I use a small cookie scoop (about 1 tablespoon) to portion the dough, rolling each portion firmly between my palms into a smooth ball. I place them about an inch and a half apart on the sheet—they don’t spread much. I bake them for 12-15 minutes. The key is to pull them out when the bottoms are just lightly golden and the tops are still pale. They should not brown on top. I let them cool on the baking sheet for exactly 5 minutes. While still warm but firm enough to handle, I roll each cookie generously in the remaining cup of powdered sugar. I let them cool completely on a wire rack, then give them a second, lavish roll in the powdered sugar to create that perfect, snowy, drifty look.
Pro Tips for Best Results
My number one tip is to use fruit-flavored gumdrops, not spice drops (like the black ones you see at Halloween). Spice drops have a strong, licorice-like flavor that can overpower the delicate cookie. Bright, fruity gumdrops add little bursts of berry, orange, and lime that are wonderfully festive. Trust me on the variety—it makes a huge difference in the overall taste.
Coating the chopped gumdrops in flour is a step you cannot skip. I tried adding them straight into the dough once, and they all melted together into one sticky, gooey mass during baking, bleeding color everywhere. The light flour coating creates a barrier, allowing them to stay suspended as individual chewy gems throughout the cookie. It’s a 30-second step that ensures perfect results.
The double roll in powdered sugar is what creates the authentic “snowball” effect. The first roll while warm allows the sugar to stick and slightly melt into a light glaze. The second roll once completely cool gives you that thick, fluffy, dry snow coating. Don’t just dust them—really roll them around in a bowl of sugar for full, beautiful coverage.
Common Mistakes to Avoid
The first mistake I made was not chopping the gumdrops finely enough. I left them in large chunks, thinking they’d be fun. What happened was that the big pieces created weak spots in the dough, causing some cookies to crack open and the molten candy to leak out and burn on the baking sheet. Small, uniform pieces distribute the sweetness and texture perfectly without compromising the cookie’s structure.(See the next page below to continue…)
Overbaking is the quickest way to lose the delicate, meltaway texture. These cookies should not take on any browning on top. I pull mine when the bottoms have just the faintest hint of gold and the cookies are set but still feel soft to a light touch. They continue to firm up as they cool. Waiting for them to look “done” will give you a dry, crunchy cookie instead of a tender snowball.
Using cold butter is a disaster for this dough. Your butter must be properly softened—yielding to gentle pressure but not shiny or oily. Cold butter won’t cream properly, leading to a dense, greasy dough that’s hard to roll. I take mine out of the fridge at least an hour before I start. Properly softened butter is the key to that light, crumbly texture.
Skipping the rest time before the second sugar coating can lead to a melted, sticky mess. If you try to roll them in the second coat of powdered sugar while they are still even slightly warm, the sugar will dissolve and become pasty instead of powdery. Let them cool completely on the rack for that perfect, snowy finish.
Serving Suggestions
I love piling these cookies high on a bright red or green platter. Their snowy white appearance with the occasional peek of colorful gumdrop makes them look like a festive winter landscape. They are the perfect addition to a holiday cookie buffet, alongside classics like gingerbread and shortbread.
For a whimsical touch, I sometimes serve them in individual mini paper cupcake liners arranged on a tiered stand. It makes them feel extra special and prevents the powdered sugar from getting everywhere. They pair beautifully with a cup of hot chocolate or a light, fruity herbal tea.
These cookies make fantastic holiday gifts. I pack them in clear cellophane bags tied with a ribbon or layer them carefully in a festive tin between sheets of parchment paper. Their unique look and delicious taste make them a memorable homemade gift for neighbors, teachers, or coworkers.
Variations & Customizations
If you’re not a coconut fan, you can replace the shredded coconut with an equal amount of finely chopped toasted pecans or almonds. It gives a lovely nutty crunch and a different flavor profile. The nuts also pair wonderfully with the fruity gumdrops.
For a chocolate twist, replace 1/4 cup of the flour with unsweetened cocoa powder. Use chocolate-covered gumdrops or even finely chopped chocolate-covered raisins for the mix-in. Roll the baked cookies in a mixture of powdered sugar and cocoa powder for a “dirty snowball” effect.
You can tailor the colors to any holiday! For Easter, use pastel gumdrops. For the Fourth of July, use red, white, and blue ones. The base recipe stays wonderfully versatile, letting you create a themed snowball cookie for any celebration.
How to Store, Freeze & Reheat
To keep them looking their snow-white best, I store the completely cooled cookies in a single layer in an airtight container at room temperature. If I need to stack them, I place a sheet of parchment paper between each layer to protect the powdered sugar coating. They will stay fresh and delicious for up to 5 days.
These cookies freeze beautifully. Place them in a single layer on a tray to freeze solid, then transfer to a freezer-safe bag or container. They will keep for up to 3 months. Thaw at room temperature, still in the container, to prevent condensation from ruining the sugar coating. You may want to give them a light fresh roll in powdered sugar after thawing to revive the snowy look.
There is no need to reheat these cookies. They are meant to be enjoyed at room temperature. The delicate powdered sugar coating will melt if warmed. If they’ve been frozen, simply thaw and serve—their texture and flavor are perfectly preserved this way.
Conclusion
Baking these Coconut Gumdrop Holiday Snowball Cookies is a joyful, festive activity that fills the kitchen with sweetness and ends with a treat that’s as fun to look at as it is to eat. They’ve added so much colorful cheer to my holiday seasons. I hope this recipe brings a touch of whimsy and deliciousness to your kitchen, creating new traditions and happy memories with every snowy, sugary bite. Now, go chop those gumdrops and get ready to make some magical snowballs. Happy baking!