
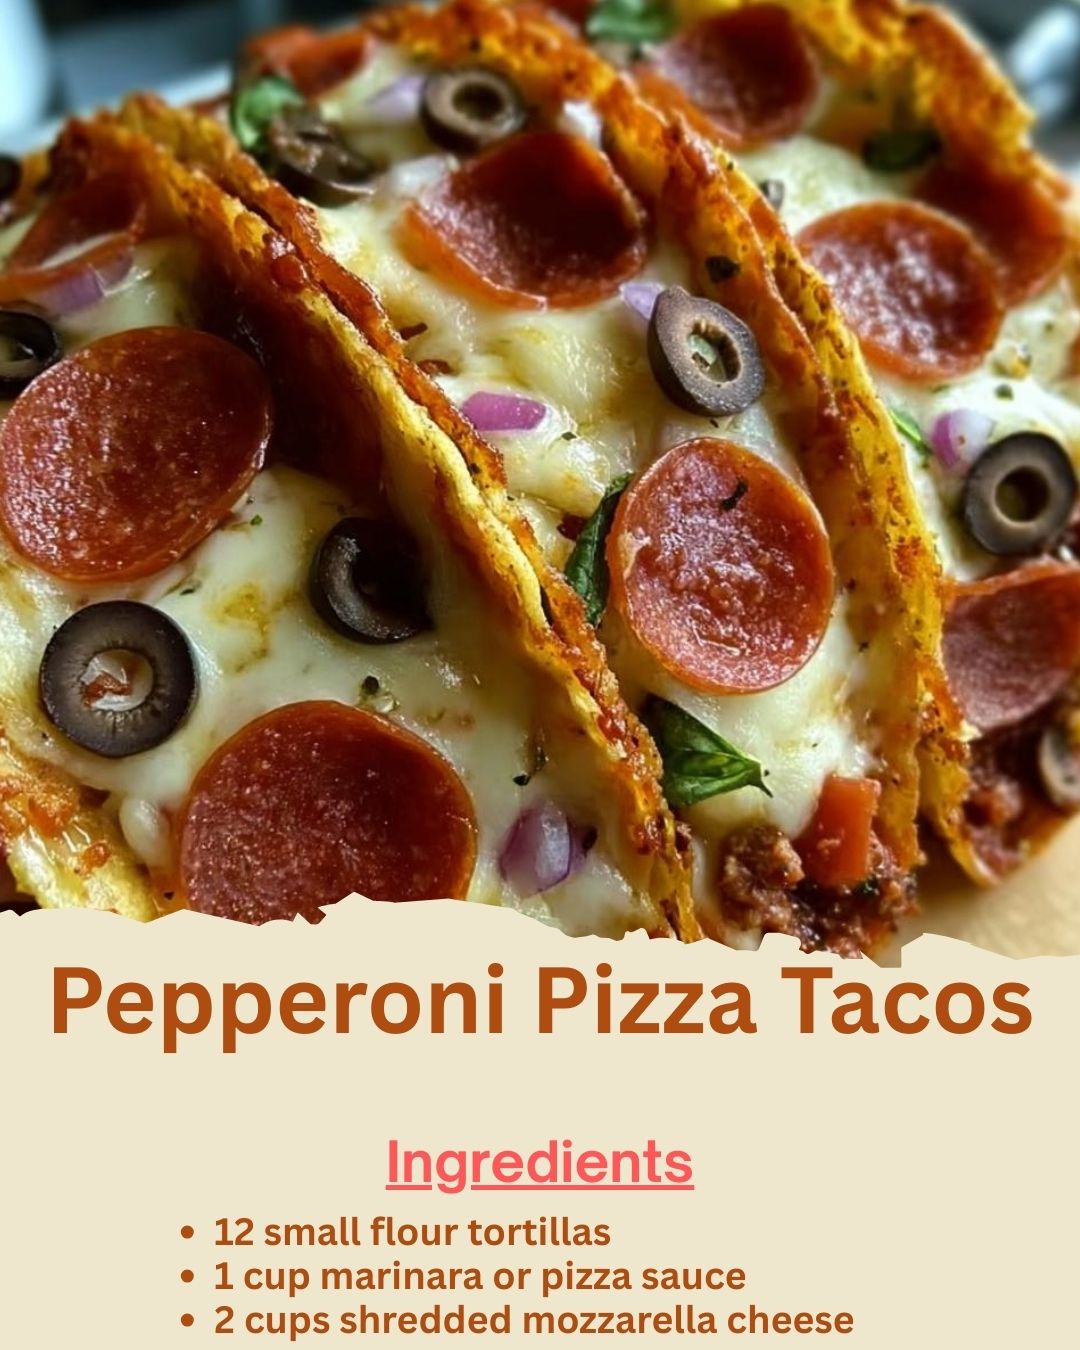
The night I first made Pepperoni Pizza Tacos, my kitchen smelled like my favorite Friday night. It was the classic, savory scent of baking pepperoni and melting mozzarella, but with the warm, toasty aroma of crisping tortillas. I remember the excited chatter as everyone assembled their own, layering sauce, cheese, and toppings into the soft shells. When they came out of the oven, the cheese was bubbly and golden, the edges of the tortillas were perfectly crisp, and the first bite was pure joy—a crunchy, cheesy, saucy handheld masterpiece. It was the perfect solution to the “pizza or tacos?” debate, and it’s been our go-to fun dinner ever since.
Why You’ll Love This Recipe
You will love this recipe because it’s the ultimate in customizable, interactive, and deliciously easy cooking. It takes less than 20 minutes from start to finish, uses simple ingredients you probably have on hand, and is a guaranteed hit with both kids and adults. It’s endlessly adaptable to suit any taste, it’s less messy than traditional tacos, and it delivers that irresistible pizza flavor in a fun, crispy package. This is the meal that turns an ordinary weeknight into a mini party.
Ingredients
- 12 small flour tortillas (soft taco size, about 6-inch)
- 1 cup marinara or pizza sauce
- 2 cups shredded mozzarella cheese
- 30-40 slices of pepperoni
- 1/2 teaspoon garlic powder
- 1/2 teaspoon dried oregano
- Optional toppings for serving: grated Parmesan cheese, crushed red pepper flakes, fresh basil or parsley, sliced black olives, diced green bell peppers, sliced mushrooms (See the next page below to continue…)
Equipment Needed
- Two baking sheets
- Parchment paper or aluminum foil
- Cooking spray or olive oil
- Pastry brush (optional)
- Small bowls for toppings
- Oven mitts
Step-by-Step Instructions
I always start by preheating my oven to 400°F (200°C). This high heat is key for getting the tortillas crisp without overcooking the fillings. I line two baking sheets with parchment paper for easy cleanup—trust me, the cheese that inevitably drips is no fun to scrub off. Then, I prep my station: I warm the tortillas slightly in the microwave for about 15 seconds, just to make them more pliable so they don’t crack when I shape them. I lay them out on my counter, and in a small bowl, I mix the marinara sauce with the garlic powder and oregano. This simple step adds a huge flavor boost that makes the sauce taste truly pizzeria-quality.
Now, for the assembly line, which is my favorite part. Using a spoon or a small brush, I spread about a tablespoon of the seasoned marinara sauce onto the bottom half of each tortilla. I leave a small border around the edge to prevent major overflow. Then, I sprinkle a generous pinch of shredded mozzarella over the sauce. The cheese acts as a glue, holding the “taco” shape together. I finish by adding 3-4 slices of pepperoni on top of the cheese. I’ve tried layering the pepperoni under the cheese, but on top allows it to get a little crispy in the oven, which is far superior.
Here’s the trick to the perfect shape: I don’t fold them completely in half like a hard-shell taco. Instead, I fold just the bottom third of the tortilla up over the filling, then I roll the sides in gently to create an open-top boat or canoe shape. This structure sits flat on the baking sheet and holds all the goodness inside while letting the heat circulate to crisp the shell. I place each assembled taco seam-side down on the prepared baking sheet, giving them a little space so they aren’t touching. Just before they go in the oven, I give each one a very light spray or brush of olive oil on the exposed tortilla edges. This promotes an even, golden crispiness. (See the next page below to continue…)
I bake the pizza tacos for 10-12 minutes, but I always check at the 8-minute mark. You’ll know they’re done when the cheese is completely melted and bubbly, the pepperoni has curled slightly at the edges, and the tortilla shells are crisp and lightly browned. I let them cool on the sheet for just 2-3 minutes—they are molten lava inside straight from the oven! This brief rest lets the cheese set slightly, making them less messy to pick up.
Pro Tips for Best Results
For the crispiest shell, I use two tricks. First, I lightly toast the empty tortillas on a dry skillet for about 30 seconds per side before assembling. This dries them out a bit and starts the crisping process, so they don’t get soggy from the sauce. Second, I bake them directly on the oven rack for the last 2-3 minutes. I slide the parchment paper with the tacos right onto the rack, which gives incredible all-over crunch. Just watch them closely to avoid burning!
The type of sauce you use makes a big difference. I tested this with a plain marinara and a robust, herby pizza sauce. The pizza sauce won hands down. It’s thicker and more flavorful, so it doesn’t make the tortilla soggy. If you only have marinara, simmer it in a pan for 5 minutes to thicken it slightly before using. Don’t skip this if you want the best texture.
Don’t overfill the tacos. My first batch was a cheesy, saucy landslide because I got too generous. About a tablespoon of sauce and a good sprinkle of cheese is plenty. The goal is to have enough filling to be satisfying but not so much that it spills out and prevents the shell from crisping properly. Less is more here for structural integrity.
Common Mistakes to Avoid
My biggest first-time mistake was using cold tortillas straight from the fridge. They cracked when I tried to fold them, creating leaky seams. Don’t do what I did! Always let your tortillas come to room temperature or warm them briefly. This makes them flexible and cooperative, ensuring you get a good seal that holds in the melting cheese. (See the next page below to continue…)
Do not skip the step of adding oil to the tortilla edges. I thought the oven heat alone would crisp them, but the exposed flour tortilla can dry out and become tough instead of crisp. A light brush of olive oil or a quick spritz of cooking spray guarantees a perfectly golden, crunchy texture that’s delightful to bite into.
Avoid using too-thin or too-thick tortillas. The standard “soft taco size” flour tortillas are the perfect balance—sturdy enough to hold the filling but thin enough to crisp up nicely. Thin “street taco” tortillas will burn quickly, and thick “burrito size” tortillas will stay doughy in the middle. The right vessel is key.
Finally, don’t forget to season your sauce. Plain marinara straight from the jar can taste a bit flat. Stirring in that garlic powder and oregano (or even a pinch of onion powder and sugar) elevates it instantly and makes your pizza tacos taste like they came from a professional kitchen, not a rushed one.
Serving Suggestions
I love serving these right on the baking sheet lined with fresh parchment, letting everyone grab their own. I set up a topping bar with small bowls of grated Parmesan, crushed red pepper flakes, chopped fresh basil, a little cup of warm marinara for extra dipping, and maybe some sliced black olives or banana peppers. Letting everyone customize their own taco after baking is half the fun.
For a complete meal, I’ll serve them with a big, crisp Caesar salad or a simple side of garlic butter pasta. The salad cuts through the richness, and the pasta leans into the Italian theme. For a lighter option, carrot and celery sticks with ranch dressing work perfectly for dipping.
These are also fantastic party food. I’ll cut them in half diagonally and arrange them on a platter for easy grabbing. They’re a huge hit for game day, movie nights, or kids’ birthday parties. They’re less messy than sliders and more exciting than plain pizza.
Variations & Customizations
For a “Supreme” version, I’ll add a few finely diced bell peppers, sliced mushrooms, and black olives on top of the cheese before baking. If I’m using veggies with high water content (like fresh mushrooms), I sauté them first to remove excess moisture so they don’t make the taco soggy.
These are easily made vegetarian by skipping the pepperoni and using chopped artichoke hearts, sun-dried tomatoes, and spinach instead. For a meatier option, cooked and crumbled Italian sausage or diced ham are fantastic additions. You can even make a “breakfast pizza taco” with scrambled eggs, cheese, and crumbled bacon.
For a different twist, try using different sauces. A garlic Alfredo sauce with chicken and mozzarella makes an incredible “Chicken Alfredo Taco.” A pesto base with grilled chicken and fresh mozzarella is another fresh and delicious option. The method stays the same, just swap the flavors.
How to Store, Freeze & Reheat
To store leftovers, I let the tacos cool completely, then place them in a single layer in an airtight container in the fridge. They’ll keep for 2-3 days. The tortillas will soften in the fridge, but they can be revived.
Reheating is best done in the oven or air fryer to restore crispiness. I warm them at 375°F (190°C) for 5-7 minutes until hot and crisp. The microwave will make them very soggy, so I only use it if I’m in a desperate rush, and I accept the softer texture.
You can freeze unbaked assembled tacos for a future quick meal. Assemble them, place them on a baking sheet to flash-freeze until solid, then transfer to a freezer bag. Bake from frozen, adding 3-5 minutes to the baking time. I don’t recommend freezing them after baking, as the texture of the tortilla suffers.
Conclusion
Pepperoni Pizza Tacos are more than just a clever mashup; they’re a ticket to a fun, flavorful, and fuss-free dinner that brings everyone to the table with a smile. They’ve saved countless of my busy evenings and sparked so much kitchen joy. I hope this recipe becomes a playful staple in your home, turning the age-old dinner debate into the best of both worlds. Now, go preheat that oven—your fun, crispy, cheesy dinner is just minutes away.