
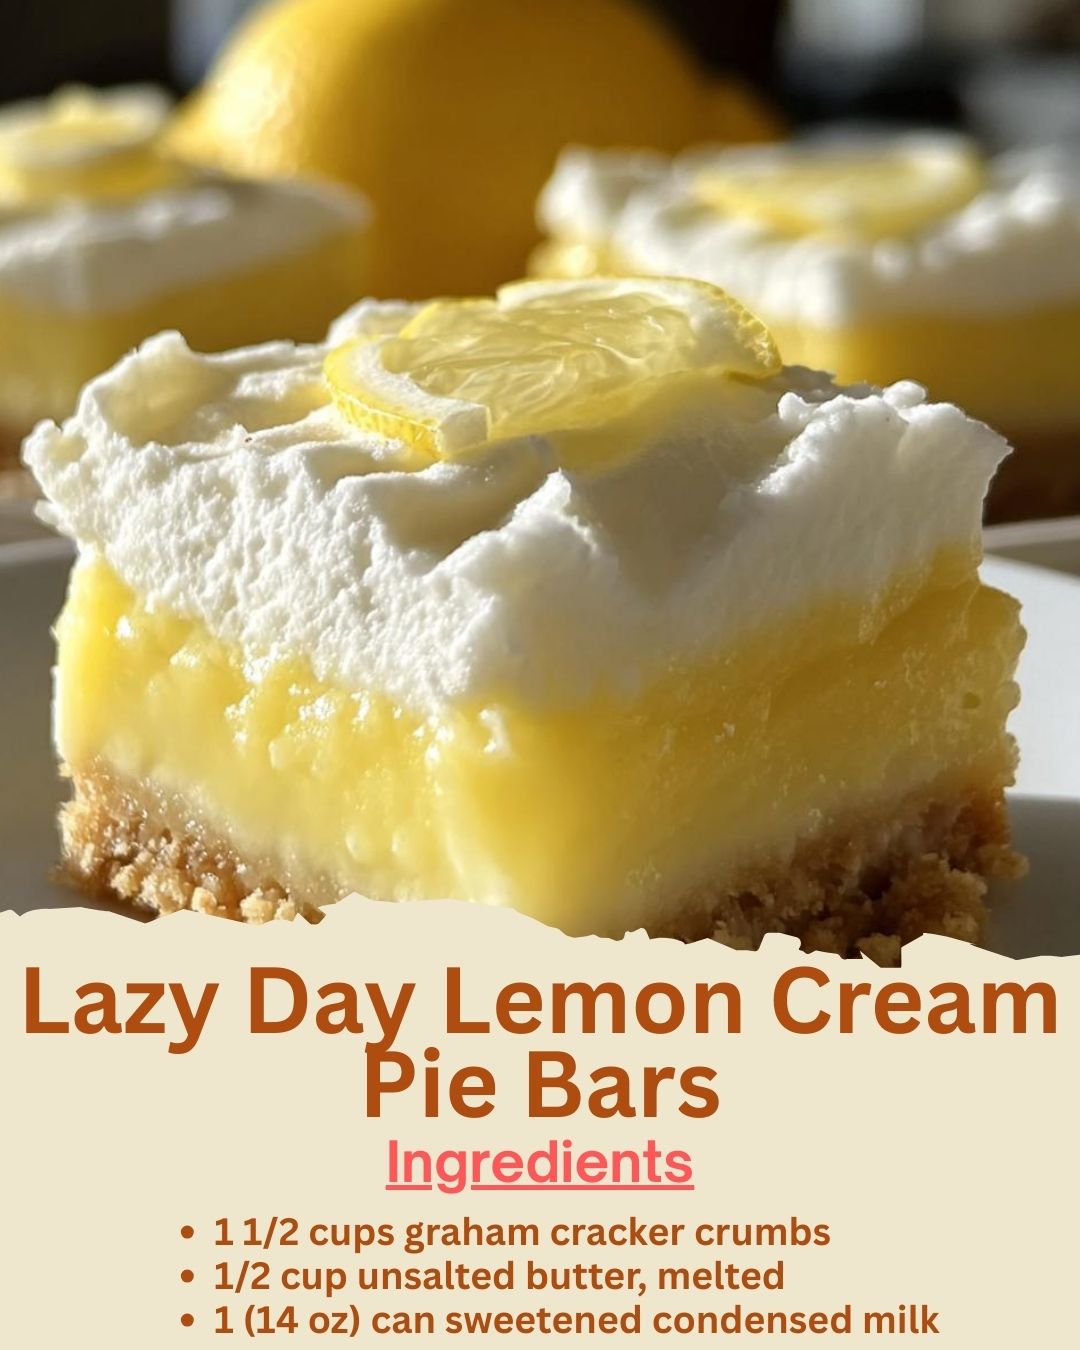
I remember the first time I whisked together the lemon juice and sweetened condensed milk for these bars. A bright, tangy aroma instantly cut through the air, a crisp contrast to the warm, buttery smell of the graham cracker crust baking in my oven. It was a scent that promised something both refreshing and indulgent. When I finally pulled the chilled pan from the fridge and sliced into that creamy yellow layer atop the crunchy base, I knew I’d found the perfect dessert hack. The first bite was pure bliss—a perfect balance of sweet, tart, and creamy with a satisfying crumble. It tasted like the heart of a perfect lemon pie, but without any of the fuss of a rolling pin or a temperamental custard. These bars are my secret for bringing a little sunshine to the table, even on the laziest of days.
Why You’ll Love This Recipe
You will absolutely love this recipe because it delivers the sophisticated, zesty flavor of a homemade lemon pie with almost no effort and zero baking of the filling. It’s a magical, no-fail combination of simple ingredients that come together to create something that feels special and tastes incredibly complex. It’s the perfect dessert for when you want to impress without stress, for potlucks, for hot summer days, or for satisfying a sudden citrus craving. They’re cool, creamy, and utterly irresistible.
Ingredients
For the Crust:
- 1 1/2 cups graham cracker crumbs (from about 12 full sheets)
- 1/3 cup granulated sugar
- 1/2 cup (1 stick) unsalted butter, melted
- Pinch of salt
For the Lemon Cream Filling:
- 1 (14 oz) can full-fat sweetened condensed milk (don’t use fat-free)
- 3/4 cup freshly squeezed lemon juice (from about 4-5 large lemons)
- 2 large egg yolks
- 1 tablespoon lemon zest (trust me, this makes a huge difference)
- Optional: 1 cup heavy cream + 2 tbsp powdered sugar for whipped cream topping (See the next page below to continue…)
Equipment Needed
- 8×8 inch or 9×9 inch square baking pan
- Parchment paper
- Medium and small mixing bowls
- Whisk
- Fork or food processor for crumbs
- Zester or fine grater
- Juicer or reamer
- Electric mixer (optional, for whipped cream)
Step-by-Step Instructions
I always start by prepping my pan—it makes everything so much easier later. I line my 8×8 inch pan with a sheet of parchment paper, leaving some overhang on two sides. This creates “handles” so I can lift the entire slab of bars out for perfectly clean slicing. Next, I make my crust. If I’m using a food processor, I pulse the graham crackers until they’re fine crumbs. If I’m doing it by hand, I put them in a sturdy zip-top bag and roll them with a rolling pin. In a bowl, I mix the crumbs, sugar, and salt. Then, I pour in the melted butter and stir until the mixture resembles wet sand and holds together when pinched.
Now, I pour the crumb mixture into my prepared pan. Using the bottom of a flat glass or a measuring cup, I press it down firmly and evenly into every corner. This firm press is the secret to a crust that holds together when you bite into it. I don’t just pat it; I really use some pressure. I then bake the crust in a preheated 350°F (175°C) oven for 10 minutes. This short bake sets the crust, giving it a toasty flavor and a sturdy base for the creamy filling. I set it aside on a cooling rack while I make the filling.
For the filling, the magic happens in one bowl. I zest one of my lemons first, being careful to get only the bright yellow skin, not the bitter white pith. Then, I juice all the lemons until I have 3/4 cup of fresh juice. In a medium bowl, I whisk together the sweetened condensed milk, the fresh lemon juice, the egg yolks, and the lemon zest. The moment the lemon juice hits the condensed milk, it thickens miraculously into a luscious, pudding-like consistency. I whisk until the mixture is completely smooth and beautifully yellow. I taste it at this point—it should be boldly tart and sweet. (See the next page below to continue…)
I pour this creamy lemon filling over the warm (or room temperature) crust and spread it into an even layer. Then, the hard part: I place the pan in the refrigerator to chill for at least 3 hours, though I prefer 4 or even overnight. This chilling time is non-negotiable; it allows the filling to set firmly so you can get those clean, sharp slices. If I’m feeling fancy, while it chills, I’ll whip the heavy cream with a little powdered sugar until stiff peaks form. Right before serving, I’ll spread or pipe the whipped cream over the entire pan or on individual bars.
Pro Tips for Best Results
Using fresh lemon juice is absolutely critical. I tested this with bottled lemon juice once, and the flavor was flat, slightly bitter, and lacked that vibrant, sunny punch. The fresh juice provides not only the right acidity to thicken the condensed milk but also the essential bright flavor that makes these bars sing. Squeezing the lemons yourself is the single most important step for taste.
Don’t skip the lemon zest. The zest contains the fragrant essential oils that pure lemon juice lacks. Adding that tablespoon of zest to the filling infuses it with an intense, aromatic lemon flavor that permeates every bite. It’s the difference between a simple lemon bar and a truly exceptional one that tastes like the essence of lemon.
For the cleanest, most professional-looking slices, I use two tricks. First, I chill the entire pan in the freezer for the last 30 minutes before cutting. This makes the filling extra firm. Second, I run a thin, sharp knife under very hot water, wipe it dry, and make a clean cut. I repeat this—heat, wipe, cut—for every slice. It takes an extra minute but guarantees those gorgeous, crumb-free edges.
Common Mistakes to Avoid
My biggest first-time mistake was not pressing the crust firmly enough into the pan. I just patted it down, and when I went to slice the bars, the crust crumbled into pieces instead of holding a neat base. Don’t do what I did! Use real, even pressure with a flat-bottomed tool. A well-packed crust is the foundation of the whole dessert. (See the next page below to continue…)
Do not use fat-free or low-fat sweetened condensed milk. The fat in the full-fat version is essential for the rich, creamy mouthfeel of the filling. The fat-free version will set, but the texture can be rubbery or gummy instead of luxuriously smooth. For the best results, stick with the classic, full-fat can.
Avoid adding the lemon filling to a hot crust straight from the oven. I did this once, and the heat began to “cook” the egg yolks in the filling on contact, creating little curdled bits. Let the crust cool for at least 15-20 minutes before pouring in the filling. Room temperature or slightly warm is perfect.
Finally, don’t skimp on the chilling time. If you try to cut into the bars after just an hour or two, the filling will be too soft and will ooze, making a mess. The full 3-4 hours (or overnight) in the fridge allows the filling to set into a perfect, sliceable custard. Patience is the final, crucial ingredient.
Serving Suggestions
I love serving these bars cold, cut into neat squares on a simple white platter. A light dusting of powdered sugar or a tiny dollop of the optional whipped cream on top of each square looks elegant. A few thin curls of lemon zest or a single fresh raspberry on each makes for a stunning presentation.
For a casual, summery vibe, I’ll serve them directly from the pan with a bowl of fresh berries (blueberries, raspberries, or strawberries) on the side. The berries’ natural sweetness and slight acidity complement the lemon perfectly, and it lets everyone build their own perfect bite.
These bars are my go-to potluck dessert. I’ll cut them into smaller, bite-sized pieces and arrange them on a decorative tray. They transport beautifully in a cooler or an insulated bag and are always one of the first things to disappear from the table. They’re a refreshing finish to any heavy meal.
Variations & Customizations
For a “Lemon Blueberry Bliss” version, I’ll scatter a cup of fresh blueberries over the warm crust before pouring the lemon filling on top. They sink in slightly and create little bursts of juicy sweetness. A swirl of blueberry jam in the filling is another delicious option.
If you love coconut, mix 1/2 cup of toasted shredded coconut into the graham cracker crust. For the filling, you can add 1/2 teaspoon of coconut extract along with the lemon juice. It’s a fantastic tropical twist that feels like a vacation in a bar.
For a different citrus profile, try using lime juice and zest for “Key Lime Pie Bars,” or a combination of lemon and orange. You can also make a “Swirled” version by gently folding a few tablespoons of raspberry or strawberry puree into half of the lemon filling before pouring it into the pan, then swirling it with a knife.
How to Store, Freeze & Reheat
To store leftovers, I keep the bars covered tightly with plastic wrap or in an airtight container in the refrigerator. They will stay fresh and maintain their perfect texture for 4-5 days. The crust will soften slightly over time but remains delicious.
Yes, you can freeze these bars! Once fully set, I cut them, place them in a single layer on a parchment-lined baking sheet to flash-freeze, then transfer them to a freezer-safe bag. They’ll keep for up to 2 months. Thaw in the refrigerator overnight before serving. Note: If topped with whipped cream, freeze without it and add fresh cream after thawing.
There is no need to reheat these bars. They are designed to be enjoyed cold. Serving them straight from the fridge is part of their refreshing charm. If they’ve been frozen and thawed, they might be slightly softer but will still taste fantastic.
Conclusion
These Lazy Day Lemon Cream Pie Bars are proof that the most dazzling desserts don’t require marathon baking sessions. They’ve brought so much bright, sunny flavor to my table with such minimal effort, and they never fail to make people smile. I hope this recipe becomes your secret weapon for easy, impressive treats, bringing a little slice of creamy, citrusy joy to your kitchen whenever you need it. Now, go zest those lemons—your lazy day masterpiece awaits.