
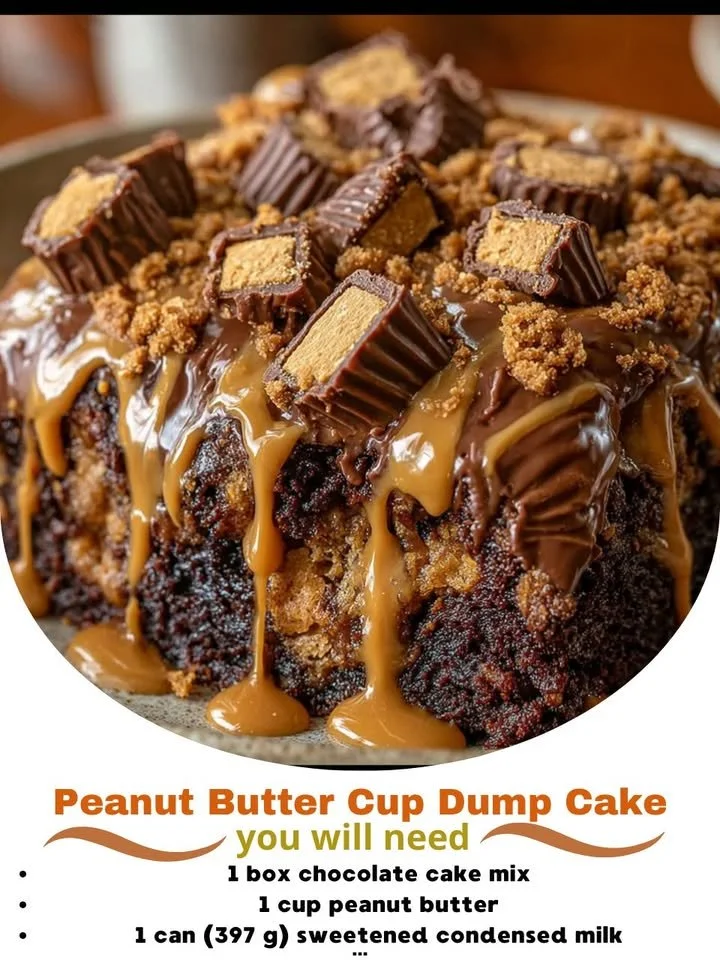
If you’re anything like me, you know there’s something truly special about a dessert that feels indulgent and cozy all at once. This Peanut Butter Cup Dump Cake is not only ridiculously easy to make, but it also results in a warm, gooey treat that melts in your mouth. So, grab your apron, and let’s dive into my kitchen!
Why You’ll Love This Recipe
You’ll love this Peanut Butter Cup Dump Cake because it’s the ultimate comfort food, bringing together the nostalgic taste of peanut butter cups with the simplicity of a dump cake. It’s perfect for family gatherings, parties, or just a cozy night in with a spoonful of something sweet. The best part? You can whip it up in no time, and I promise your house will smell incredible as it bakes! (See the ingredients in the next page below…)
Ingredients
– 1 box chocolate cake mix
– 1 cup creamy peanut butter
– 1 cup milk
– 1 cup chocolate chips
– 1 cup chopped peanut butter cups (I love using Reese’s!)
– ½ cup butter, melted
– 1 teaspoon vanilla extract
– Powdered sugar for sprinkling (optional)
Equipment Needed
– 9×13 inch baking dish
– Mixing bowl
– Whisk or spatula
– Measuring cups and spoons
– Oven
Step-by-Step Instructions
To start, preheat your oven to 350°F. While it heats up, grab a mixing bowl and combine the chocolate cake mix with milk, melted butter, creamy peanut butter, and vanilla extract. I love to use a whisk for this part because it makes the batter nice and smooth. You’ll know you’ve got it right when the mixture is creamy and well-blended! (See the next page below to continue steps…)
Next, fold in the chocolate chips and chopped peanut butter cups into the batter. The combination of textures at this stage is just delightful — the soft batter along with the chunks of candy awaiting their turn in the oven makes my mouth water! Now, pour the batter into a greased 9×13 inch baking dish. Spread it out evenly so that every corner gets that deliciousness.
Once your cake batter is in the dish, pop it into the oven for about 30-35 minutes, or until the top is golden brown and a toothpick inserted in the center comes out clean. The chocolatey scent wafting through my kitchen during this time is almost unbearable! As it cools, I often sprinkle some powdered sugar on top to give it that extra touch of sweetness and a lovely finish.
After it has cooled for a few minutes, slice yourself a generous piece, and dig in! I highly recommend serving this warm, perhaps with a scoop of vanilla ice cream on top for that classic hot-and-cold experience. Trust me, it’s the perfect treat for any occasion!
Pro Tips for Best Results
I’ve tested this recipe a few different ways, and one tip I can give you is to use room temperature ingredients. If you take your eggs and butter out of the fridge beforehand, they combine more easily and create a smoother batter. The texture will be so much more enjoyable!
Another thing I’ve found is that you can get creative with the toppings. The first time I made this, I topped it with crushed peanuts for a little extra crunch — such a great idea if you’re a nut lover like me! You could also try drizzling some melted chocolate over the top for an extra decadent finish.
Lastly, don’t skip the powdered sugar at the end if you want that beautiful, café-style look. It elevates the dessert and makes it feel even more special, like something you’d find in a bakery. Your friends and family will be so impressed!
Common Mistakes to Avoid
One common mistake I made when I first tried this recipe was not greasing the baking dish properly. Let me tell you, it’s a pain to clean! Always make sure to grease the dish well so that your cake slides out easily and doesn’t stick to the bottom. A simple layer of butter or a non-stick spray does wonders. (See the next page below to continue…)
Another thing to watch out for is overmixing your batter. I know it can be tempting to really get in there with the whisk, but too much mixing can lead to a dense cake instead of the light, airy, deliciousness we want. Just mix until the ingredients are combined and resist the urge!
Also, keep an eye on the baking time. My oven runs a bit hot, and I’ve accidentally burned my first batch. Check it five minutes earlier than suggested — this allows you to catch it at the perfect time while it’s still moist and tender.
Lastly, be careful not to skip the cooling time. I completely understand the excitement to dive in, but if you cut into the cake too early, you might make a gooey mess. Patience is key here, my friends!
Serving Suggestions
Serve this Peanut Butter Cup Dump Cake warm, and if you want to take it to the next level, a scoop of vanilla ice cream is a must — the creamy coldness pairs perfectly with the warm, gooey cake. If you’re feeling extra indulgent, drizzle some chocolate syrup over the top before serving. It’s a treat that definitely satisfies any sweet tooth!
I also love serving this cake at gatherings. Cut it into squares, and arrange pieces on a large serving platter. It makes for an inviting dessert display and is perfect for guests to help themselves.
Lastly, don’t forget to set out some whipped cream or even some whipped topping. Placing a dollop on top of each serving adds a lovely lightness and makes everything feel festive. Everyone will be asking for your recipe!
Variations & Customizations
If you’re feeling adventurous, you can swap out the chocolate cake mix for a yellow cake mix for a delightful twist. The flavor will change, but the essence of the peanut butter cups will still shine through. Sometimes, I even layer in some fresh banana slices for a banana-peanut butter flavor that’s absolutely dreamy.
You could also incorporate different flavors of peanut butter cups, like the crunchy version or even the limited-edition flavors that come out every fall. It adds a seasonal twist that can really surprise your guests in the best possible way!
For a more decadent twist, I’ve added a chocolate ganache drizzle. Simply melt some chocolate with a bit of cream and drizzle it over the cooled cake. It takes your dessert from amazing to spectacular in just a few minutes!
How to Store, Freeze & Reheat
If you happen to have leftovers, I’m sure you’ll be pleased to know that this cake stores quite well. Simply cover it with plastic wrap or foil and keep it at room temperature for up to three days. I recommend re-warming individual pieces in the microwave for about 15 seconds before enjoying them again.
If you want to make a batch in advance, you can freeze the dump cake, too! Just make sure it’s fully cooled, then cut it into squares and wrap each piece tightly in plastic wrap. Pop those babies into a freezer bag, and they can last for up to three months. When you’re ready to enjoy a slice, let it thaw in the fridge overnight or warm it up directly from the freezer for that freshly-baked taste.
And if reheating from frozen, just pop it in the microwave for about 30 seconds, and you’ll be ready to indulge in your delicious treat once again!
Conclusion
I hope you enjoy making this Peanut Butter Cup Dump Cake as much as I do! It’s a simple yet satisfying dessert that’s perfect for sharing with loved ones or just treating yourself. Remember, there’s nothing better than a warm cake fresh out of the oven to brighten your day. Happy baking!