
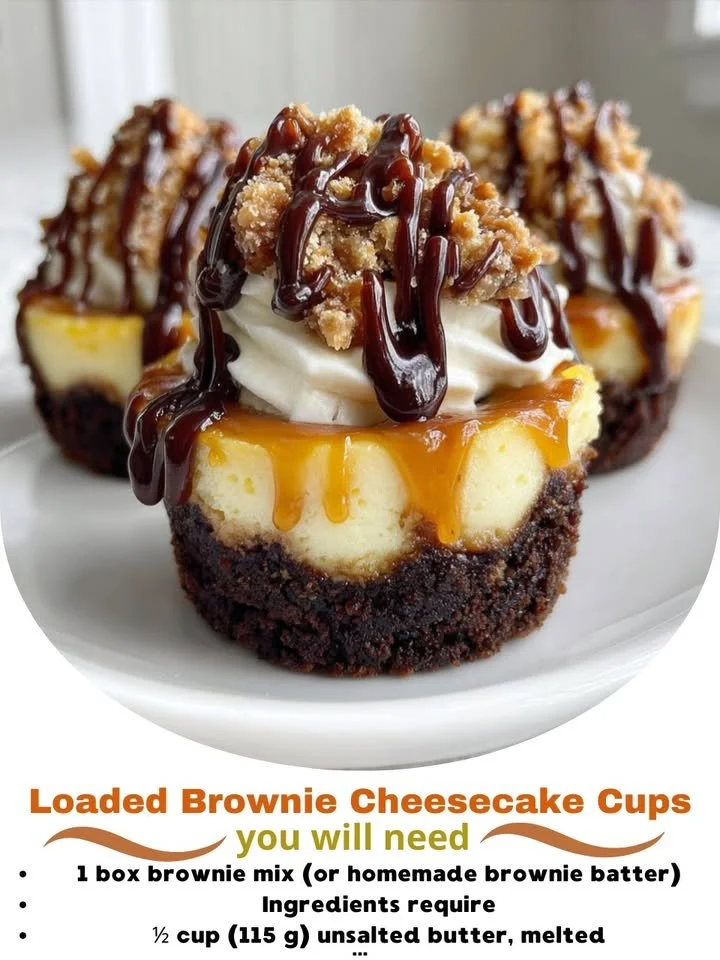
Oh, my goodness! Have you ever had a dessert that makes your heart sing and your taste buds do a happy dance? That’s exactly how I feel about these Loaded Brownie Cheesecake Cups. They’re like a hug in food form, bursting with flavor and textures that will leave you craving more. Easy to make and oh-so-satisfying, these delectable little cups are perfect for any occasion—whether it’s a cozy night in or a gathering with friends.
Why You’ll Love This Recipe
The combination of rich, fudgy brownies encased in creamy cheesecake makes for a dessert that is hard to resist. Each bite is a perfect balance of chocolate and creamy goodness, topped off with your favorite add-ins like nuts and caramel sauce. I can promise you that these Loaded Brownie Cheesecake Cups will make you the star of any dessert table. They’re fun to make and even more fun to eat! (See the ingredients in the next page below…)
Ingredients
– 1 box of brownie mix (plus ingredients as per package)
– 8 oz cream cheese, softened
– 1/3 cup sugar
– 1 tsp vanilla extract
– 1 large egg
– Mini chocolate chips (for topping)
– Chopped nuts (for added crunch)
– Caramel sauce (for drizzling)
Equipment Needed
– Muffin tin
– Cupcake liners
– Mixing bowls
– Hand mixer or whisk
– Measuring cups and spoons
– Rubber spatula
Step-by-Step Instructions
First, let’s start by preheating your oven to 350°F (175°C). This is such an essential step to ensure your Loaded Brownie Cheesecake Cups bake evenly. Then, go ahead and prepare your muffin tin by lining it with cupcake liners. I love using colorful ones to brighten up my kitchen! Next up, you’ll want to prepare the brownie mix according to the package directions. Once your batter is smooth and chocolaty, spoon it into the prepared muffin cups, filling them about halfway. This is where the magic begins! (See the next page below to continue steps…)
After that, it’s time to make the cheesecake layer. In a separate bowl, mix the softened cream cheese with sugar and vanilla until it’s creamy and smooth. Then, add the egg and mix just until combined. You don’t want to overmix this part; keeping that luscious cheesecake texture is key! Once that’s done, spoon the cheesecake mixture over the brownie batter in the muffin cups. You can mix them a little if you want a marbled effect or keep them separate for distinct layers. The choice is yours!
Now, pop the muffin tin into the preheated oven and let those beauties bake for about 20-25 minutes. The tops should look set and a bit golden, sending a mouthwatering aroma wafting through your kitchen. Once they’re done, allow them to cool in the tin for a few minutes before transferring them to a wire rack to cool completely. When they’re finally cool, don’t forget to load them up with mini chocolate chips, nuts, and a drizzle of caramel for that finishing touch!
Pro Tips for Best Results
When I first tried this recipe, I was a little impatient and didn’t let the brownie cups cool completely before trying to remove them from the liners. Let me tell you, it was a gooey mess! So, lesson learned: patience is key. After baking, allow them to cool for at least 15 minutes in the muffin tin.
Also, I tested using different brownie mixes—some were cake-like, while others were fudgier. I found that a fudgy mix is perfect for holding up the cheesecake layer, creating that delightful contrast. So, if you can, go for one that’s dense and rich!
Lastly, I sometimes like to add a pinch of sea salt on top of the caramel drizzle. The sweet-and-salty combination takes these cups to a whole new level, and I can’t resist the contrast!
Common Mistakes to Avoid
One mistake I often see is overfilling the muffin cups with brownie batter. I learned the hard way that they can overflow while baking, creating a chocolaty mess in the oven. Trust me; filling them halfway is perfect to give the cheesecake layer enough space to rise as well. (See the next page below to continue…)
Another common pitfall is overbaking. It’s tempting to leave them in just a little longer to get a “set” top, but if you overbake them, they can turn dry, losing that creamy cheesecake goodness. Keep an eye on them toward the end of the baking time!
Lastly, when adding toppings, do it while the cups are still slightly warm so that the chocolate chips melt just enough to create a beautiful, gooey layer on top. It’s a simple but crucial step that enhances both the look and taste of your desserts.
Serving Suggestions
These Loaded Brownie Cheesecake Cups are delightful on their own, but let’s be real, they’re way more fun when dressed up! I love serving them with a scoop of vanilla ice cream on the side. The cold ice cream juxtaposes beautifully with the warm brownie cups.
You can also serve them at a party with a variety of toppings laid out—think whipped cream, extra chocolate sauce, or fresh berries. This way, guests can customize their dessert, turning it into a fun experience for everyone.
Finally, don’t shy away from combining them with a rich cup of coffee or hot chocolate. The depth of flavor from both beverages complements the rich chocolate and creamy cheesecake, creating a perfect pairing for dessert time!
Variations & Customizations
One variation I absolutely adore is making an Oreo version of these cups. Just substitute half of the brownie mix with crushed Oreo cookies and throw in some crushed Oreos into the cheesecake batter as well—it’s a decadent twist that my friends absolutely love.
If you’re feeling adventurous, try adding a layer of peanut butter in the cheesecake mix! Swirling in some creamy peanut butter not only alters the flavor slightly but adds a whole new creaminess that enhances that indulgent feel.
You could even personalize them with seasonal flavors like pumpkin spice in the fall or peppermint during the holiday season. A little bit of spice or mint can transform these cups into a festive treat everyone will rave about!
How to Store, Freeze & Reheat
These Loaded Brownie Cheesecake Cups can be stored in an airtight container in the fridge for up to five days—if they last that long! Just remember to keep any toppings like whipped cream separate until you’re ready to serve to maintain freshness.
If you want to make these ahead of time, they freeze beautifully. After they’ve cooled completely, pop them in a freezer-safe container and they’ll keep for about two months. When you’re ready to indulge, just thaw them in the refrigerator overnight.
Reheating is simple. You can pop them in the microwave for about 15-20 seconds, just enough to warm them through. This will give you that freshly baked experience when you take a bite!
Conclusion
I hope you fall in love with these Loaded Brownie Cheesecake Cups as much as I have! They bring comfort, joy, and a sprinkle of happiness in every bite. Whether you whip them up for yourself, share them with family, or impress friends at a gathering, these little delights are sure to be a hit. Happy baking!