
Next, I gently fold the wet ingredients into the dry mixture, careful not to overmix. Once combined, I add in the crushed pineapple and shredded coconut, folding until everything is evenly distributed. Prepare your baking pan by greasing it lightly, pouring in the batter, and smoothing it out. I find that this gets the cake ready for an even bake. Place it in the oven and let it bake for about 30-35 minutes, or until a toothpick comes out clean from the center. The warm, fruity fragrance wafting through the house during those precious minutes is pure bliss!
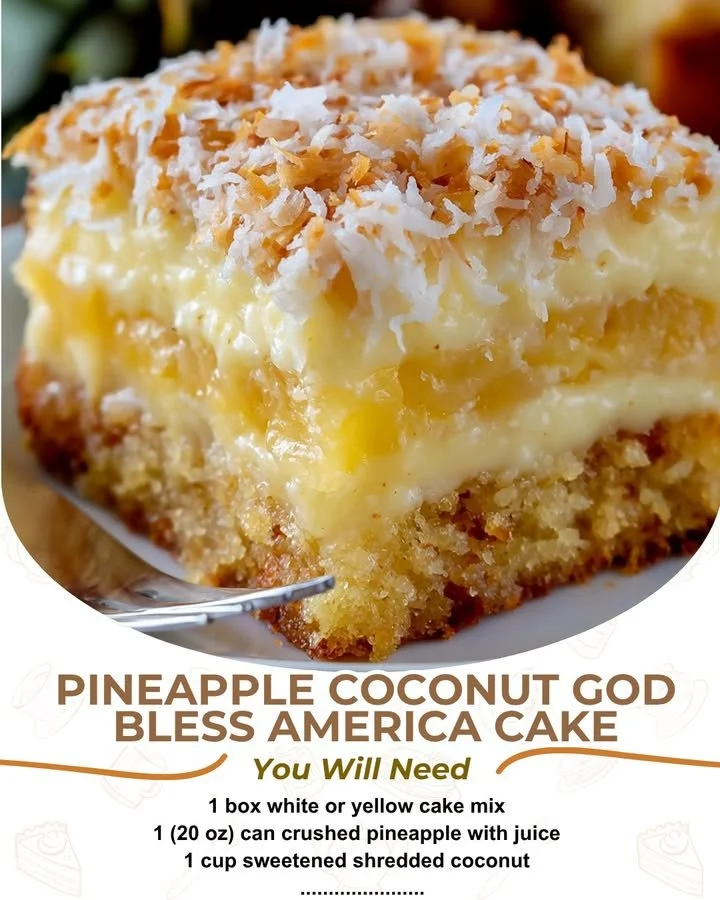
After baking, I let the cake cool in the pan for about 10 minutes before transferring it to a wire rack to cool completely. Once cooled, I love to prepare a light frosting of whipped cream or cream cheese to add that finishing touch. It complements the cake perfectly, creating that signature Pineapple Coconut flavor explosion.
Pro Tips for Best Results
One of the best tips I can share from my baking adventures is to truly let the pineapple drain before adding it to the batter. The extra moisture can make your cake soggy, and trust me, you don’t want that! I’ve tried both fresh pineapple and canned, and honestly, they both work, but the canned pineapple gives a more consistent flavor and texture.
Also, allowing your cake to cool completely is crucial before adding any frosting. I’ve made the mistake of frosting a warm cake in the past, and it melted right off! A well-cooled cake sets the stage for a beautifully frosted masterpiece. If you’re short on time, you can pop it in the fridge for about 30 minutes to speed up the cooling process.
Lastly, feel free to personalize your cake! I once had extra toasted coconut on hand, so I sprinkled it on top before serving, and it brought a delightful crunch that my guests loved. Experimenting with different toppings can really change the entire vibe of your cake!
Common Mistakes to Avoid
One of the most common mistakes I’ve seen is not measuring ingredients accurately. It may seem trivial, but too much flour or sugar can dramatically alter the texture of your cake. I recommend using a kitchen scale for precision. I’ve learned my lesson the hard way when a perfectly good batch turned out dense because I miscalculated the flour! (See the next page below to continue…)