
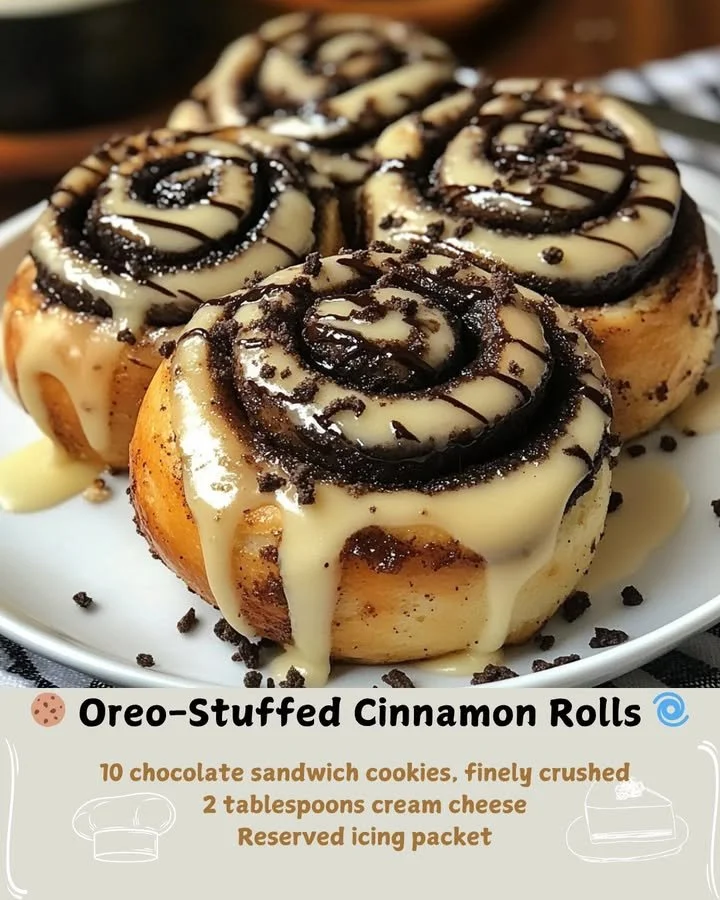
There’s something truly magical about the smell of freshly baked cinnamon rolls wafting through my kitchen. I love the soft, pillowy texture and the way they warm the heart and soul. But what if I told you that you could take that deliciousness to a whole new level? Enter Oreo-Stuffed Cinnamon Rolls! These are not just any cinnamon rolls; they’re a decadent blend of fluffy dough and creamy Oreo goodness that will leave you craving more with every bite.
Why You’ll Love This Recipe
These Oreo-Stuffed Cinnamon Rolls are a delightful mix of nostalgia and indulgence—perfect for cozy mornings or special occasions. The chocolatey crunch of Oreos paired with the sweet, spiced cinnamon filling creates a treat that feels both comforting and exciting. I promise this twist on a classic will have everyone in your home swooning. Trust me; you won’t want to miss this one! (See the ingredients in the next page below…)
Ingredients
– 2 cups all-purpose flour
– 2 tablespoons sugar
– 1 packet (2 ¼ teaspoons) active dry yeast
– ½ cup warm milk (about 110°F)
– 2 tablespoons unsalted butter, melted
– 1 large egg
– 1 teaspoon vanilla extract
– ½ teaspoon salt
– 1 cup crushed Oreos (about 10-12 cookies)
– 3 tablespoons brown sugar
– 1 tablespoon ground cinnamon
– Optional: icing for drizzling
Equipment Needed
– Mixing bowls
– Measuring cups and spoons
– Rolling pin
– Baking dish
– Plastic wrap or kitchen towel
– Oven mitts
– Cooling rack
Step-by-Step Instructions
To kick things off, I start by combining the warm milk, sugar, and yeast in a mixing bowl. I let this sit for about 5-10 minutes until it becomes frothy—there’s something so satisfying about watching the yeast work its magic! In another bowl, I mix in the melted butter, egg, vanilla extract, and salt. Once the yeast mixture is ready, I combine both bowls and gradually stir in the flour until a soft dough forms. This is where the fun really begins! (See the next page below to continue steps…)
Next, I knead the dough on a floured surface for about 5 minutes until it’s smooth and elastic. Then, I place it in a lightly greased bowl, cover it with plastic wrap, and let it rise in a warm spot for about an hour. The smell of the dough rising fills the kitchen—so delightful! Once it’s doubled in size, I punch it down and roll it out into a rectangle about ¼ inch thick.
Now comes the fun part! I sprinkle the cinnamon and brown sugar mixture evenly over the dough, followed by the crushed Oreos. The visual juxtaposition of the dark cookies against the golden dough really gets my appetite going! Carefully, I roll the dough tightly into a log shape and slice it into even rolls. Each swirl reveals a delicious hidden filling that I can hardly wait to taste.
Finally, I place the rolls in a greased baking dish, cover them again, and let them rise for another 30 minutes. Once they puff up beautifully, I pop them in the oven preheated to 350°F and bake for about 20-25 minutes until they are golden brown. The aroma that fills the house at this point is irresistible—it’s like a warm hug!
Pro Tips for Best Results
First off, I’ve tested this recipe using both homemade and store-bought dough, and honestly, the homemade version wins every time in terms of flavor and freshness! The texture just can’t be beat. If you’re short on time, though, feel free to use pre-made dough; nobody will judge!
Another tip I learned the hard way is to wait for your rolls to cool for at least 10 minutes before icing them. I once drizzled icing on while they were still piping hot, and it just melted away. Letting them cool a bit allows the icing to set, creating a beautiful glaze that you can actually see and enjoy.
Lastly, I love experimenting with my filling. If you find yourself with leftover cookie crumbs or other treats, don’t hesitate to mix them in! I’ve tried adding chocolate chips, peanut butter, and even sprinkles—it all turns out delicious!
Common Mistakes to Avoid
One of the most common mistakes is rushing the dough rising time. I know it’s tempting to skip ahead, but giving the dough enough time to rise is crucial for fluffy, airy rolls. My first few attempts resulted in dense, sad rolls because I wanted instant gratification! (See the next page below to continue…)
Another pitfall is not rolling the dough tightly enough. If the rolls are loose, they can unravel during baking, leaving you with a gooey mess instead of beautiful spirals. It takes practice to get the right tension, but trust me, it’s worth the effort!
Moreover, be mindful of the oven temperature. I once baked my rolls too hot, resulting in burnt edges while the insides were still doughy. Using an oven thermometer can help avoid this; ovens can sometimes be deceiving, and checking the heat ensures perfectly baked goods every time.
Serving Suggestions
These Oreo-Stuffed Cinnamon Rolls are an extraordinary treat as-is, but I like to serve them with a scoop of vanilla ice cream for a comforting dessert. The creaminess of the ice cream pairs wonderfully with the warm rolls, making it a hit for family gatherings or weekend brunches.
Another serving option I adore is drizzling a simple homemade icing over the top. I mix powdered sugar, a splash of milk, and vanilla extract to create a light drizzle that adds just the right sweetness without overpowering the Oreo flavor.
Lastly, don’t shy away from giving them a breakfast twist! I’ve been known to serve these rolls with a side of crispy bacon for a delightful contrast of sweet and savory. It’s a breakfast experience everyone will remember!
Variations & Customizations
If you’re feeling adventurous, consider swapping out the classic Oreo for different cookie fillings. Golden Oreos add a stunning twist, and using other sandwich cookies can yield some fun flavor combinations, like mint or peanut butter. Your creativity is the only limit!
For those who want a healthier spin, you can substitute a portion of the all-purpose flour with whole wheat flour. The flavor might change slightly, but it gives you a touch more nutrition without compromising too much on texture.
Finally, if you adore spices, try adding in a pinch of nutmeg or even a bit of cocoa powder into the dough for an added flavor dimension. The playful mix of spices can elevate the rolls to a whole new level!
How to Store, Freeze & Reheat
After enjoying these delightful rolls, if you have any leftovers (which is rare in my house), you can store them in an airtight container at room temperature for up to two days. If you want to keep them longer, freezing is a great option. I wrap each roll tightly in plastic wrap and then foil, placing them in a freezer-safe bag. They can be frozen for up to three months!
When you’re ready to enjoy them again, just remove the number of rolls you want from the freezer and let them thaw at room temperature. To reheat, I find that putting them in the microwave for 20-30 seconds does the trick, bringing back that soft, gooey goodness that’s hard to resist.
If you prefer a warmer option, you can pop them in a low oven (around 300°F) for about 10 minutes. The smell that fills the house will be just like the first time you baked them!
Conclusion
Oreo-Stuffed Cinnamon Rolls are a treat that combines the nostalgic flavors of childhood with the comforting essence of home baking. I hope you find as much joy in making and sharing these rolls as I do. They’re perfect for any occasion or simply for indulging in a delightful breakfast or dessert. So grab your apron, roll up your sleeves, and let the sweetness fill your kitchen! Happy baking!