
Next, I combine the dry ingredients: flour, baking powder, and salt in a separate bowl. I sift them together to make sure there are no lumps. It’s such a lovely process—flour gently cascading into the bowl. Then, I gradually mix the dry ingredients into my wet mixture, being careful not to overmix. I pour the batter evenly into the prepared cake pans, giving them a gentle shake to level it out. Bake these beauties for around 25 minutes or until a toothpick comes out clean. While those cakes cool, I get started on the churro bites.
For the churros, I heat equal parts water and butter in a saucepan, bringing it to a gentle boil before removing it from heat. I stir in the flour, sugar, and a pinch of salt until it forms a dough. Once it’s cool enough to handle, I pipe small strips of dough onto a baking sheet and fry them until golden brown. I can’t even describe the delightful aroma that fills my kitchen during this step! After they’ve cooled, I coat them in a mixture of cinnamon and sugar, which adds that classic churro touch.
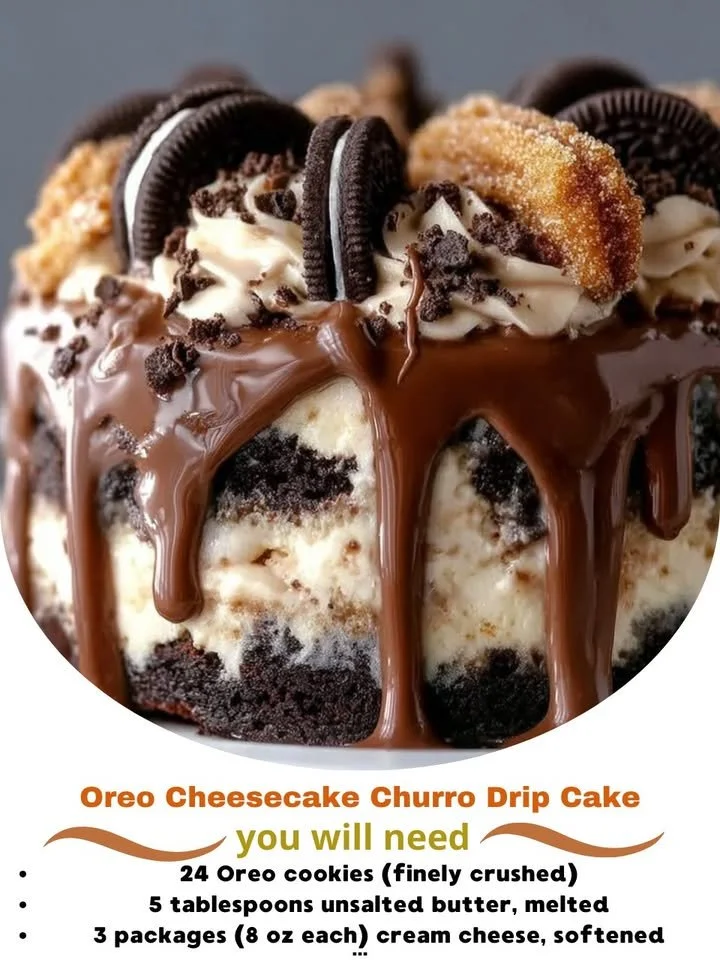
Now comes the fun part—assembly! I carefully slice the cooled cakes in half and layer them with generous dollops of Oreo cheesecake filling in between. I love using a piping bag for this—it makes everything so neat! Once stacked, I whip up some heavy cream and chocolate chips over a double boiler until it’s silky smooth for the drip. I let it cool slightly before pouring it over the top of my cake. I finish by arranging my delicious churro bites on top for that jaw-dropping presentation.
Pro Tips for Best Results
To get that perfect cheesecake filling, I used room temperature cream cheese. I tested it three ways, and trust me, taking the time to soften it properly made a huge difference in how creamy and blended the filling turned out. Nobody likes lumps, especially in cheesecake!
When it comes to the chocolate drip, I had to play around with the consistency a bit. The secret is to have it slightly cooled but still pourable. I once let it get too cold, and it wouldn’t drip down the sides—what a mess! So always keep an eye on that timing!
Lastly, if you want your churros extra crispy, I recommend frying them in batches. This way, they all get a nice even golden brown color and a perfect crunchy texture. If they sit in the oil for too long, they can get a little soggy, and nobody wants that in a churro—trust me!
Common Mistakes to Avoid
One of the biggest mistakes I made the first time was not letting my cake layers cool completely before assembling. Picture this: warm cake layers, a creamy filling, and everything just starts to melt together into a gooey mess. It’s heartbreaking to watch! So, be patient and let that cake cool.
Another pitfall is overmixing your batter. I’ve done that, and it can result in a dense cake instead of the fluffy layers we desire. Mix just until everything’s combined, and you’ll be on the right track.
Don’t skip the step of lining the cake pans! I thought greasing them would be enough the first time, but one of my layers stuck and came apart when I flipped it out. This left me fumbling to patch it up with filling. A quick piece of parchment on the bottom is worth every second!
Lastly, keep an eye on those churros while frying. It’s so easy to get distracted with the cake-making process. The first time I left my churros too long, they turned nearly black! Set a timer if you need to, so you can focus on those delicious flavors without burning them. (See the next page below to continue…)