
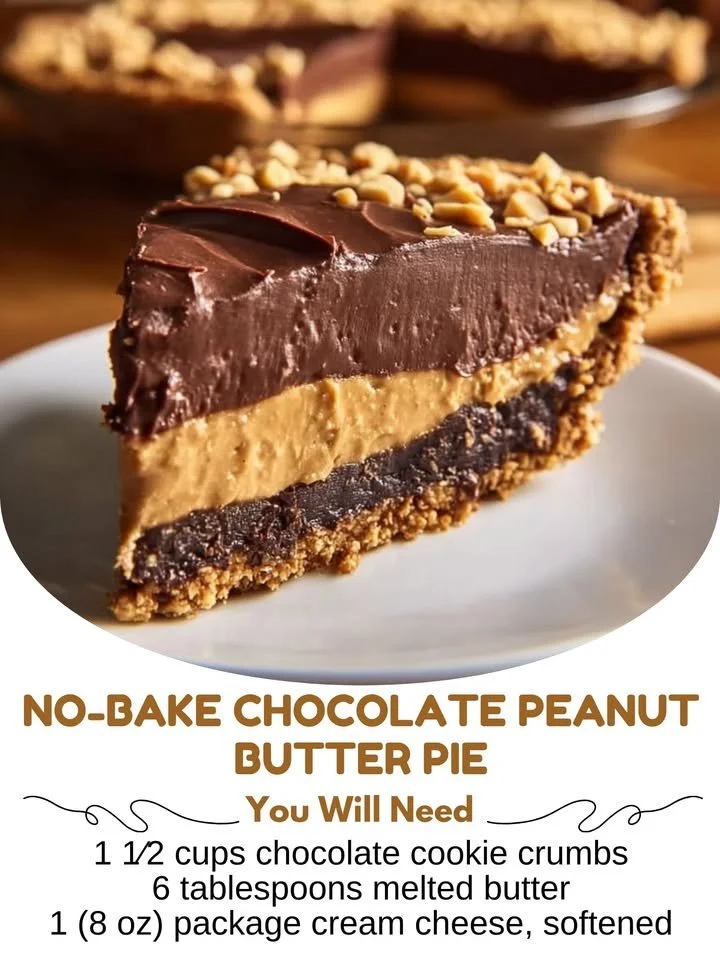
No-Bake Chocolate Peanut Butter Pie. This recipe is perfect for those moments when you want something indulgent but don’t want to heat up the kitchen. Plus, it’s so easy to whip up! I love that I can prepare it in a flash, and it’s always a hit with family and friends.
Why You’ll Love This Recipe
You’ll love this No-Bake Chocolate Peanut Butter Pie for its creamy texture, the rich chocolate flavor, and of course, that delightful peanut butter taste that balances everything perfectly. It’s a dessert that feels gourmet but is so simple to put together. I’ve often found myself craving it late at night, and the best part? It’s guilt-free because it requires no baking at all! (See the ingredients in the next page below…)
Ingredients
– 1 ½ cups crushed chocolate cookies (like Oreo)
– ½ cup unsalted butter, melted
– 1 cup creamy peanut butter
– 1 cup powdered sugar
– 1 ½ cups heavy whipping cream
– 1 teaspoon vanilla extract
– 1 cup semi-sweet chocolate chips
– 1 tablespoon coconut oil (optional, for chocolate drizzle)
Equipment Needed
– Mixing bowls
– Electric mixer or whisk
– 9-inch pie dish
– Rubber spatula
– Microwave-safe bowl (for melting chocolate)
– Plastic wrap (for covering the pie)
Step-by-Step Instructions
To start off, I begin by making the crust, which is one of my favorite parts. I crush the chocolate cookies in a resealable plastic bag—there’s something oddly satisfying about that! Then, I combine the crumbs with melted butter until it resembles wet sand. Press this mixture firmly into the bottom and up the sides of a 9-inch pie dish, and pop it in the fridge while I prepare the filling. This allows the crust to firm up a bit. (See the next page below to continue steps…)
Next, I grab a mixing bowl and beat the heavy whipping cream until soft peaks form. It’s so fluffy and light—it just smells divine! In another bowl, I mix together the peanut butter and powdered sugar until well combined, which creates a beautifully creamy texture. Then, I gently fold in the whipped cream until everything is luscious and combined, making sure not to deflate it.
Now comes the fun part: pouring the filling into the crust. I take my time spreading it evenly, ensuring every corner is covered. Once that’s done, I melt the chocolate chips with a bit of coconut oil in the microwave, stirring until silky smooth, and drizzle it over the top of the pie. This gives the pie that beautiful glossy finish and adds an extra layer of chocolatey goodness.
Finally, I cover the pie with plastic wrap and pop it in the fridge for at least 4 hours, preferably overnight if you can wait that long. The filling gets to set up nicely, making each slice a treat of creamy peanut butter goodness and chocolate bliss.
Pro Tips for Best Results
Through my baking adventures, I’ve tested this pie in a couple of different ways, and I found that letting the pie sit overnight in the fridge truly enhances the flavors. The peanut butter gets richer, and the crust becomes more integrated with the filling, making every bite divine!
I also discovered that using heavy whipping cream instead of whipped topping makes a world of difference in texture. The fresh whipped cream adds an airy feel that pairs beautifully with the dense peanut butter mixture. Trust me, it takes it to an entirely different level!
Lastly, I recommend using a good-quality chocolate for the topping. I’ve tried both semi-sweet and dark chocolate, and while they both taste fantastic, dark chocolate gives it a nice depth. The balance with the sweetness of the pie is just heavenly.
Common Mistakes to Avoid
One of the most common mistakes I see (and made myself initially) is not letting the crust cool completely before adding the filling. If you try to pour the filling into a warm crust, it can cause the filling to melt, and trust me, nobody wants a gushing pie! (See the next page below to continue…)
Another mistake is over-mixing when combining the whipped cream with the peanut butter mixture. I learned to fold gently to keep that light texture intact. If you mix too aggressively, you’ll lose all those lovely air bubbles that give this pie its fluffiness!
Don’t rush the chilling time either. I know it’s tempting to slice into the pie right after making it, especially when the chocolate aroma wafts through the kitchen. But allowing it to set properly is key to achieving that perfect slice.
Serving Suggestions
I love serving this No-Bake Chocolate Peanut Butter Pie with a dollop of whipped cream on top! It adds an extra touch of fluffiness and presentation that makes it look even more inviting. A sprinkle of crushed peanuts or chocolate shavings on top can elevate it further, adding a nice crunch and visual appeal.
For an adorable touch, consider pairing it with a side of fresh berries. The tartness of the berries cuts through the richness of the pie perfectly, creating a delightful balance. It’s a great way to add a pop of color to your dessert table!
Finally, hot coffee or even a glass of cold milk complements this dessert beautifully. The warm beverage enhances the flavors of chocolate and peanut butter, while milk gives you that classic dessert experience we all know and love.
Variations & Customizations
If you’re feeling adventurous, why not try adding a layer of banana slices beneath the peanut butter filling? This adds a subtle sweetness and a fun texture that pairs surprisingly well. I often have ripe bananas sitting on my countertop, and this is the perfect way to use them up!
For a more decadent option, consider adding a layer of chocolate ganache between the crust and the peanut butter filling. Just melt some chocolate with a little cream, spread it in the crust, and let it set before adding the pie filling. This creates an extra level of richness and indulgence that chocolate lovers will adore.
Lastly, swap out the creamy peanut butter for crunchy peanut butter for an added texture contrast. This simple change gives the pie a delightful crunch that really enhances the eating experience!
How to Store, Freeze & Reheat
You can store any leftover pie in an airtight container in the fridge for up to 5 days—if it lasts that long! The flavors continue to meld together, making the next slices even more delightful. Just be sure to keep it covered to maintain freshness.
If you want to prepare ahead for a special occasion, this pie can easily be made and frozen. Just make sure to wrap it tightly in plastic wrap and then foil before freezing to avoid freezer burn. You can freeze it for up to a month, and when you’re ready, simply take it out a few hours before serving to let it thaw in the fridge.
As for reheating, there’s no need to heat this pie—serve it chilled. If you’d like a warm dessert experience, consider warming individual slices in the microwave for about 10-15 seconds. This lightly warms the peanut butter while still allowing the chocolate to maintain its creamy texture.
Conclusion
I can’t recommend this No-Bake Chocolate Peanut Butter Pie enough! Each bite is a divine blend of chocolate and peanut butter—it’s comforting, decadent, and surprisingly easy to make. Whether for a special occasion or just because you’re in the mood for something sweet, this pie is sure to win hearts. Now, if you’ll excuse me, I think I need to go whip up another one for my family!