
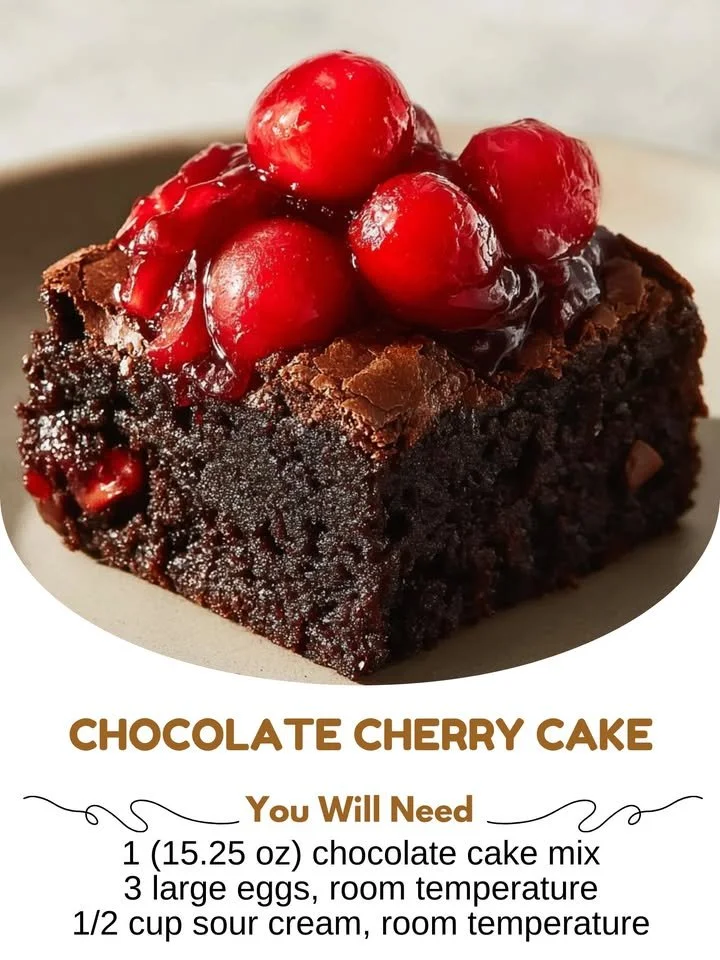
Chocolate Cherry Cake is one of those delightful desserts that always brings a smile to my face. The rich, velvety chocolate pairs beautifully with the tartness of cherries, creating a flavor balance that is simply irresistible. Every time I bake this cake, my kitchen fills with the warm aromas of chocolate and cherry, making it a cherished treat for any occasion. Whether it’s a birthday, a holiday, or just an everyday celebration of life, this cake never disappoints!
Why You’ll Love This Recipe
This recipe is the perfect combination of easy and impressive, making it suitable for both novice bakers and seasoned pros. The moist chocolate cake blends seamlessly with juicy cherries, and the whole thing can be topped off with a simple frosting or enjoyed as is. It’s a great dessert to share with family or friends, and the compliments that follow are always well-deserved. Plus, each bite feels like an indulgent escape into a world of chocolatey goodness. (See the ingredients in the next page below…)
Ingredients
– 1 ¾ cups all-purpose flour
– 2 cups granulated sugar
– ¾ cup unsweetened cocoa powder
– 1 ½ teaspoons baking powder
– 1 ½ teaspoons baking soda
– 1 teaspoon salt
– 2 large eggs
– 1 cup whole milk
– ½ cup vegetable oil
– 2 teaspoons vanilla extract
– 1 cup boiling water
– 1 cup pitted cherries (fresh or frozen)
– Optional: whipped cream or chocolate frosting for topping
Equipment Needed
– Mixing bowls
– Whisk
– Electric mixer (optional but helpful)
– Measuring cups and spoons
– 9-inch round cake pans
– Oven
– Cooling rack
Step-by-Step Instructions
To start, preheat your oven to 350°F (175°C) and grease your round cake pans. I find that using a little bit of cooking spray or butter really helps the cakes come out easily after baking. In one large mixing bowl, I whisk together the flour, sugar, cocoa powder, baking powder, baking soda, and salt. It’s important to mix these dry ingredients well to ensure an even distribution of flavors. Once that’s done, I add in the eggs, milk, oil, and vanilla extract, and beat everything together until it’s smooth and creamy. The batter will have a lovely glossy look, which always makes me excited! (See the next page below to continue steps…)
Next up, I slowly pour in the boiling water, which might seem odd, but trust me—this step makes the cake super moist. Mix it gently until combined, and then fold in those beautiful cherries. The vibrant red of the cherries against the rich chocolate batter is nothing short of stunning. Now, divide the batter evenly between the two prepared pans, smoothing out the tops with a spatula. Bake them in the preheated oven for about 30-35 minutes, or until a toothpick comes out clean from the center. Once baked, I let them cool in the pans for about 10 minutes, then transfer them to a cooling rack to cool completely.
While waiting for the cakes to cool, I like to prepare my frosting or topping, if I’m using one. If you decide to go with whipped cream, feel free to sweeten it to your liking. It complements the cake splendidly! Once the cakes are cool, I gently place one layer on a serving plate and generously top it with the whipped cream or frosting (or even just a sprinkle of powdered sugar for something simpler). Then, I carefully place the second layer on top and repeat the process. I usually slice into it right away—who can resist that first slice?
Pro Tips for Best Results
I tested this cake three ways: with fresh cherries, frozen cherries, and even cherry jam. I found that fresh or frozen yield the best results in terms of texture and flavor, while the jam can add a bit too much sweetness. If you’re using frozen cherries, make sure to thaw and drain them first to avoid excess moisture in your batter. Additionally, let your eggs and milk come to room temperature before mixing them into the batter. This small step can really make a difference in how well the ingredients combine and contribute to the cake’s fluffiness.
When it comes to baking time, every oven is different! I highly recommend checking the cakes at the 30-minute mark. I’ve had a few mishaps with overbaking, resulting in a cake that’s a bit too dry for my taste. And don’t rush the cooling stage; this is vital for the cakes to firm up and hold their shape during assembly. If you try to frost them too soon, you could end up with a melty mess!
Lastly, taste your batter! Before baking, I always dip a spoon into the chocolate batter to check for flavor. Adjusting the sugar or adding a hint of espresso powder can elevate the taste to something truly extraordinary. Trust your instincts; my kitchen is my playground!
Common Mistakes to Avoid
One common mistake I learned early on is rushing the baking stage. You may be eager to take that cake out early, but it’s crucial to give it the full time in the oven. I once pulled my cake out too soon, thinking I could compensate with the cherries, but it resulted in a gooey mess that didn’t hold together. Patience is key! (See the next page below to continue…)
Another newbie error is not properly greasing the pans. I’ve had my fair share of cakes stick to the pan, which is heartbreaking! I suggest using both butter and a light dusting of flour in the pans to ensure they’re coated well. And don’t forget to line the bottom with parchment paper for added protection.
Also, pay attention to cooling: if you try to frost the cake while it’s still warm, that lovely frosting will melt away and create a soupy ganache instead! Letting the cakes cool completely is non-negotiable if you want to avoid that dreaded drippy disaster. Lastly, resist the temptation to skip the cherry folding step. It provides that delightful burst of fruitiness with each bite, and not incorporating them properly could leave you with a rather dull chocolate cake.
Serving Suggestions
When it comes to serving this divine Chocolate Cherry Cake, I always recommend slicing it into generous pieces. Personally, I love serving it alongside a scoop of vanilla ice cream or a dollop of whipped cream. The contrast between the creamy texture and the rich, chocolatey layers is heavenly! You can also sprinkle a few additional fresh cherries on top for a fun pop of color—after all, we eat with our eyes first, right?
Another fun idea is to pair the cake with a glass of sweet red dessert wine or a dark coffee. The flavors complement each other so well, and it creates a cozy, café-style experience right at home. If you’re feeling extra fancy, drizzle a bit of chocolate sauce over each slice just before serving to turn it into a real showstopper at the dessert table.
And of course, for those special occasions or holidays, setting up a small dessert bar with other treats is always a hit. You can have small bowls of fruit, whipped cream, and chocolate shavings for guests to customize their slices. It’s like creating their own little masterpiece on a plate, and who doesn’t love that?
Variations & Customizations
If you’re feeling adventurous and want to switch things up, one of my favorite variations is to add a splash of almond extract to the batter. It enhances the cherry flavor beautifully and adds an unexpected twist that keeps everyone guessing what the secret ingredient is! Almond and cherry are quite the dynamic duo, often creating a wonderful flavor profile that I absolutely adore.
For those who want a lighter version, you could easily substitute half of the oil with applesauce. It keeps the cake moist while cutting back a bit on calories, and I promise it doesn’t compromise on flavor whatsoever. Plus, you could even consider using a sugar substitute if you’re looking for a healthier alternative—even with all the modifications, I’ve had some lovely results!
And let’s not forget about the frosting—if you’re not a fan of chocolate, a simple cream cheese frosting or a light citrus glaze would also work wonders. The refreshing tang of cream cheese perfectly matches the richness of the cake, creating a balanced experience for your palate.
How to Store, Freeze & Reheat
If you happen to have leftovers (which I highly doubt you will!), you can store the cake in an airtight container at room temperature for up to 2 days. I usually cover the top with plastic wrap to keep it moist if I haven’t already frosted it. For longer storage, this cake freezes beautifully! Just make sure to wrap it tightly in plastic wrap and then in aluminum foil to avoid freezer burn.
To freeze, slice the cake into individual pieces, which makes it easy to thaw just the amount you want to enjoy later. It can last up to three months in the freezer, so you can prepare ahead of time for any upcoming gatherings or simply treat yourself later.
When it’s time to reheat, I recommend letting it thaw in the fridge overnight and warming individual slices in the microwave for about 15-20 seconds. It should be just enough to take the chill off without completely drying it out. Serve it warm with a side of fresh whipped cream, and you’ll feel like you’re indulging all over again!
Conclusion
So there you have it, my go-to recipe for a Chocolate Cherry Cake that never fails to impress. Whether it’s a casual family dinner or a more formal gathering, this cake brings joy and deliciousness to the table. I hope you enjoy baking it as much as I do, and that each slice feels like a little piece of heaven! Happy baking!