
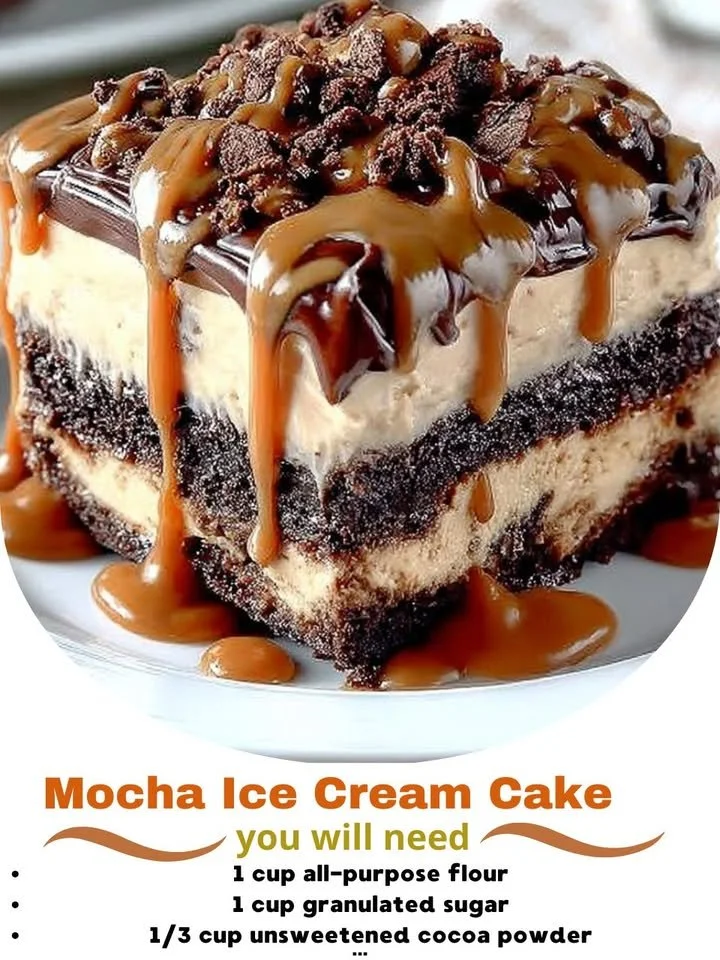
I’ve always had a soft spot for desserts that bring together my two favorite things: coffee and chocolate. It’s like a cozy hug on a plate, especially when it’s presented as a stunning Mocha Ice Cream Cake. Whenever I whip up this delightful treat, my kitchen fills with the comforting aroma of brewed coffee mixed with rich cocoa. This recipe has become a staple for not just my family but also for gatherings and celebrations. If you’re looking for a dessert that’s both impressive and utterly delicious, you’ve come to the right place!
Why You’ll Love This Recipe
This Mocha Ice Cream Cake is the perfect blend of creamy, chocolatey, and coffee goodness. It’s simple to make yet looks like a showstopper, which is my favorite combination when entertaining guests. Each bite is a delightful experience—not too sweet, with a wonderful contrast in textures. This cake is an all-around crowd-pleaser that can easily be customized to fit various occasions, from birthdays to cozy family dinners. You’ll definitely want to keep this recipe handy! (See the ingredients in the next page below…)
Ingredients
- 1 pint coffee ice cream
- 1 pint chocolate ice cream
- 1 cup chocolate wafer cookies, crushed
- ½ cup unsalted butter, melted
- ½ cup sweetened condensed milk
- 1 tablespoon instant coffee (or espresso powder)
- 2 tablespoons cocoa powder
- ½ cup whipped cream (for topping)
- Chocolate shavings (for garnish)
Equipment Needed
- 9-inch springform pan
- Mixing bowls
- A spatula or wooden spoon
- Measuring cups and spoons
- An electric mixer (optional for whipped cream)
- Plastic wrap
Step-by-Step Instructions
To start, I like to prepare my springform pan by lining the bottom with parchment paper and greasing the sides lightly. This helps ensure that the cake comes out beautifully once it’s frozen. Then, in a mixing bowl, I combine the crushed chocolate wafer cookies with melted butter and press the mixture into the bottom of the pan to form a nice crust. The chocolate aroma wafting through my kitchen is already making me excited for what’s to come! (See the next page below to continue steps…)
Next, it’s time to layer in the ice cream. I take the coffee ice cream out of the freezer and let it sit for about 10 minutes to soften slightly, making it much easier to spread. With a spatula, I gently layer the coffee ice cream over the crust, smoothing it out evenly. I do the same with the chocolate ice cream after the coffee layer is set—a process that helps create those lovely distinct layers that look beautiful when you slice into the cake.
For added richness, I like to mix the sweetened condensed milk with the cocoa powder and instant coffee in a separate bowl. This mixture will drizzle over the chocolate layer before I return the cake to the freezer. I’ve found that freezing the cake for at least 4 hours—though overnight is even better—ensures that each layer is perfectly set. Make sure to cover it with plastic wrap before you pop it back in the freezer.
Finally, when I’m ready to serve, I remove the cake from the freezer and let it rest for about 10 minutes at room temperature. This prevents the knife from getting stuck! I then use a sharp knife to cut into lovely slices, topping each piece with dollops of whipped cream and a sprinkle of chocolate shavings for that final touch. The contrast between the creamy layers and the crunchy crust is nothing short of heavenly.
Pro Tips for Best Results
I tested this recipe three ways to see what worked best, and I found that letting the ice cream soften helps a lot. If you’re in a hurry, you might be tempted to skip this step, but trust me—letting it soften for even just 5-10 minutes makes spreading it so much easier, ensuring a smooth and even layer.
Another tip I discovered is that using high-quality ice cream really makes a difference in flavor. I’ve tried several brands, and the richer, creamier options definitely elevated the cake’s overall taste. It’s worth the extra couple of bucks for something truly indulgent!
Lastly, if you want to amp up the coffee flavor, consider adding a splash of brewed espresso to the sweetened condensed milk mixture. This little addition took my cake to a new level of mocha goodness.
Common Mistakes to Avoid
One mistake I often made in the beginning was not letting the ice cream soften enough. Trying to spread hard ice cream resulted in a mess—definitely not ideal when you’re aiming for pretty layers. I learned that patience is key and that a little waiting time really pays off in terms of ease and presentation. (See the next page below to continue…)
Another thing to watch out for is not packing the crust tightly enough. If the crust isn’t firm, it may crumble when you cut into the cake. I recommend firmly pressing the crushed cookies into the bottom of the pan—using a flat-bottomed glass can really help create that solid base.
Also, make sure you’re using a sharp knife to cut and serve your cake. A dull knife can cause the beautiful layers to meld into one another, which we definitely want to avoid. And remember, allowing the cake to sit at room temperature for a few minutes will make slicing easier.
Serving Suggestions
When it comes to serving this Mocha Ice Cream Cake, I like to keep it simple. A slice paired with a hot cup of coffee really elevates the experience—especially if you’re a fellow coffee lover! The warm notes of the coffee contrast beautifully with the cold, creamy ice cream.
For an extra touch, I sometimes drizzle some chocolate sauce on the plate before placing the cake slice on it. The visual appeal is lovely, and the added flavor is an indulgent bonus. I love how the sauce enhances the cake without overpowering the delightful mocha flavor.
If you’re serving a crowd, consider slicing the cake into smaller pieces. This way, guests can enjoy a taste without committing to a huge slice, allowing them to savor every flavor and texture without feeling overwhelmed.
Variations & Customizations
One of the best things about this Mocha Ice Cream Cake is its versatility. If you’re not a fan of coffee, switching it to vanilla ice cream creates a more traditional cake. You could then use chocolate syrup or a berry puree for color and flavor—it’s just as delightful!
For those looking to mix things up, try incorporating additional flavors like hazelnut or mint. Swapping out the coffee ice cream for hazelnut ice cream would add a lovely new layer to the flavor profile, making it a unique addition to your dessert rotation.
Don’t forget about toppings! You can get creative with toppings by adding crushed nuts, fresh berries, or even a sprinkle of sea salt to enhance the flavors even further. These delicious touches can turn a simple dessert into a stunning centerpiece.
How to Store, Freeze & Reheat
Storing any leftover Mocha Ice Cream Cake is quite simple! I usually wrap it tightly in plastic wrap and cover it with foil to keep it from absorbing any unwanted odors from the freezer. It’s best enjoyed fresh, but it will keep well for about a week in the freezer.
If you do have leftovers and decide to take them out later, be sure to let them thaw a bit before serving. This will ensure that the cake maintains its soft, creamy texture when you dig in. I let mine sit for about 10 minutes at room temperature for the perfect consistency.
Reheating isn’t necessary, but if you like your cake a little softer, brief microwave heating can achieve that. Just take care to heat it in 10-second intervals to avoid melting it too much. You’ll want to enjoy that lovely layered structure after all your hard work!
Conclusion
Now that I’ve shared my treasured Mocha Ice Cream Cake recipe, I hope you’re as excited to make it as I am to enjoy it! Each slice offers a blend of rich flavors and textures that are sure to impress anyone lucky enough to taste it. Whether it’s a celebration or just an afternoon treat, this cake is bound to brighten your day—and maybe even become a favorite in your home. Happy baking!