
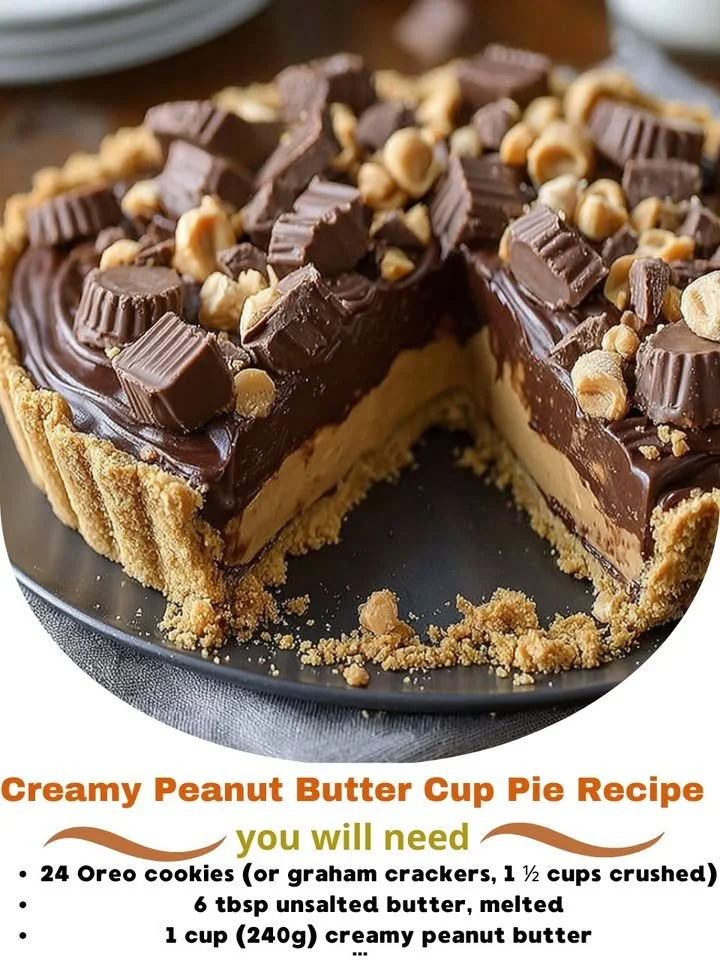
There’s something about the combination of creamy peanut butter and rich chocolate that just feels like a warm hug on a plate. If you’re a dessert lover like I am, you know exactly what I mean. Today, I’m excited to share my recipe for Creamy Peanut Butter Cup Pie. This pie is a delightful blend of textures and flavors that come together to create a treat that’s perfect for any occasion, or simply as a sweet ending to a cozy dinner at home. Get ready to dive into the creamy goodness!
Why You’ll Love This Recipe
What I adore about this Creamy Peanut Butter Cup Pie is its simplicity and the joy it brings to those who enjoy it. Whether you’re making it for a special event, a family gathering, or just because you want to indulge yourself, this pie never disappoints. The smooth peanut butter filling paired with a crunchy graham cracker crust is a match made in dessert heaven that everyone will rave about. Just thinking about it brings a smile to my face! (See the ingredients in the next page below…)
Ingredients
– 1 ½ cups graham cracker crumbs
– ½ cup unsalted butter, melted
– 1 cup creamy peanut butter
– 1 cup confectioners’ sugar
– 8 oz cream cheese, softened
– 1 teaspoon vanilla extract
– 1 ½ cups whipped cream or whipped topping
– ½ cup chocolate chips (for topping)
– Additional chopped peanut butter cups (optional)
Equipment Needed
– Mixing bowls
– Electric mixer
– 9-inch pie dish
– Measuring cups and spoons
– Rubber spatula
– Medium saucepan (for melting chocolate, optional)
Step-by-Step Instructions
Making this pie is an absolute joy! First, I start by preheating my oven to 350°F (175°C). In a mixing bowl, I combine the graham cracker crumbs and melted butter until it’s all well-blended, making a wonderful crumbly mixture. I then firmly press this mixture into the base and up the sides of my pie dish to form the crust. I can already smell that buttery aroma wafting through my kitchen! (See the next page below to continue steps…)
Next, I prepare the filling. In a separate bowl, I beat the cream cheese until it’s smooth and creamy, then I add in the peanut butter and mix until it’s fully combined. It’s absolutely delicious, and I can’t resist sneaking a taste! Next, I sift in the confectioners’ sugar and add the vanilla extract, mixing until it’s perfectly smooth. Finally, I gently fold in the whipped cream, giving it a light and airy texture that just melts in your mouth.
Once my filling is ready, I pour it into the graham cracker crust and spread it evenly. I like to take my time with this step, ensuring it looks beautiful before I pop it in the fridge. Letting the pie chill for at least four hours (or overnight, if you can wait) is key to achieving that luscious, creamy texture. Honestly, the wait is the hardest part, but a little bit of patience pays off big time!
Before serving, I melt the chocolate chips in a small saucepan or microwave, then drizzle the melted chocolate over the chilled pie. I might sprinkle some additional chopped peanut butter cups on top for an extra treat! And let me tell you, the presentation is stunning—rich chocolate meets creamy peanut butter goodness, and I can hardly wait to dig in!
Pro Tips for Best Results
I really recommend taking the time to soften your cream cheese before starting. I tested this three ways—cold, room temperature, and melted—and found that room temperature gives you the smoothest filling without lumps. No one wants a bumpy pie, right?
Another personal tip: be sure to give the pie adequate chilling time. While I know it’s tempting to dig in right away, allowing the pie to set for at least four hours—and preferably overnight—makes a world of difference in the creaminess and how well the flavors meld together. It’s worth the wait!
Lastly, don’t skimp on the whipped cream. I’ve tried using low-fat options in the past, and although they work, I always end up loving the rich texture of full-fat whipped cream for this pie. It truly enhances the creaminess, blending wonderfully with the luscious peanut butter filling. Trust me, it’s heavenly!
Common Mistakes to Avoid
One of the biggest mistakes I’ve made in the past is not properly measuring my graham cracker crumbs. It may seem minor, but a crust that’s too crumbly, or too compact, can ruin the whole experience. I recommend using a kitchen scale, or at least making sure to pack the crumbs lightly, so you get the perfect texture. (See the next page below to continue…)
Another pitfall is not letting the pie chill long enough. I’ve been guilty of sneaking tastes too early, and while the flavor is still outstanding, the texture can be a bit off. Trust me on this: if you want that silky, smooth result, patience truly is a virtue here!
I also learned the hard way that using natural peanut butter may alter the consistency of the filling. While I love the taste of natural peanut butter, it has a different texture and oil separation, resulting in a filling that’s not quite as creamy. Stick with creamy peanut butter for this one and your pie will thank you!
Serving Suggestions
When it comes to serving this pie, I often pair it with a dollop of whipped cream on top for that added richness—who can resist a generous swirl? You can also serve it alongside fresh fruit, like sliced bananas or strawberries, that contrasts beautifully with the creaminess of the pie.
I love to present the pie on a lovely plate, and sometimes I’ll add a sprinkle of crushed peanuts or even chocolate shavings for a special touch. It elevates the presentation and makes it feel extra decadent!
So, if you’re looking for a cozy dessert night, I recommend serving this pie with coffee or a warm cup of tea. The flavors are so comforting that they just wrap around you like a soft blanket—a delightful end to any meal!
Variations & Customizations
As much as I cherish the classic flavor of this pie, I’ve experimented with some fun variations. One of my favorites is adding a layer of chocolate ganache right on top of the peanut butter filling before I chill it. It adds an irresistible chocolate layer that makes each slice even more decadent.
If you’re looking for a twist, try swapping out the creamy peanut butter for crunchy peanut butter. The added crunch not only gives your pie a delightful texture but adds a whole new dimension to the flavor as well. I absolutely love experimenting with different nut butters too, like almond or cashew butter, for a unique twist while still keeping that creamy essence!
For those who like to get fancy, how about adding some flavor extracts such as almond or coconut? Just a teaspoon can transform the profile of your pie and delight your taste buds. It’s one of those recipes that allows for a lot of creativity, so feel free to make it your own!
How to Store, Freeze & Reheat
To store leftover pie, I recommend covering it tightly with plastic wrap or a lid and keeping it in the refrigerator. It will last for about 3-4 days, but I doubt it will last that long—it disappears quickly in my kitchen!
For longer storage, this pie can be frozen. Just slice it into individual portions, wrap each piece tightly in plastic wrap, and then place them in a freezer bag. You can freeze it for up to 2 months. When you’re ready to enjoy a slice, simply take it out and let it defrost in the fridge overnight, or at room temperature for a couple of hours.
Reheating isn’t necessary since this pie is best served chilled, but if you want to warm the chocolate topping slightly, just pop it in the microwave for a few seconds. I find that a warm drizzle of chocolate adds a little extra magic when I’m craving that comforting goodness!
Conclusion
I hope you’re as excited about making this Creamy Peanut Butter Cup Pie as I am! It’s an indulgent dessert that never fails to impress, whether it’s for special celebrations or simple family gatherings. Each slice is a delightful experience that brings joy to everyone who tries it. Remember, dessert is all about enjoying the moment, so gather your loved ones, share a piece (or two), and enjoy the sweet life! Happy baking!